Loading...
Loading...
Loading...
Loading...
Loading...
Loading...
Loading...
Loading...
Loading...
Loading...
Loading...
Loading...
Loading...
Loading...
Loading...
Loading...
Loading...
Loading...
Loading...
Loading...
Loading...
Loading...
Loading...
Loading...
Loading...
Loading...
Loading...
Loading...
Loading...
Loading...
Loading...
Loading...
Loading...
Loading...
Loading...
Loading...
Loading...
Loading...
Loading...
Loading...
Loading...
Loading...
Loading...
Loading...
Loading...
Loading...
Loading...
Loading...
Loading...
Loading...
Loading...
Loading...
Loading...
Loading...
Loading...
Loading...
Loading...
Loading...
Loading...
Loading...
Loading...
Loading...
Loading...
Loading...
Loading...
Loading...
Loading...
Loading...
Loading...
Loading...
Loading...
Loading...
Loading...
Loading...
Loading...
Loading...
Loading...
Loading...
Loading...
Loading...
Loading...
Loading...
Loading...
Loading...
Loading...
Loading...
Loading...
Loading...
Loading...
Loading...
Loading...
Loading...
Loading...
Loading...
Loading...
Loading...
Loading...
Loading...
Loading...
Welcome to Second
Second is a marketplace platform built specifically for selling services online—whether it's consulting, healthcare, recycling, training, or other professional services. Unlike traditional e-commerce solutions designed for physical goods, Second is purpose-built to handle the complexity of service transactions.
With native support for both commoditized and custom services, Second provides:
Calendar management – define when services are available
Geolocation and geofencing – control where services can be delivered
Vendor management tools – onboard, verify, and manage providers with ease
Marketplace operators can manage payments end-to-end with KYC/KYB, escrowing, pay-ins, and payouts, and run their platforms across borders with multi-language and multi-currency support.
Managing the features on your platform’s homepage from vendors perspective
Path: Homepage
Users initially judge a platform by its homepage, their first point of contact. The primary objective of a homepage is to attract users' attention and encourage them to delve deeper into the platform. Therefore, it is crucial that the homepage communicates a clear message and presents intuitive pathways for navigation.
The vendor homepage is strategically crafted to facilitate efficient interactions for vendors. It enhances their ability to engage with various elements critical for conducting business, such as selling services, generating quotes, and managing requests for proposals. This design aims to optimize the vendor's experience, fostering seamless transactions with other users on the platform.
Homepages are generated by default. Users cannot modify content on the homepage.
Administrators with the relevant rights and roles can change several aspects of the homepage.
Vendors can perform searches for services request through the dedicated search bar (figure 1.1).
Multiple criteria are available (depending on the authorized administrator’s configuration, some of these criteria may be disabled):
Location (figure 1.2): users enter a location (country, state, region, city, street, etc.) in an auto fillable field. This field is powered by Google Maps by default.
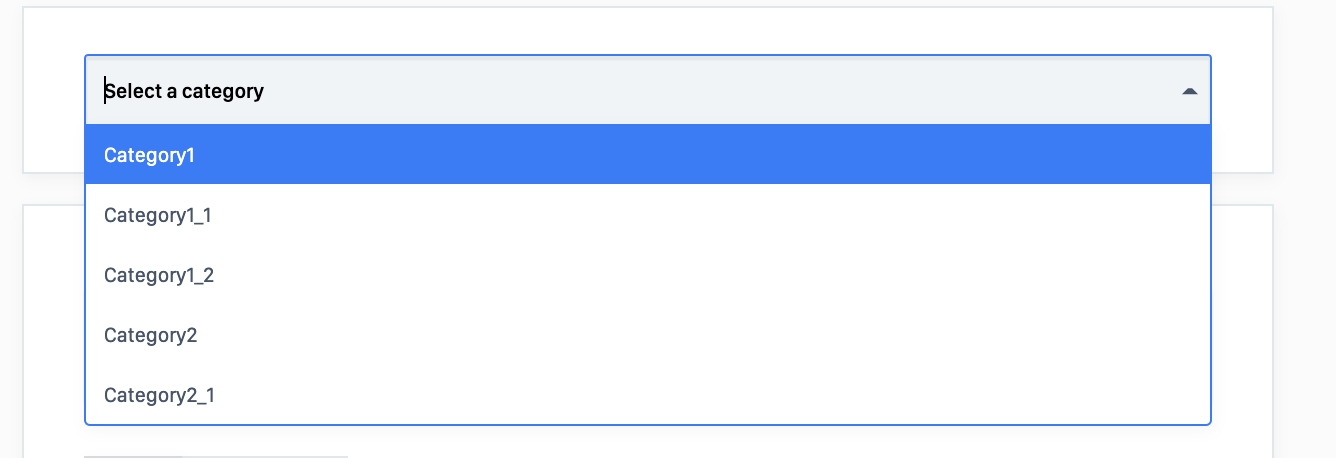
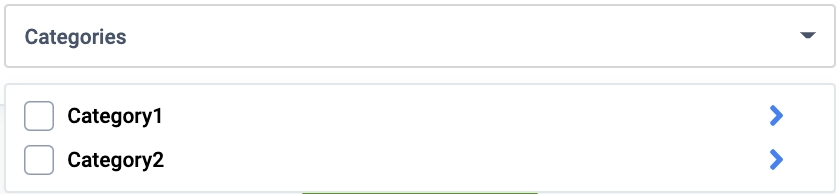
Categories (figure 1.3): users can select zero to all categories and sub-categories through a drop-down list doubled with a multi-select checking tool.
Keywords (figure 1.4): users can manually enter keywords
Start and end date and/or start and end time (figure 1.5)
All criteria can be combined for a more precise search.
Criteria can be singled out for larger searches.
Users then click the “Search” button (figure 1.6) to launch the search. The results displayed will match the information the user has selected.
On the vendor homepage, the user can publish a new service by clicking the "publish a service" button.
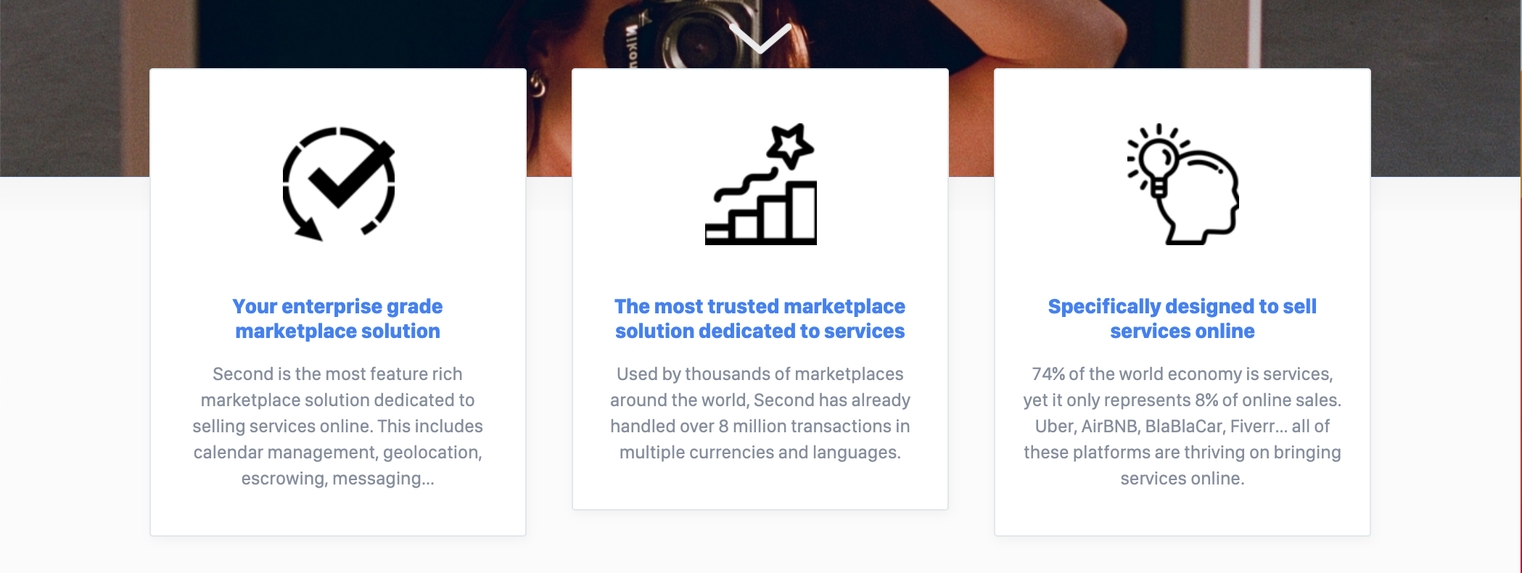
The selling points banner (see figure 2) features three distinct information blocks, each comprising a logo, a primary catchphrase, and accompanying text. Its primary function is to deliver concise explanations about the platform's purpose, target audience, and key benefits.
This section of the homepage features category blocks (see figure 3). These blocks serve as quick-access links for conducting efficient searches within specific categories.
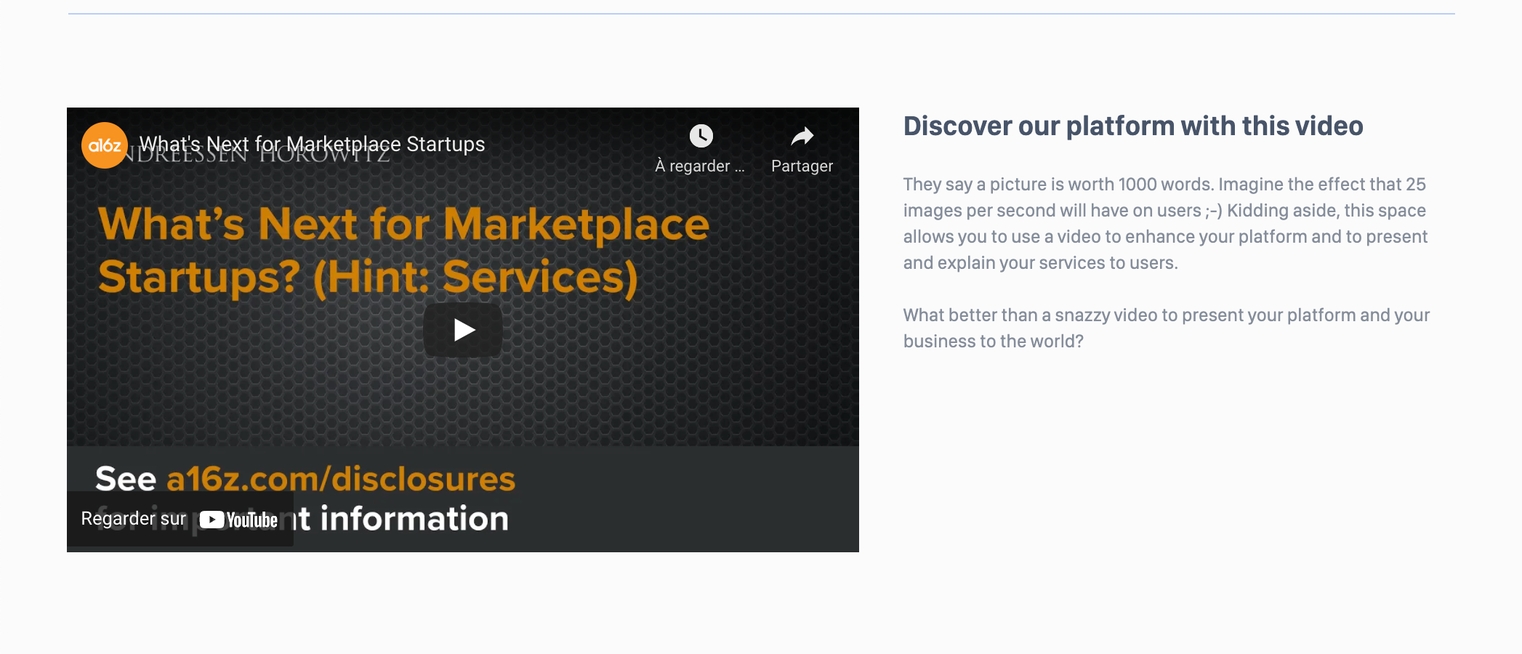
The video section (Figure 4) serves as an enhanced feature designed to enrich understanding of your platform’s purpose, benefits, target audience, and other relevant details. It is seamlessly integrated into the platform, allowing users to view it directly from the homepage. Adjacent to the video, users can find a customizable title and description, editable by authorized platform administrators. This capability enables administrators to enhance the video's context and ensure it aligns effectively with the platform's messaging.
The “Recommended request for proposal” section (figure 5.1) displays a list of automatically curated proposals available on the platform.
These can be the “best ranked” listings or “last published” listings according to the platform settings (Home Page Media and Home Page Setup).
Each card (figure 5.2) displays:
The request for proposal title
The request for proposal location
The favorites icon, see the Favorite page for additional explanations.
Users can access all requestes for proposals available on the platform through the “Show all requests for proposals” button (figure 5.3) at the end of this section. Upon click, a search results page is displayed.
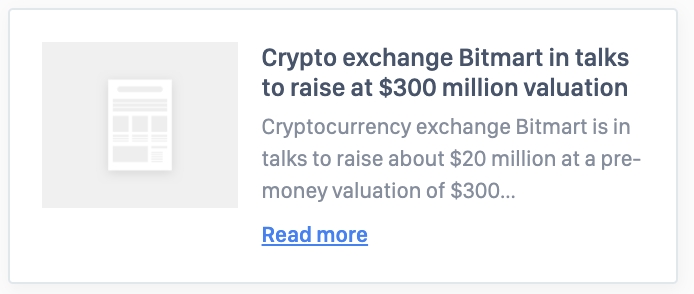
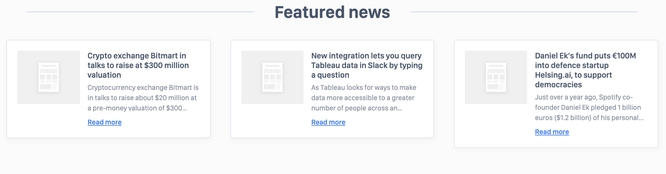
A “Featured News” section (figure 6.1) is available at the bottom of the homepage. This section displays articles from a third party blog or website according to the configuration set up by the authorized administrator. For more information on how to set it up, see Home Page Setup -> RSS Feed
Users can access in detail each article by clicking the “Read more” button available in each news block (figure 6.2). They are then redirected to the related news page.
The vendor homepage of a platform can have up to 6 sections maximum.
As an authorized administrator, each section is managed through the SBO.
Refer to the following documentation to learn more on how to manage these sections: Home Page Setup and Home Page Media
Below are the 6 sections of your homepage (figure from 7.1 to 7.6):
Users cannot delete any element on a homepage.
A homepage cannot be entirely deleted. Authorized administrators can delete some of the above-detailed sections, for more information refer to the following documentation: Home Page Media and Home Page Setup
SBO :
Front :
Business rules:
Creating accounts as a user
Path: Homepage > Log in
Register: For non-connected users who do not have a platform account.
Log in: For non-connected users who have a platform account.
WHO CAN USE THIS FEATURE?
For all users who want to connect to the platform.
Log-in/registration is required in two scenarios.
Clicking “Log in” or “Register” navbar buttons on the homepage (figure 1).
A login or registration form is displayed through a pop-up window (figure 2.1, figure 2.2).
Depending on the platform’s authorizations, users may browse through the platform without being logged in.
However, some on platform actions listed hereafter require the user to be logged in:
Publishing a listing (figure 3.1). Refer to this documentation: Listing deposit (Basic solution)
Booking service on the listing page (figure 3.2)
Clicking a link in a platform generated e-mail
Upon performing any of these actions, the user is automatically redirected to the login/registration page. The user can then either enter his platform credentials to log in (figure 4.1) or click the “Sign Up” button and fill out the registration form (figure 4.2) to create an account.
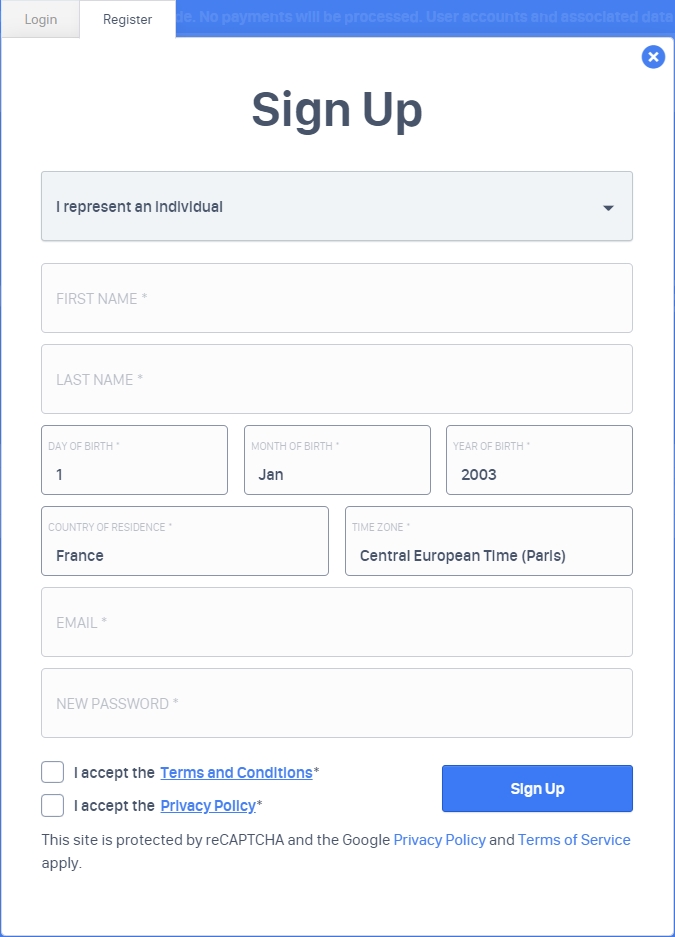
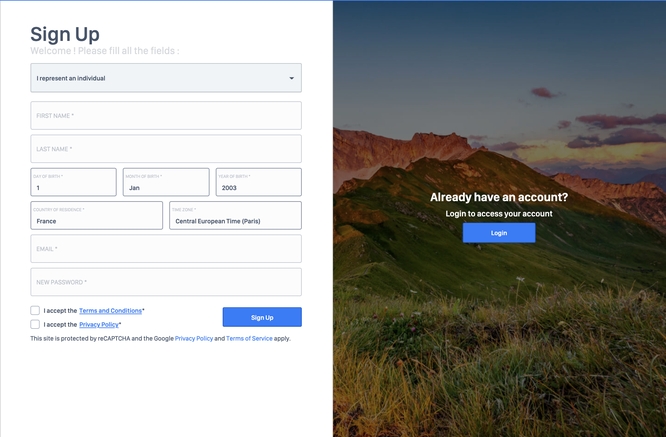
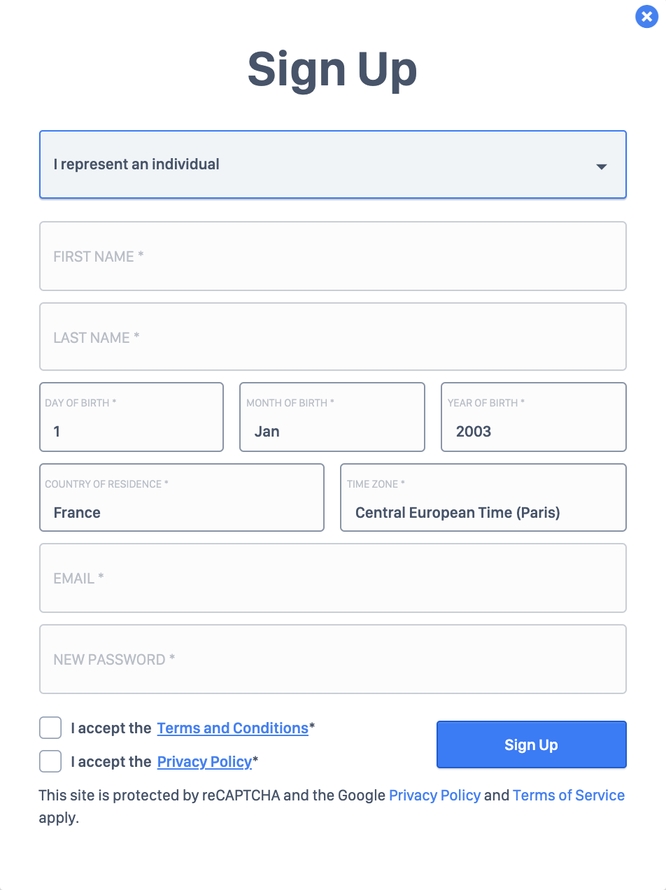
To create an account, a user fills out a registration form.
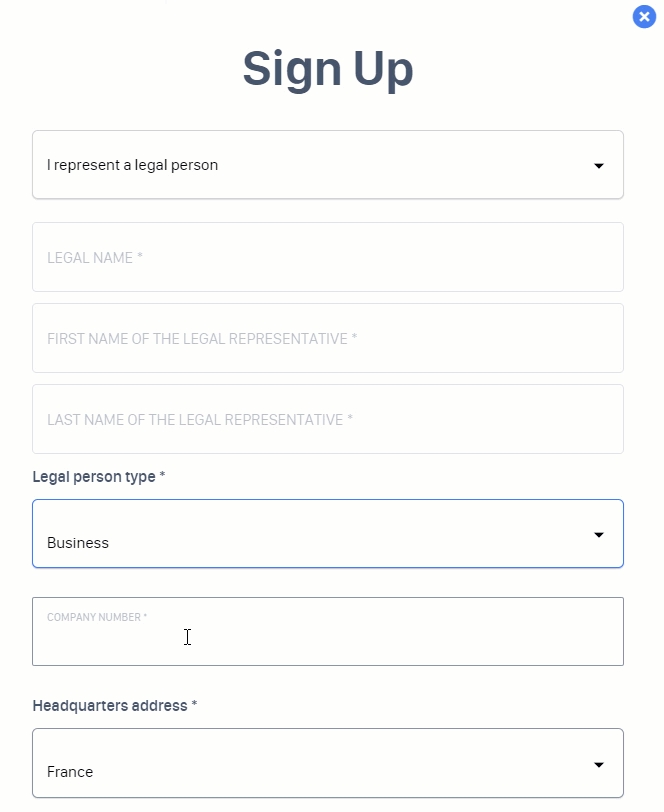
The user first indicates his legal status (individual or organization) through a dropdown box. The rest of the form can slightly vary according to his choice.
The differences are illustrated below:
For individuals (figure 5.1), the fields prompt information regarding the user.
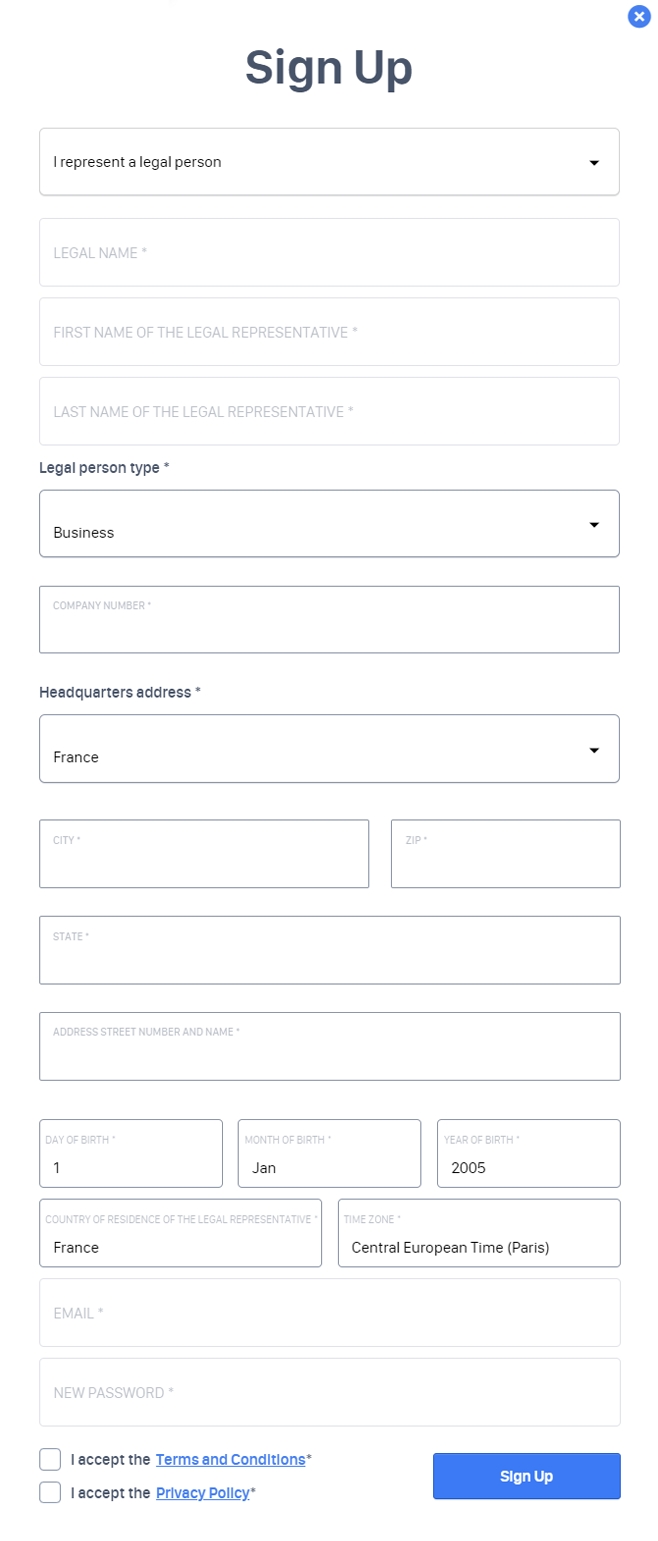
For organizations (figure 5.2), the fields prompt information regarding the company’s contact.
An “Individual” user will have to fill out (figure 5.1):
His first name (will be displayed on invoices)
His last name (will be displayed on invoices)
His birth date
His address
His email (platform automated emails are sent to this address)
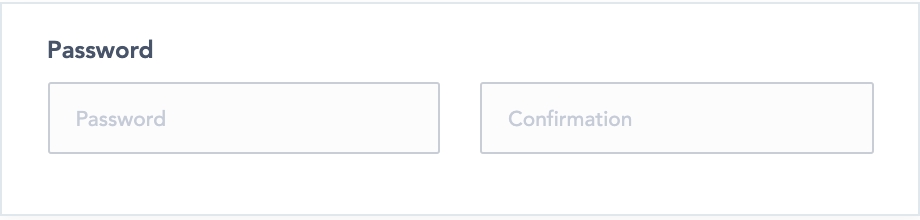
His password
An “Organization” user will have to fill out (figure 5.2):
The company name (will be displayed on invoices)
The first name of the legal representative
The last name of the legal representative
The birth date of the legal representative
The company’s address
An email (platform automated emails are sent to this address)
A password
When the Mangopay bundle is enabled, depending on the type of company, different documents may be required for processing. If a Soletrader, Partnership, or organization, is selected, there is no need for adding extra information to the registration process. However, the company number is requested if the category Business is selected. (figure 5.3)
Each user must accept the following conditions by ticking the related checkboxes:
“I accept terms and conditions”
“I accept the Privacy policy”
To finalize registration, the user clicks the “Sign up” button.
Following registration, the user will receive a confirmation email.
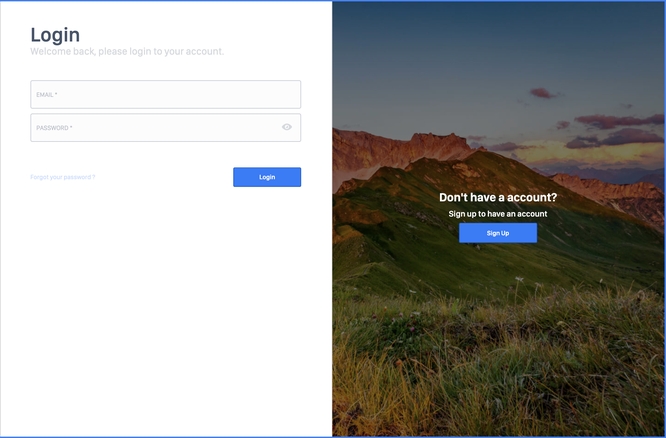
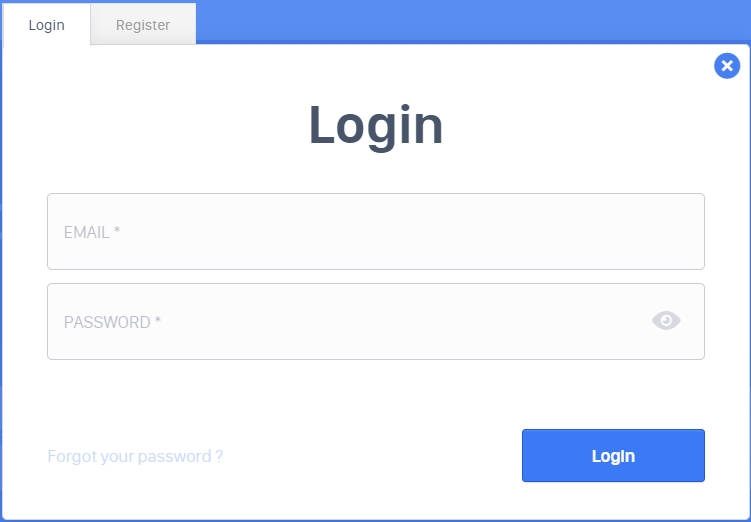
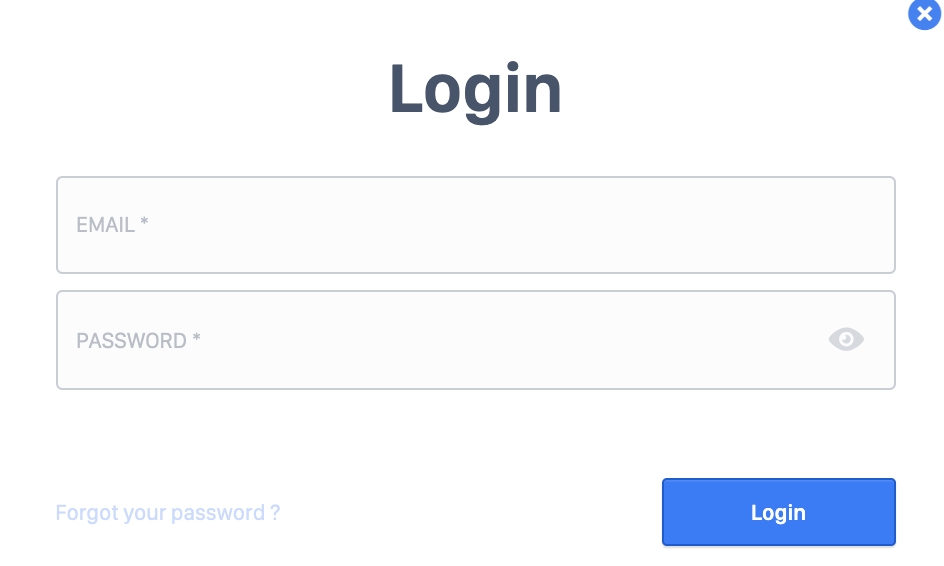
To log in, a user must indicate:
His email, in the first field (figure 6)
His password, in the second field (figure 6)
The “eye” icon allows the user to visualize the password. (figure 6)
The user clicks “login”. (figure 6)
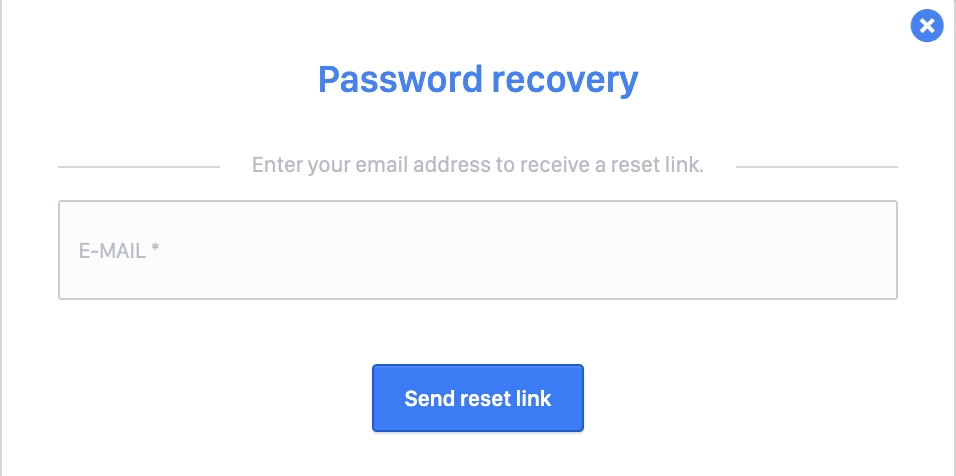
If a user forgets his password, he can click the “Forgot your password ?” button (figure 7)
Then a pop-up window will open prompting the user to enter his platform account e-mail address (figure 8).
An email with a link to reset his password will be sent to the address should the e-mail address be correct.
Users can not delete their accounts through these pages.
Front :
Understanding the different homepage versions depending on the activated bundles
Managing the features on your platform’s homepage as a vendor
Managing the features on your platform’s homepage as a customer
Homepage (User search Feature)
Managing the features on your platform’s homepage - User search solution
AI Search Assistant
Learn more about rendering types
The rendering type defines how the platform interacts with vendors and customers to deliver the most relevant information based on the service offered by the vendor. Additionally, the rendering type influences the booking process, which consists of two stages. Vendors are required to provide comprehensive details about their services, while customers must supply necessary information during booking to ensure a seamless service experience.
In SCND, the concept of a commoditized service is supported by the platform through three distinct rendering types. These rendering types are designed to accommodate any service that a vendor may propose, ensuring flexibility and adaptability within the platform.
In SCND, the administrator has the capability to enable all rendering types simultaneously or select specific ones that align with the marketplace business model. To activate the commoditized service described in this documentation, access to the Super Back Office (SBO) is required. Navigate to the left-side menu and follow the path: SBO > Configurations > Features > Platform Configuration > Platform Mode to complete the configuration.
At least one of the Commoditized or Uncommoditized rendering types must be selected.
Understanding how to use the different Front interface components
Path: Front
Several interface structure elements are available throughout the platform. These elements help make user navigation more fluid.
WHO CAN USE THIS FEATURE?
All users
New elements cannot be created from the platform’s Front interface.
The navigation bar (navbar) is consistently located at the top of each page. It enables users to personalize their platform experience according to their specific goals. Depending on the selected preferences, the homepage adjusts to function either as a solution tailored for customers seeking services and service providers proposing their offerings (Figure 1) , or vendors searching for service and services proposals (Figure 2) .
When the configuration switch mode is not enabled by the operator, users are restricted to operating within the marketplace solely as either a customer or a vendor. This designation is determined at the time of registration.
The navbar is made up of:
Login/register button
The login/register buttons (figure 3.1) are displayed when a user is not logged in to the platform. Once the user is logged in, the user’s avatar will be displayed instead.
The user avatar
The user’s avatar (figure 3.2), allows navigating through the dashboard menu quickly upon clicking it.
Platform mode
The platform's mode can be adjusted to align closely with user preferences within the marketplace. By selecting the "Become a customer"(Figure 4) button, the system automatically configures essential elements such as listing services and a customizable search bar tailored to the user's needs. Additionally, users have the option to post requests for proposals, enabling them to advertise services they seek or negotiate for the best possible deals.
On the opposite side is the "Become a Vendor" button (figure 4.1), designed to set up the marketplace with tools that help users manage their business activities within the platform. This feature enables vendors to create service listings and utilize additional resources for promoting and executing their services effectively across the marketplace.
The hamburger menu (figure 5.1) displays the content pages set by the administrator. The hamburger menu opens with a single click (figure 5.2 ).
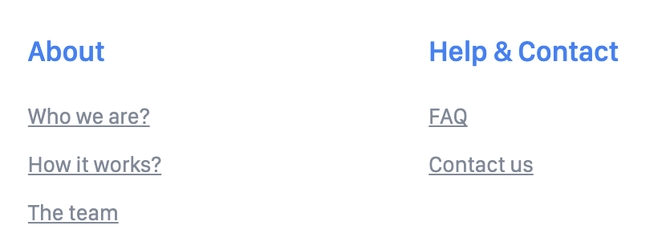
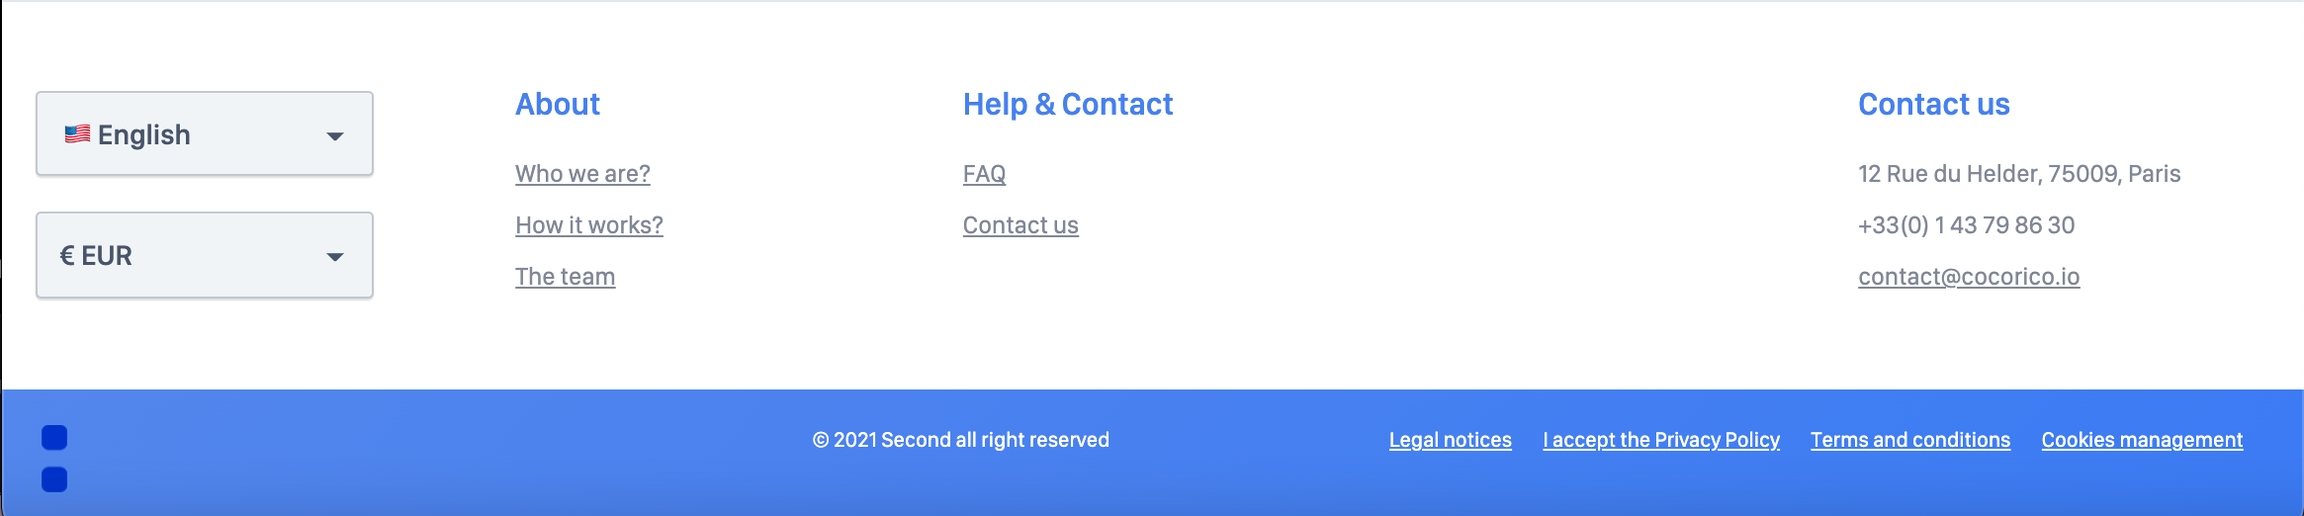
The footer displays institutional pages to users (figure 6). These pages are usually for information purposes.
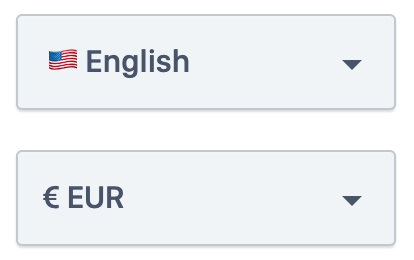
2 dropdown buttons (figure 6.1) are available on the left side of the footer:
Language selection, allows the user to select the platform language
Currency selection, enable the user to choose the display currency.
The display currency only changes the displayed prices. Payments are still made in the default platform currency set by the platform administrator.
SBO :
Front :
The platform’s logo (figure 2) is visible to all users. Clicking the logo will redirect the user to the following page:
Clicking one of the two buttons will open a modal to log in or register. This process is described in the following documentation:
Setting up the footer pages (figures 6.2 and 6.3) is described in the following documentation:
Only the super-administrator can update the header content pages (figure 5.2). Instructions are provided here:
Only the super-administrator can update the footer content pages (figure 6.3). Instructions are provided here:
Only the super-administrator can delete the header content pages (figure 5.2). Instructions are provided here:
Only the super-administrator can delete the footer content pages (figure 6.3). Instructions are provided here:


Interfaces from where users can interact with the platform and browse contents
Understanding how to use the different Front interface components
Creating accounts as a user
Understanding the different homepage versions depending on the activated bundles
Understanding the different listing deposit processes depending on the activated bundles
Understanding the different search result page versions depending on the activated bundles
Accessing and managing your favorite listings
Listing pages
Understanding the different listing page versions depending on the activated bundles
Booking requests
Understanding the different booking request page versions depending on the activated bundles
Quote requests (Quote Feature)
Creating and managing a quote request when the quote bundle is activated
Bid proposals (RFP Rendering type)
Understanding the bid proposals page seen when the RFP bundle is activated
Understanding the profile page versions depending on the activated bundles
Understanding and managing the platform's internal pages eg TnC, Privacy Policy, Who are we, etc
Understanding the fill in the user profile information
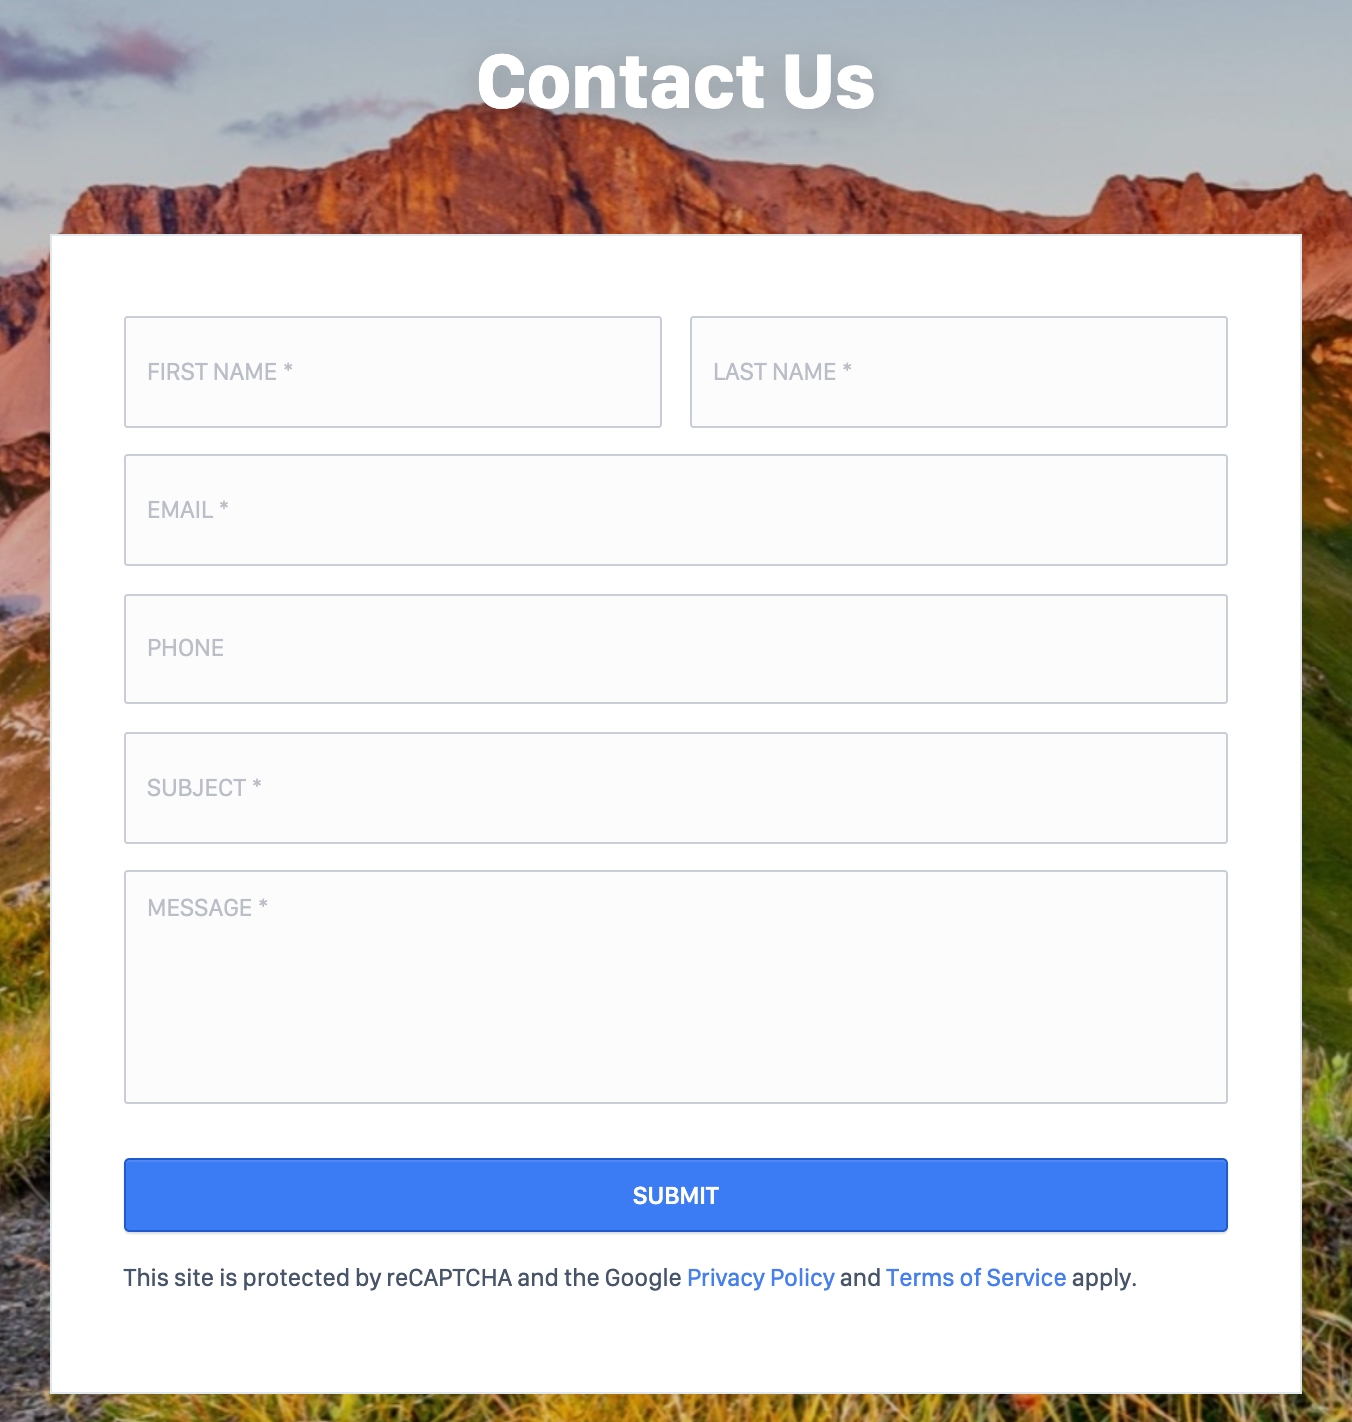
Understanding and managing the ‘Contact us’ page used by users to communicate with your organization
Understanding the different listing deposit processes depending on the activated bundles
Listing deposit (Time-Based rendering type)
How to create a listing as a platform user
Listing deposit (Flat-Rate rendering type)
How to create a listing as a platform user with the service bundle activated.
Listing deposit (Seat-Based rendering type)
How to create a listing as a platform user with the session bundle activated.
Listing deposit (RFP rendering type)
How to create requests for proposals as an asker, with the RFP bundle activated.
Listing details supported by AI
Help users to describe listings with the help of AI
How to manage and edit a listing
Path: Dashboard > Listing > Listings
User dashboard page through which users can manage their listings.
WHO CAN USE THIS FEATURE?
Switch users: All logged-in users
Non-Switch users: All logged-in offerors
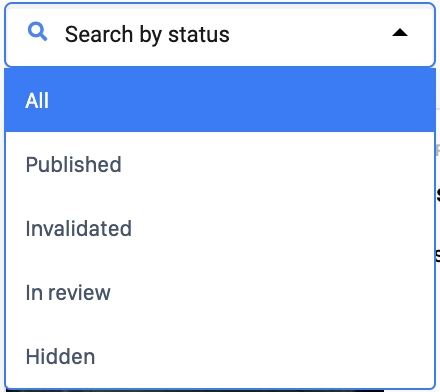
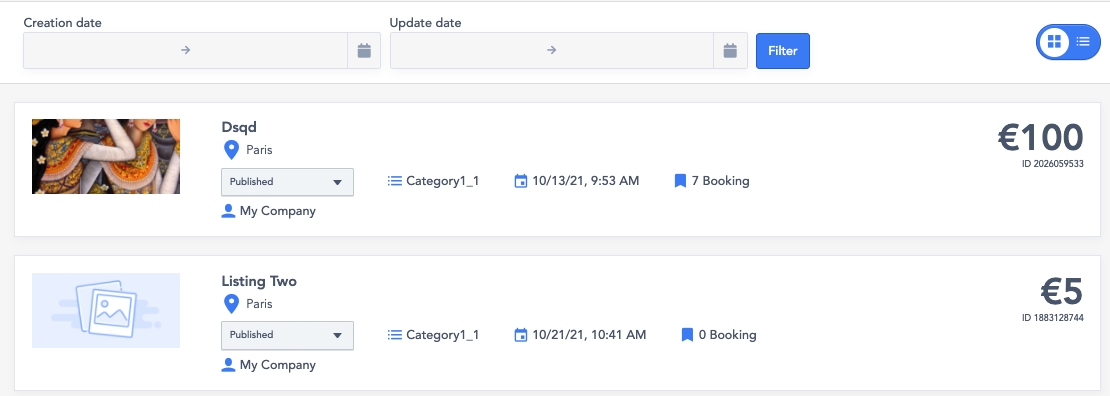
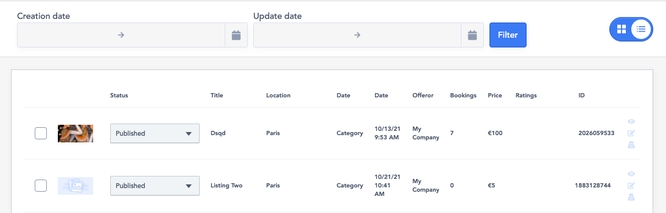
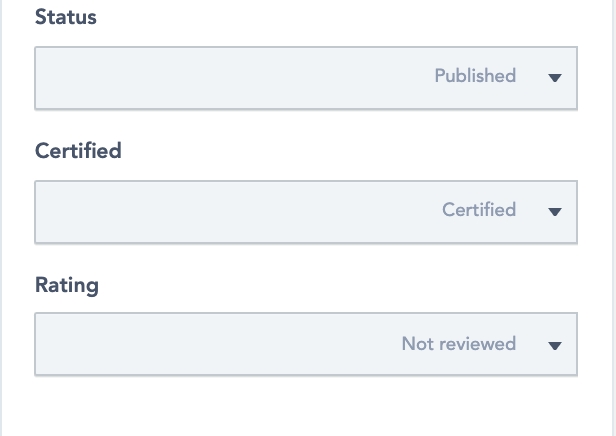
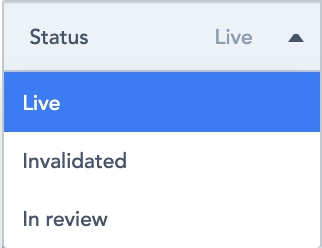
The user dashboard’s Listing section displays the list of all of his listings. These can be filtered by listing status (figure 1):
All: All listings
Published: Listings published on the platform
Invalidated: Listings declared as invalid by the administrator
In review: Listings being reviewed by authorized administrators, not publicly visible (only admins and the offeror can view the listing)
Hidden: Hidden listings, not publicly visible (only admins and the offeror can view the listing)
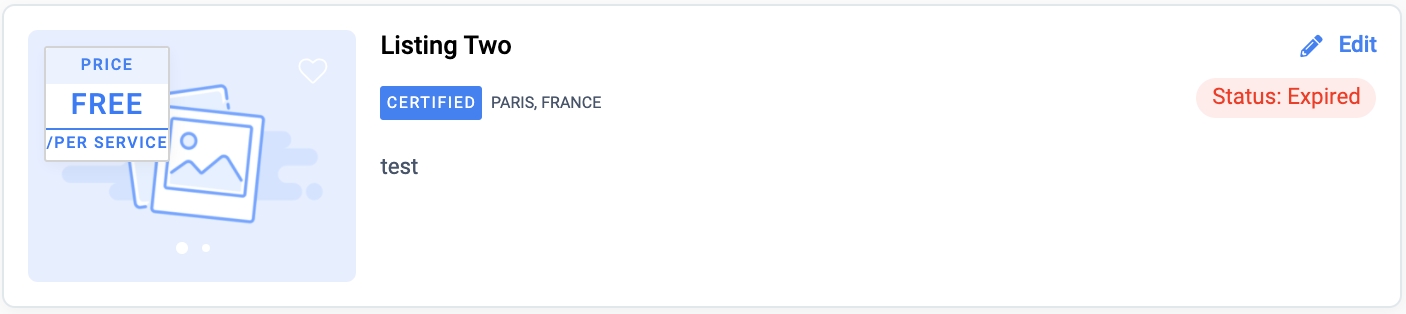
Each listing block (figure 2) displays:
The listing status
The listing media elements
The listing location
The listing title
The listing description
The listing price
The “Duplicate” button
The “Edit” button
The “Duplicate” button in the top right corner of the listing block will copy the listing.
This is especially useful when creating multiple similar listings with only a few variations.
Users can modify their listings' information through the “Edit” button located next to the “Duplicate” button.
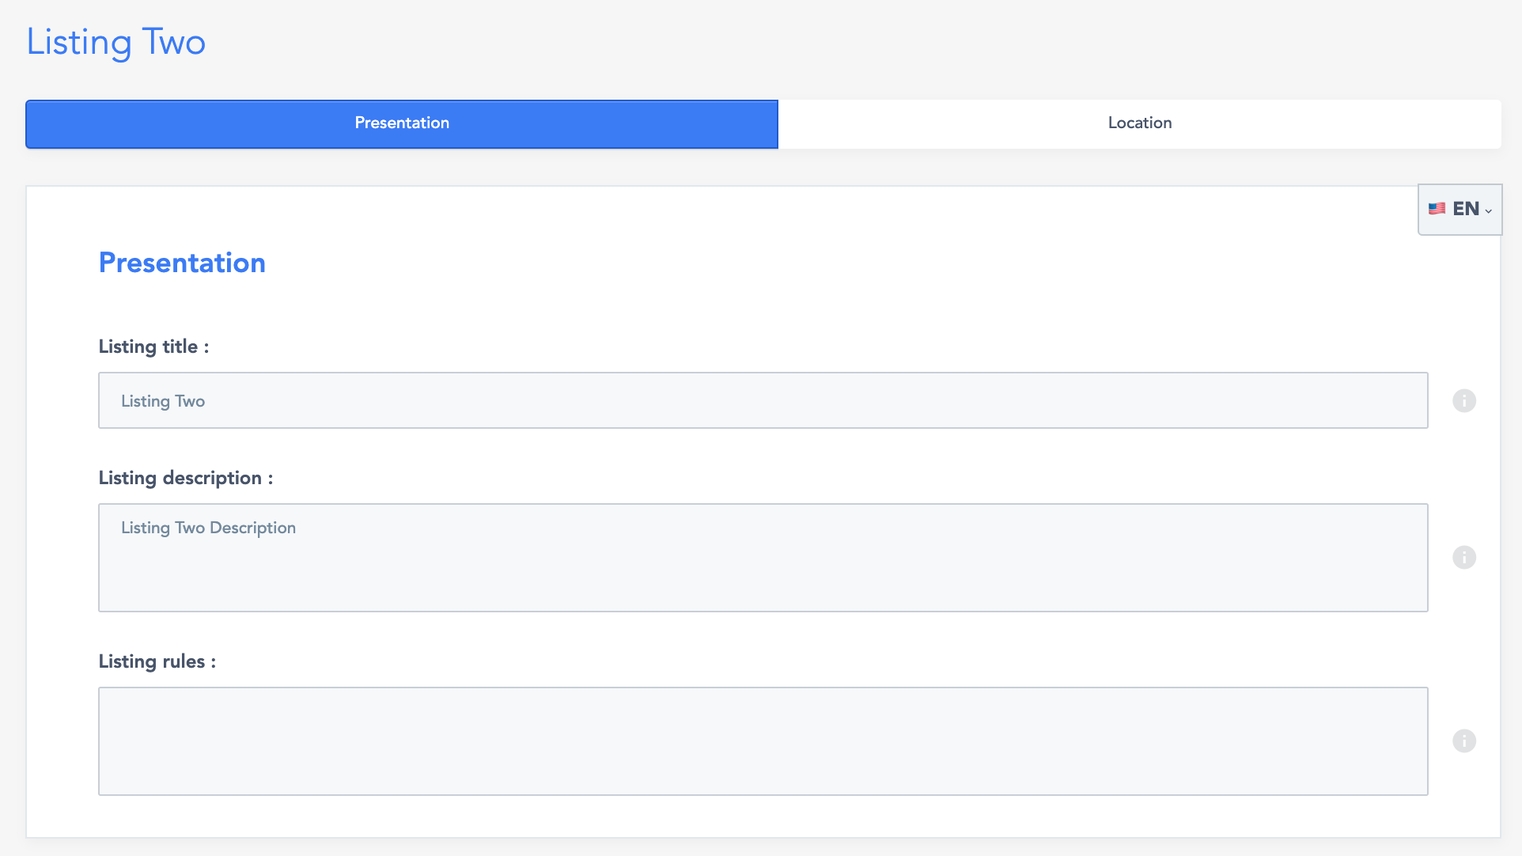
Path: Dashboard > Listings > Listing # > Presentation
Editing a listing presents the listing information in several sections. At the top of each section is always displayed:
The title of the current listing (figure 5)
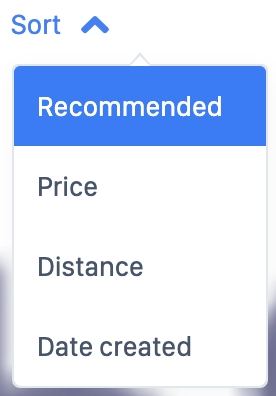
A status dropdown button (figure 6) to filter listings
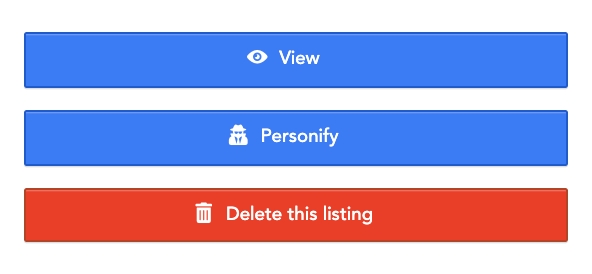
The “Duplicate” button (figure 7)
The “View listing” button (figure 8) to visualize the listing’s public display.
Information banners (figure 9) to guide the user when required
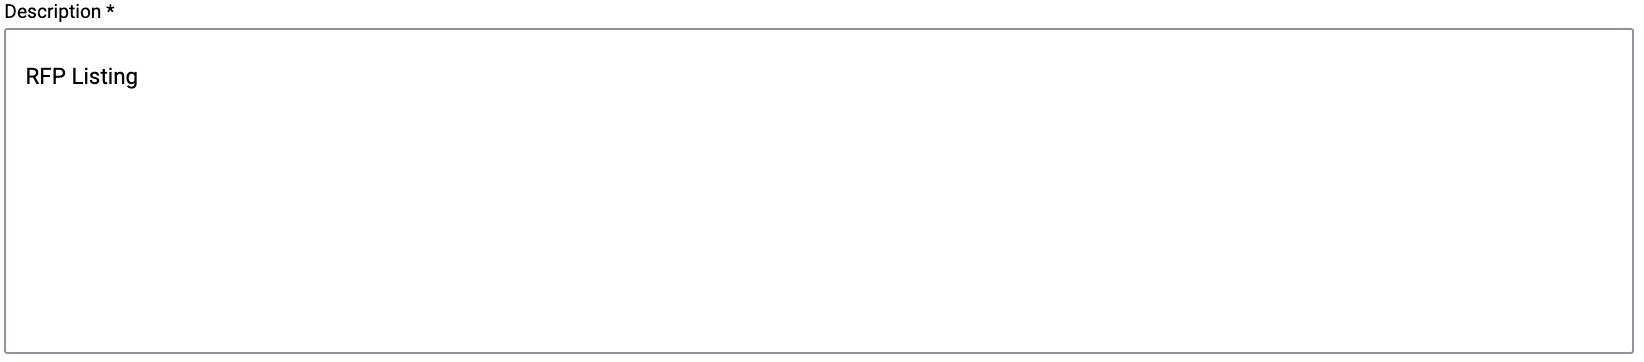
This presentation should describe the listing’s services. The information must be brief and extensive to attract the customer.
Three text fields build up the presentation section:
Click “Save” (figure 13) to save changes.
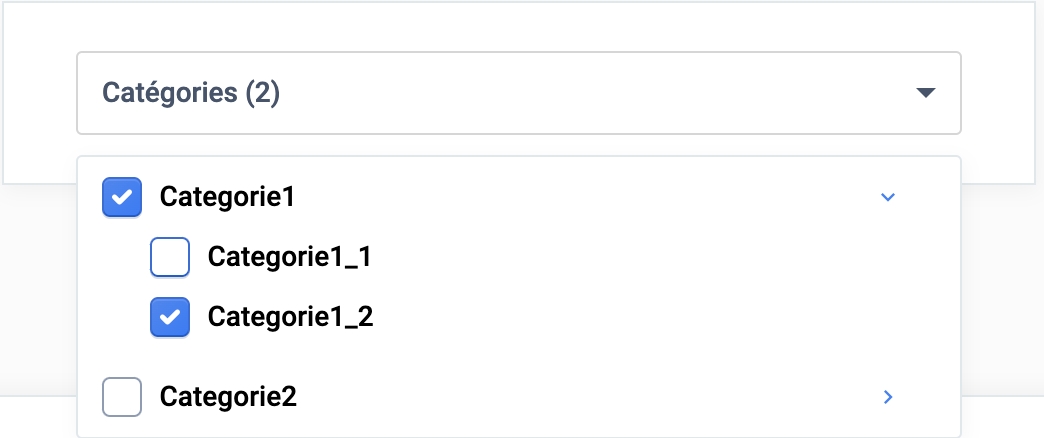
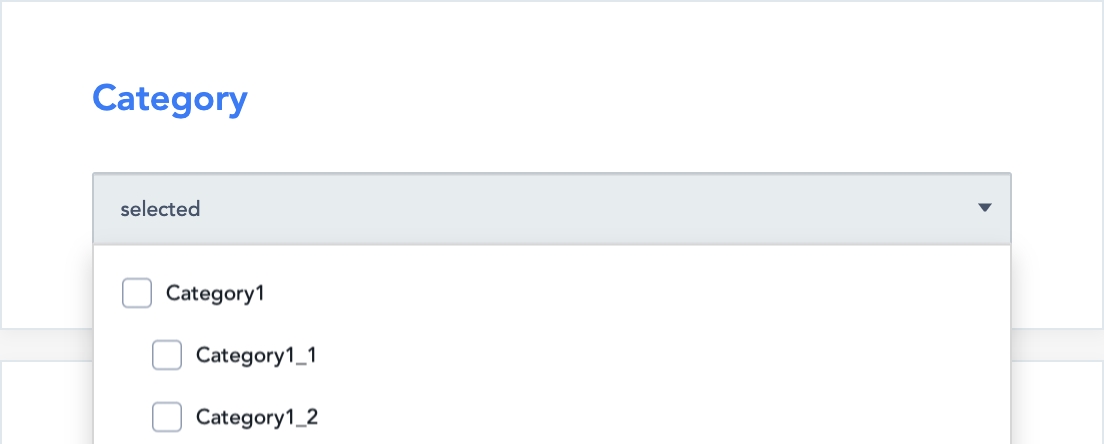
Users can update the listing’s categories through the dedicated dropdown multiselection button (figure 14).
If the user selects a parent category, the listing is automatically displayed in all the child categories.
If the user selects a child category, the listing will only be displayed in this child category + the parent category.
Click “Save” to save changes.
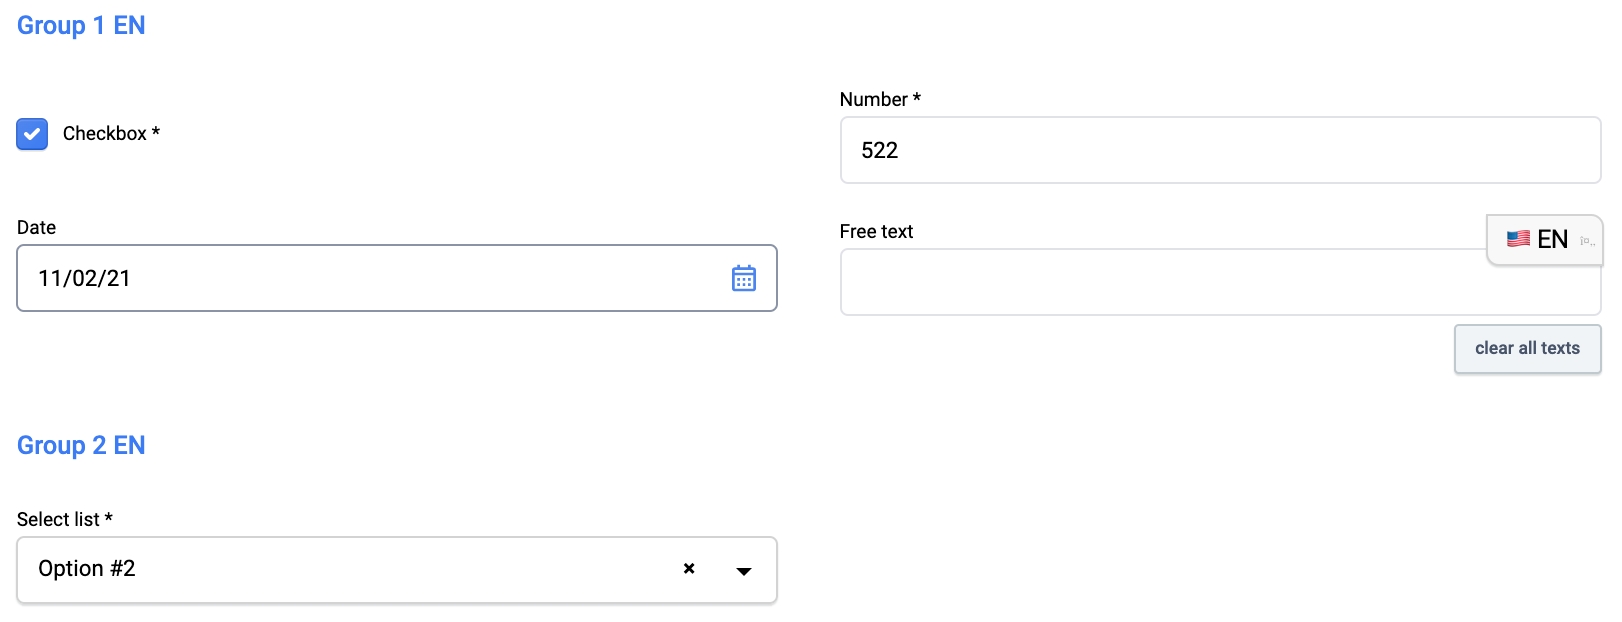
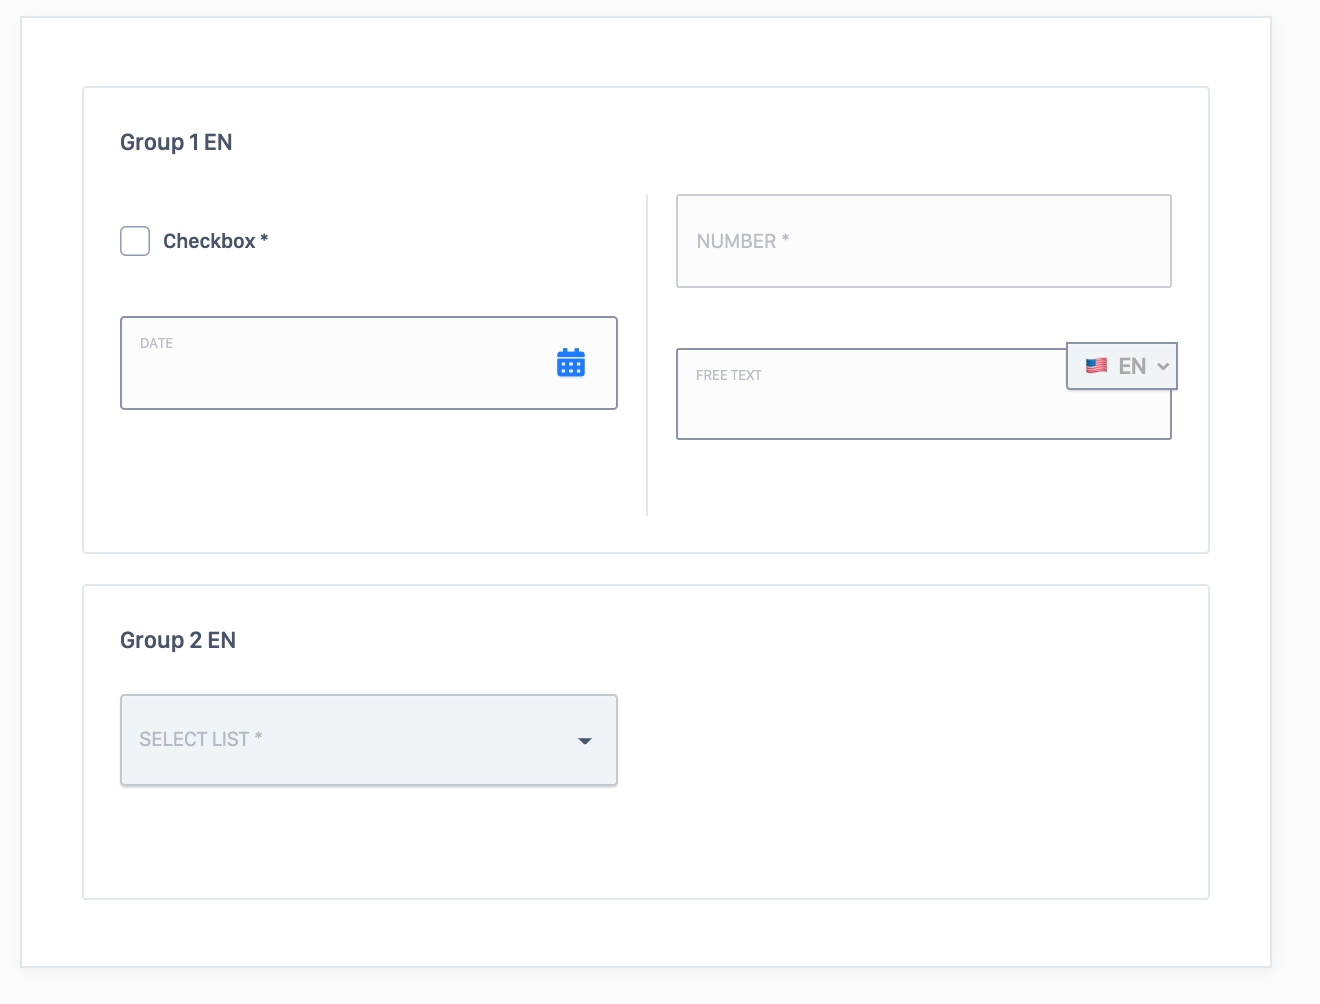
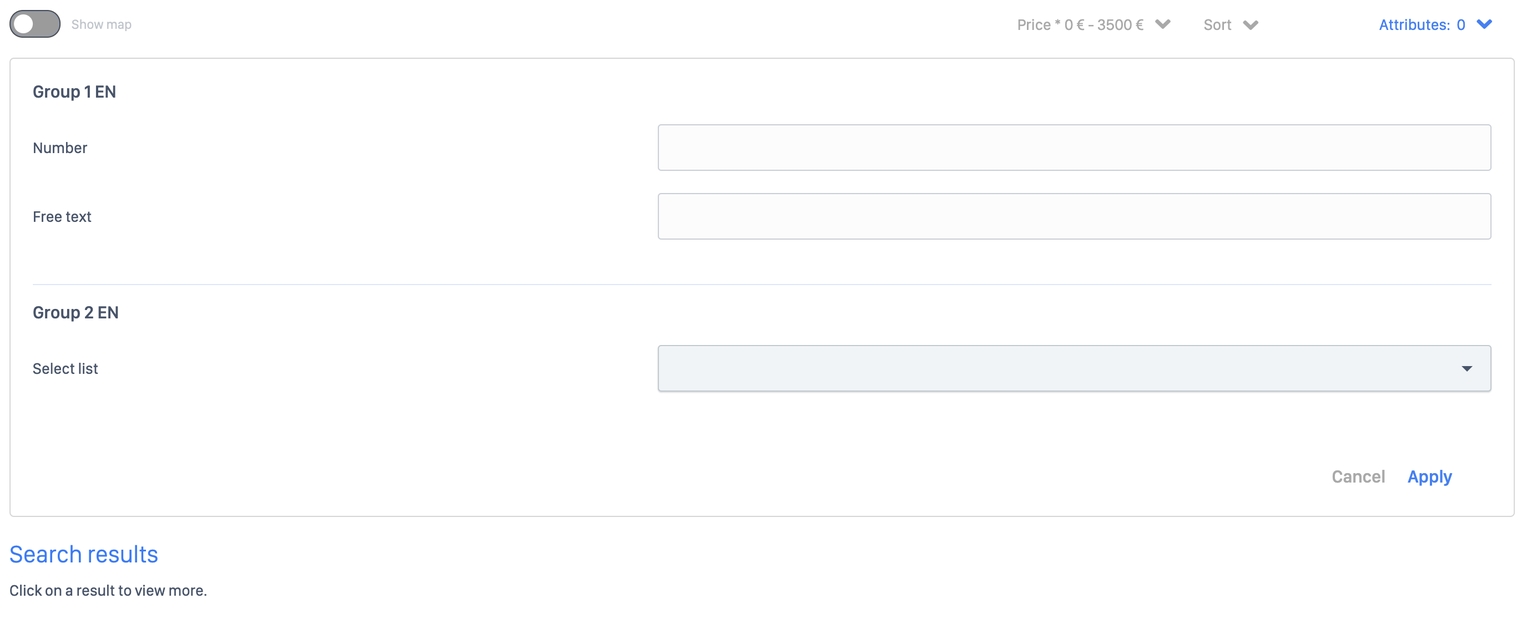
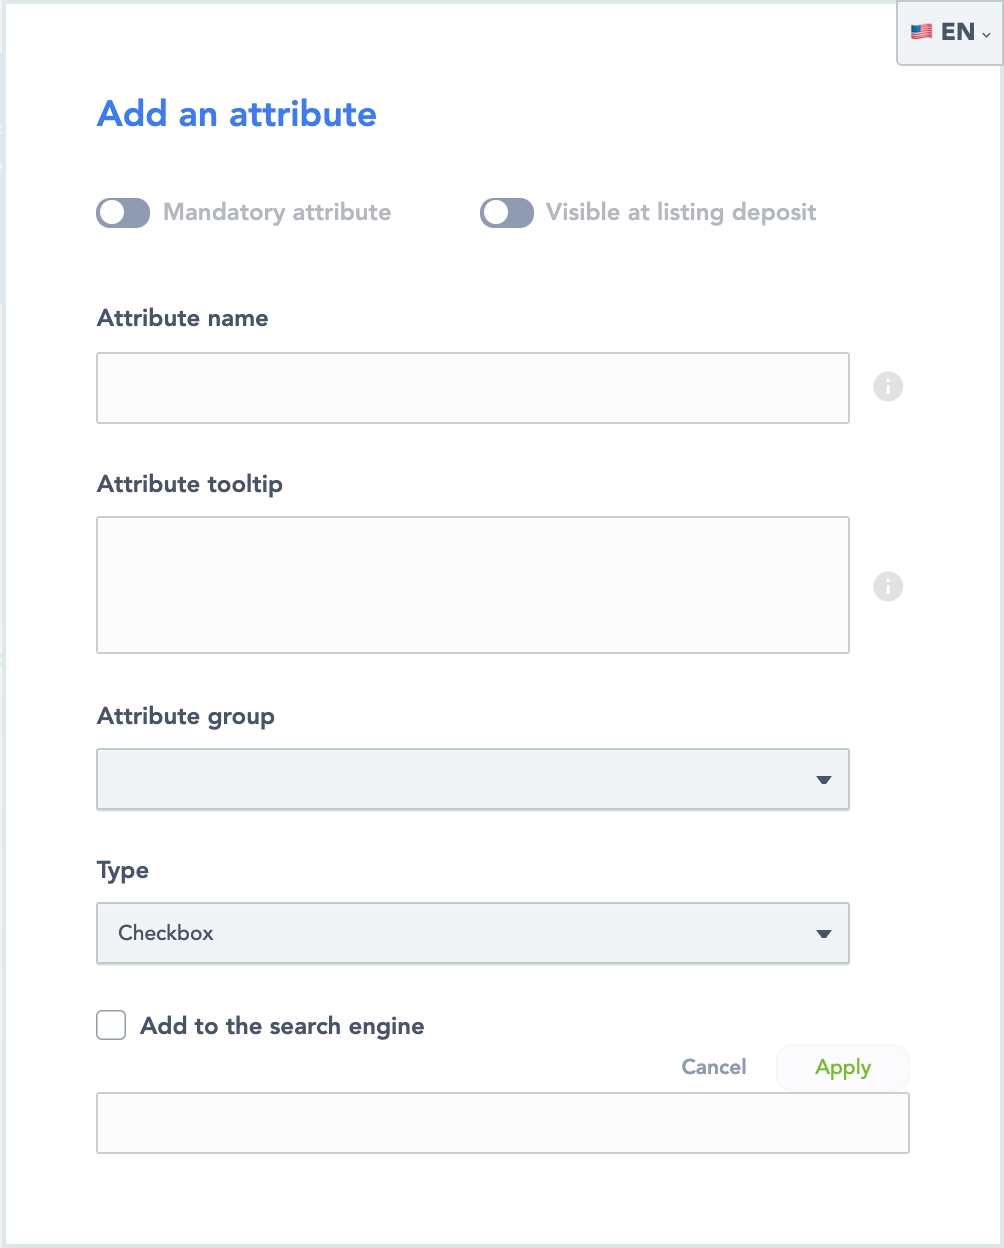
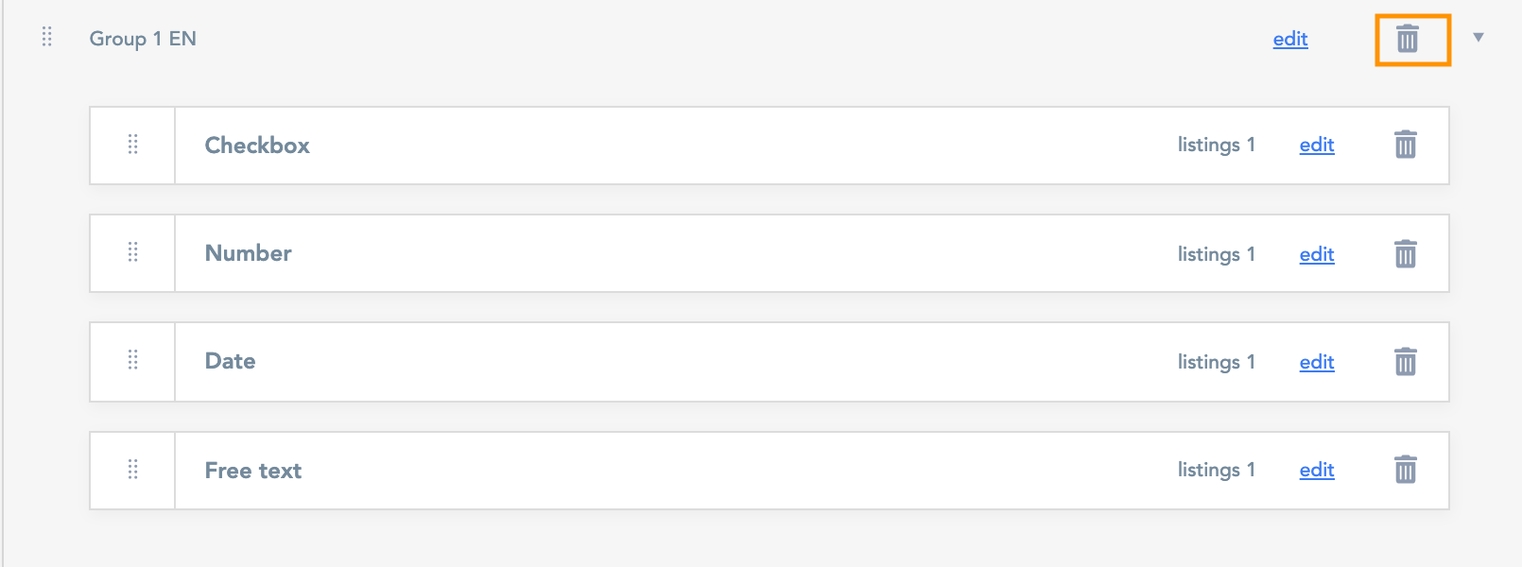
Users can manage/add attributes here.
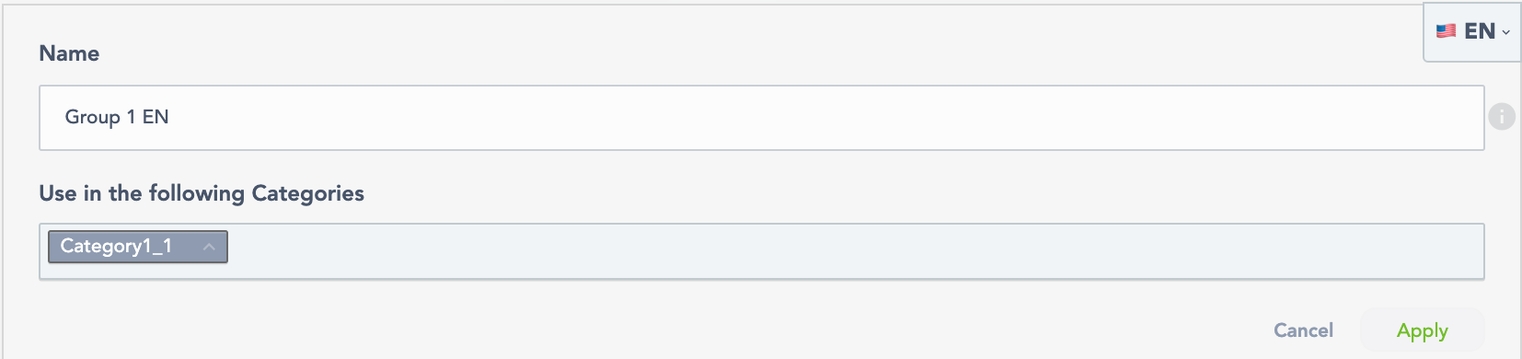
Attributes are organized as groups (figure 15.1), which each bearing an attribute group name (figure 15.2) on top of each block.
Attributes can be of different types: free text, checkbox, date, number, select list (figure 15.1).
Attributes are linked to the selected categories. Depending on the platform’s configuration, attributes may or may not be mandatory.
Click “Save” to save changes.
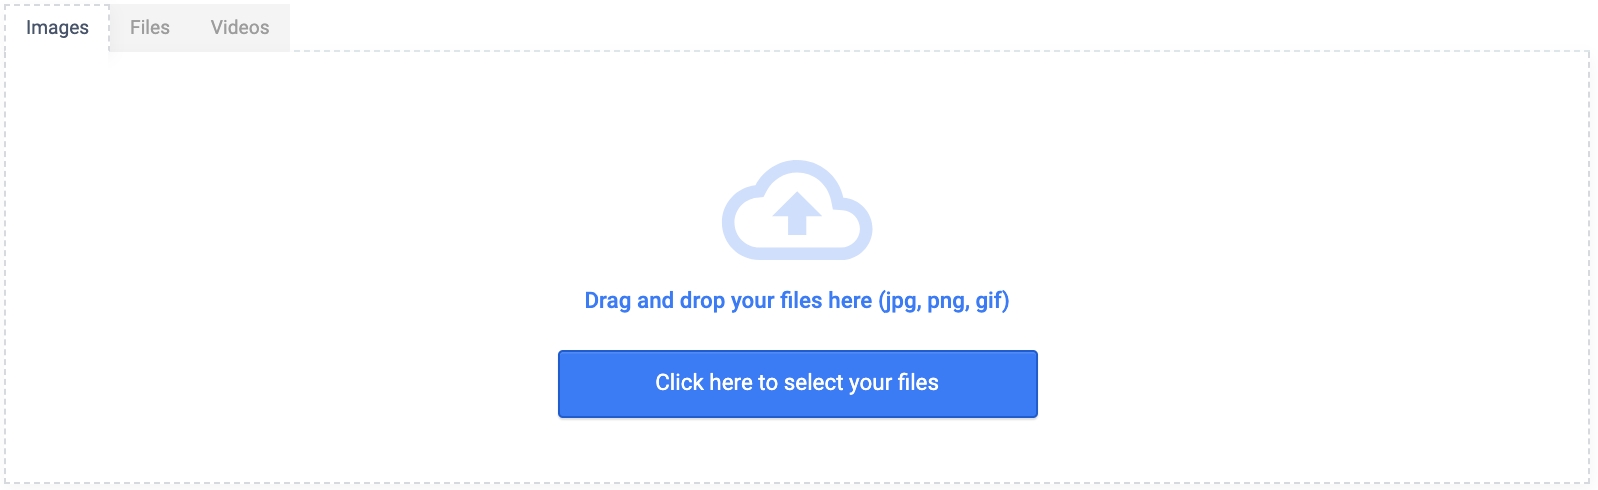
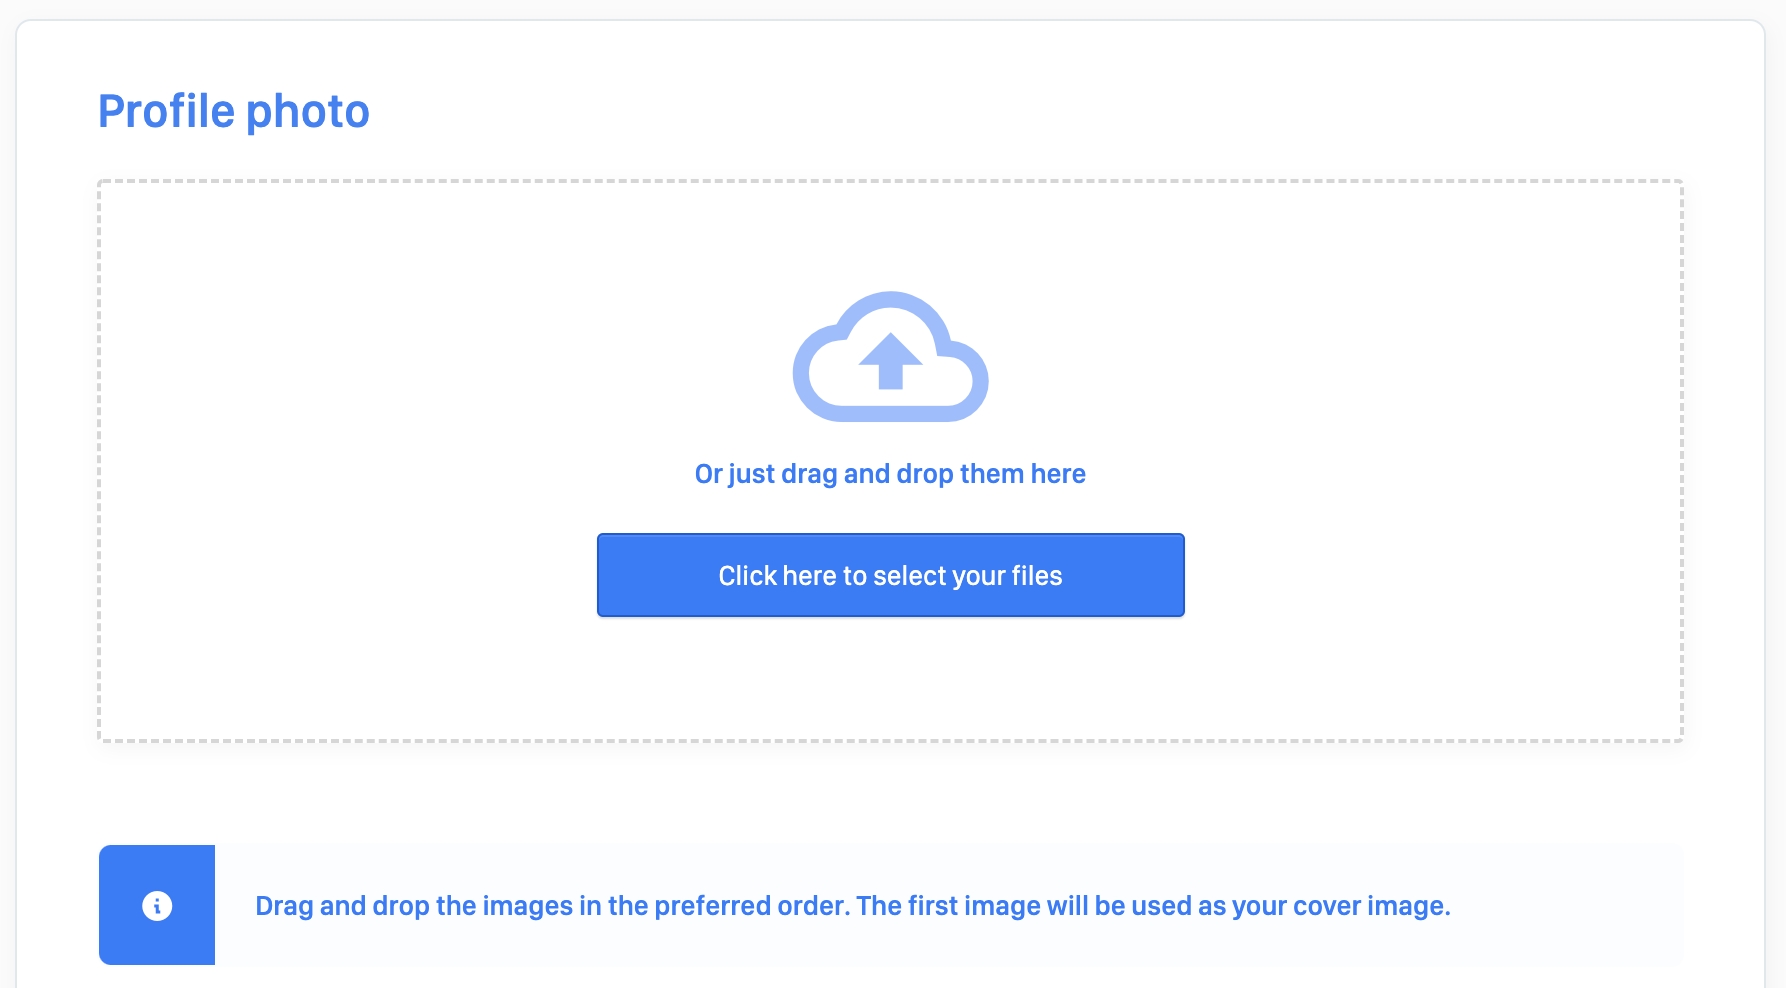
Users can update and add media elements such as images, videos, and files in this section (figure 16.1).
To add elements, the user either clicks “Click here to select your files” or drags and drops files in the dedicated block (figure 16.2).
Video can be added via their youtube URL (figure 16.3).
Under the drag and drop block, previews of the uploaded media (figure 16.4) are displayed. The user can manage the media order by simple drag and drop (figure 16.4).
The red trash icon deletes a media element.
There is no confirmation message when deleting media elements.
Click “Save” to save changes.
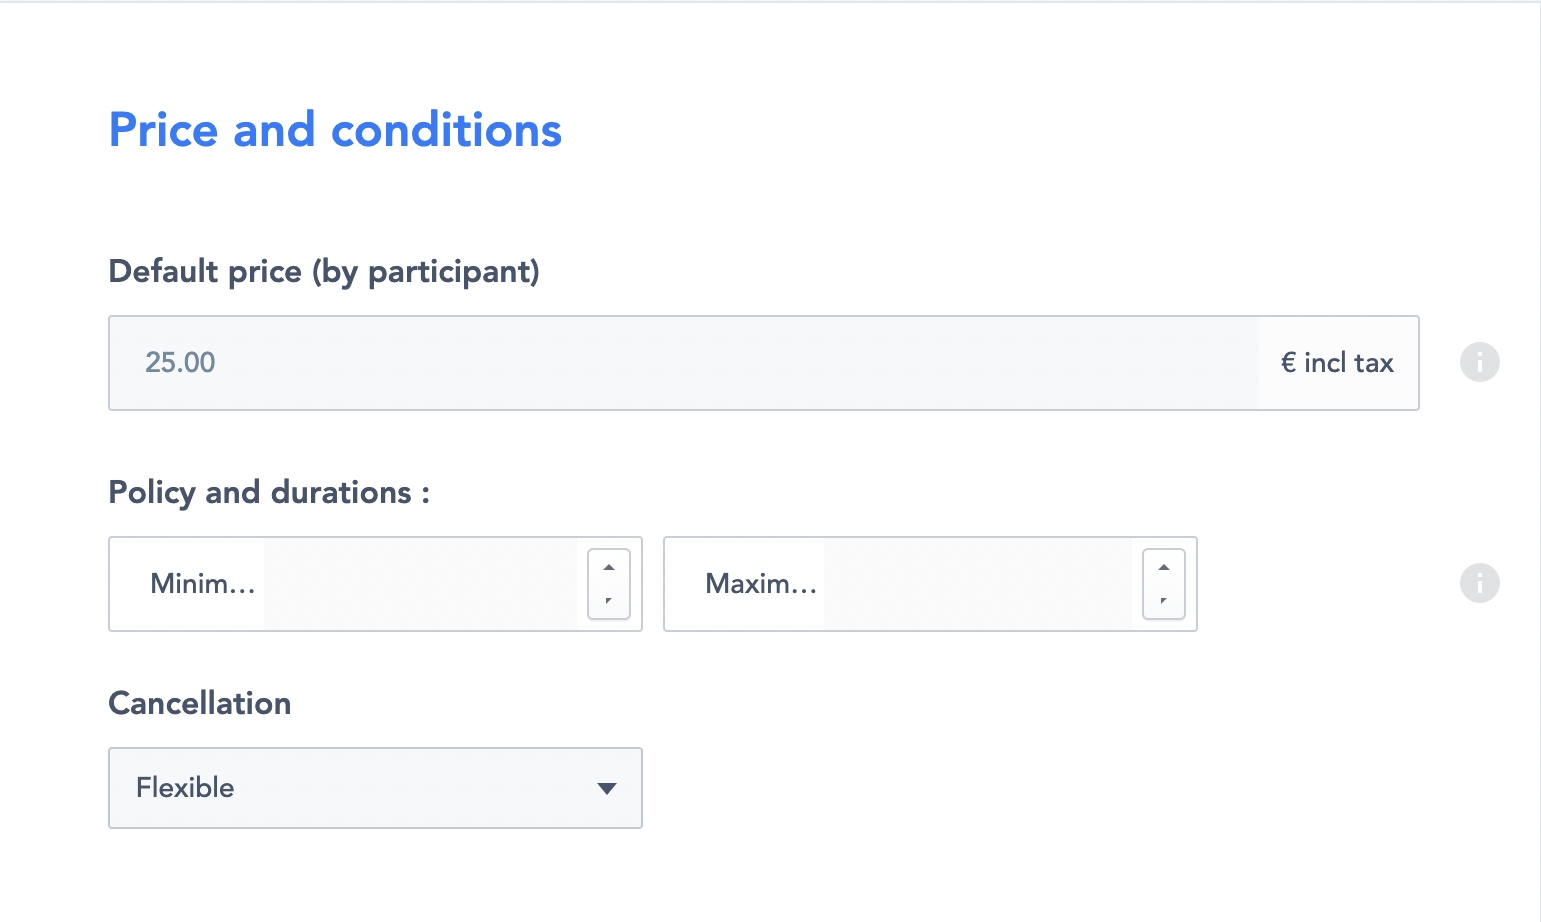
Users can manage their listings' price rules in this section.
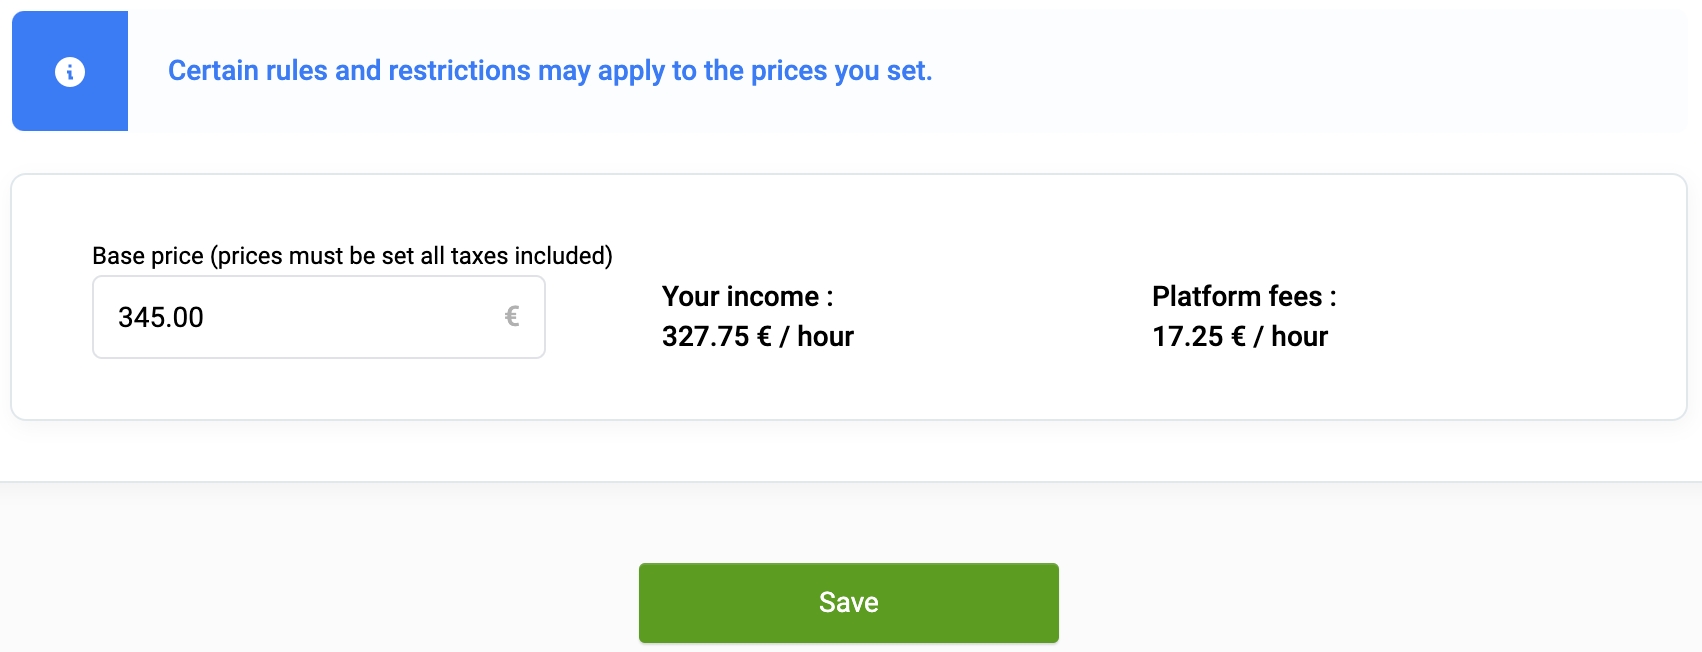
The base price represents the initial price assigned when a listing is published. This price is visible to users in the listing preview block. However, the final amount a user pays may differ due to potential seasonal pricing adjustments.
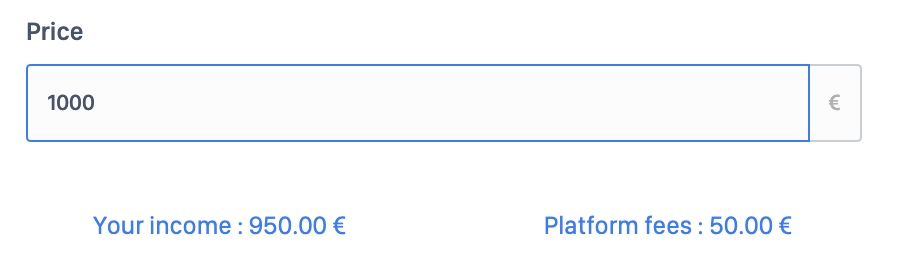
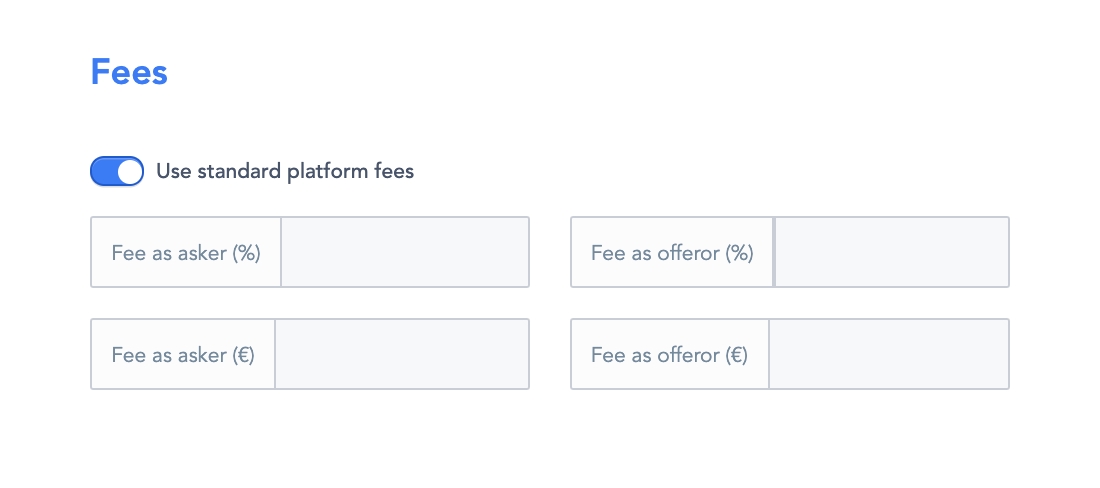
The system calculates and displays the listing’s potential income and applicable platform fees based on the specified price (see Figure 17).
To designate a listing as free, the price must be set to zero.
The minimum and maximum listing prices can be modified through the SBO by adjusting the Listing > Minimum Price or Listing > Maximum Price settings. To apply any changes, click Save.
The user can choose between 2 types of seasonal prices:
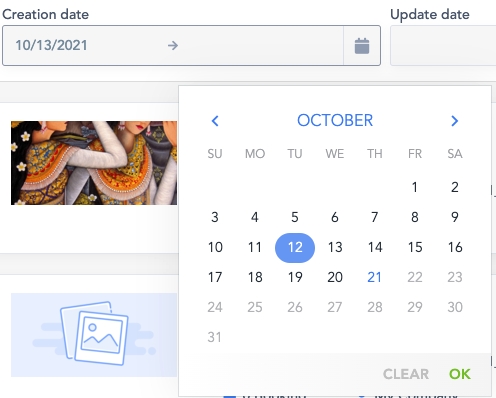
Prices per date (managed through the calendar view)
Recurring prices
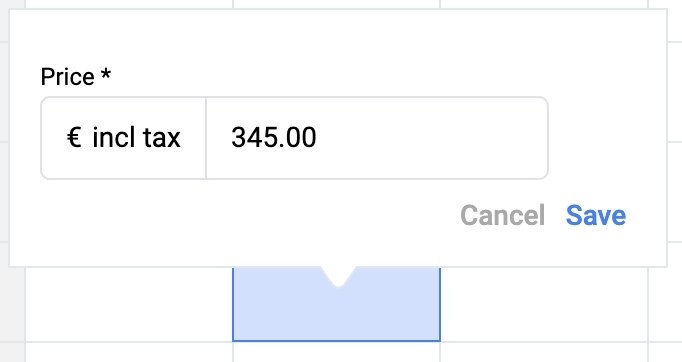
Prices per date allow the user to set a specific price per date.
By clicking a date, a price input appears (figure 18) and prompts the user to fill in a price. The user can select date/time ranges by clicking and dragging onto several calendar ranges.
The “Today”, “Day” and “Week” buttons (figure 19) change the calendar display accordingly.
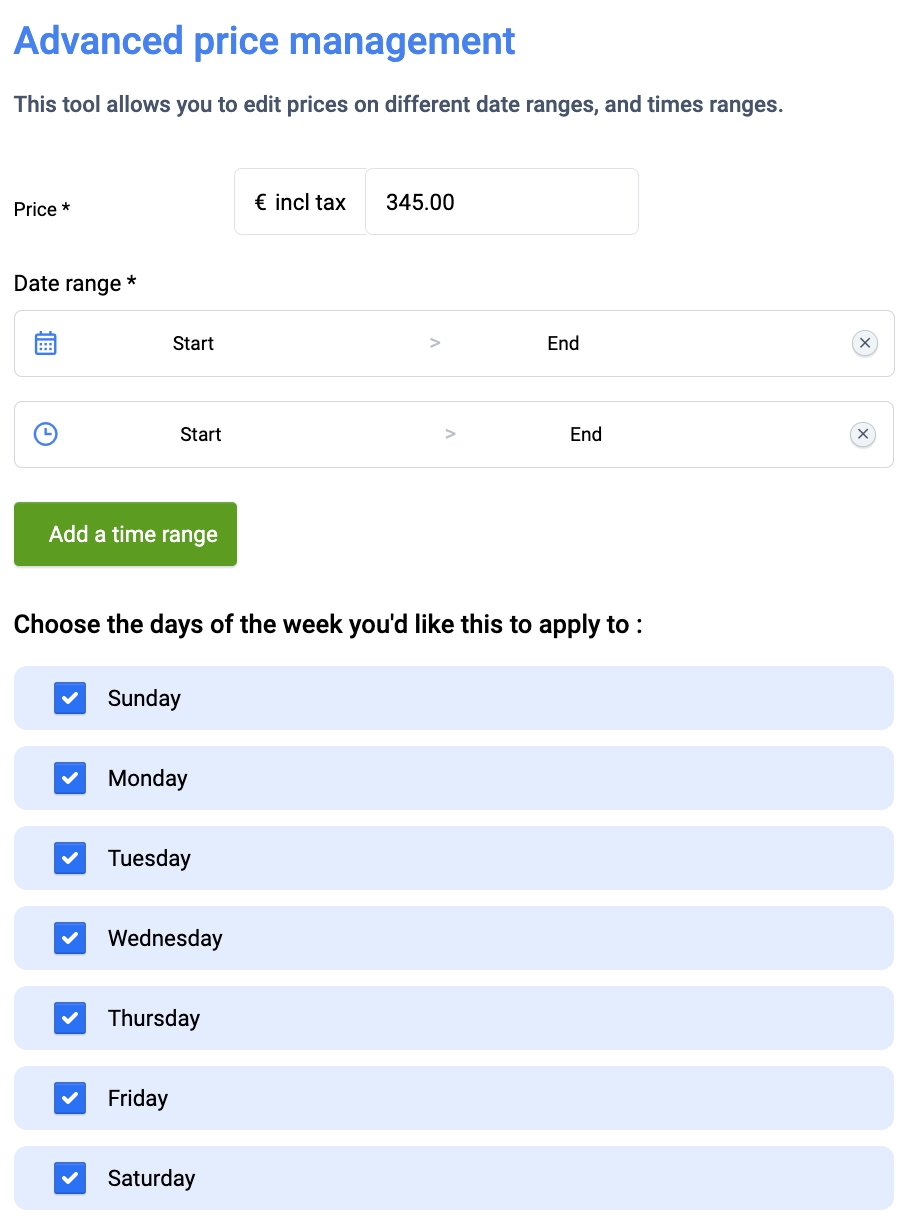
Recurring prices (figure 20) are a way to set prices over recurring weekdays (e.g. weekends are more expensive than weekdays).
To do so, a user enters:
The price
The applicable date range
The weekdays on which the price will be applied
During the listing edition process, users now have the option to add an upgrade to their listing. For detailed instructions on managing upgrades, refer to the Upgrade Management section.
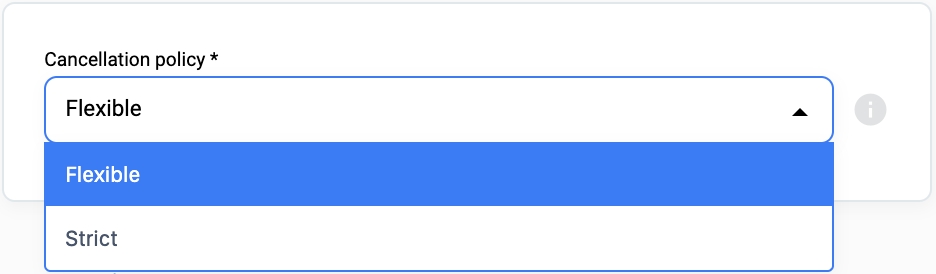
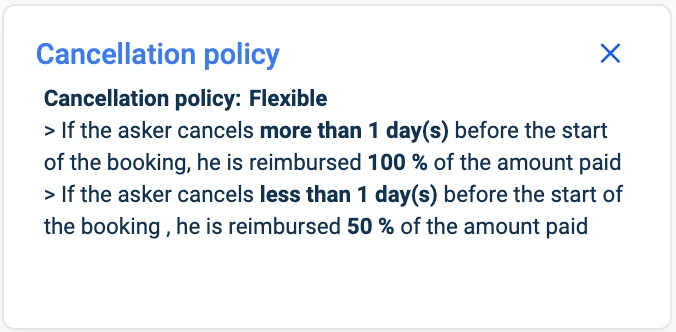
Users can also manage their listing’s cancellation policy by choosing between a “Flexible” cancellation policy or a “Strict” policy (figure 21).
The default value is determined by the platform administrator through the "Cancellation Policy" configuration within the SBO.
Users can only select one of the two policies offered by the platform. The parameters of each policy are set by authorized platform administrators.
Users can establish a minimum and maximum booking duration for their listing (figure 22).
Users can add discounts to their listing through the “Add a new discount” button (figure 23.1).
Each discount is set in percentages based on a threshold to be defined (figure 23.2).
The red trash icon deletes a media element.
There is no confirmation message when deleting a discount.
Default listing availabilities are determined by the platform’s configuration. In most cases, platforms set listing calendars to be unavailable by default. To begin receiving booking requests, offerors must manually configure their availabilities.
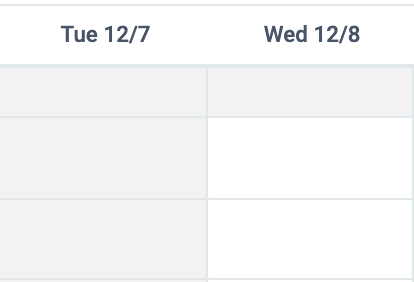
Users can change their listing’s availabilities through this calendar interface.
Greyed-out days are past dates and cannot be edited. White days are non-edited dates (figure 24.1).
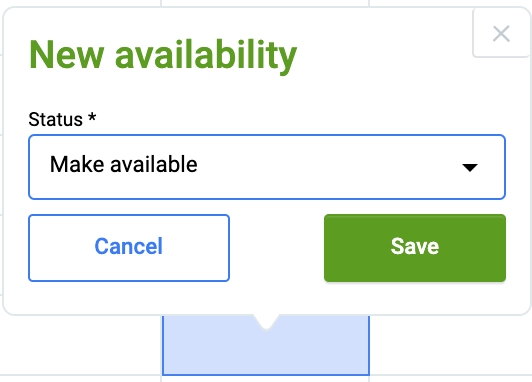
Clicking a date/time slot opens a pop-up window (figure 2.2) prompting the user to set availability for the selected period:
Make available: the date turns green (and depending on the platform’s configuration, a price (base or specific according to how prices were set) will be displayed)
Make unavailable: the date turns red
Users can also click and drag to select several dates/time slots to do bulk changes.
A “reset availabilities” button (Figure 24.3) is available at the top of the calendar block. This deletes all calendar settings and resets to default settings (usually a calendar with no availabilities).
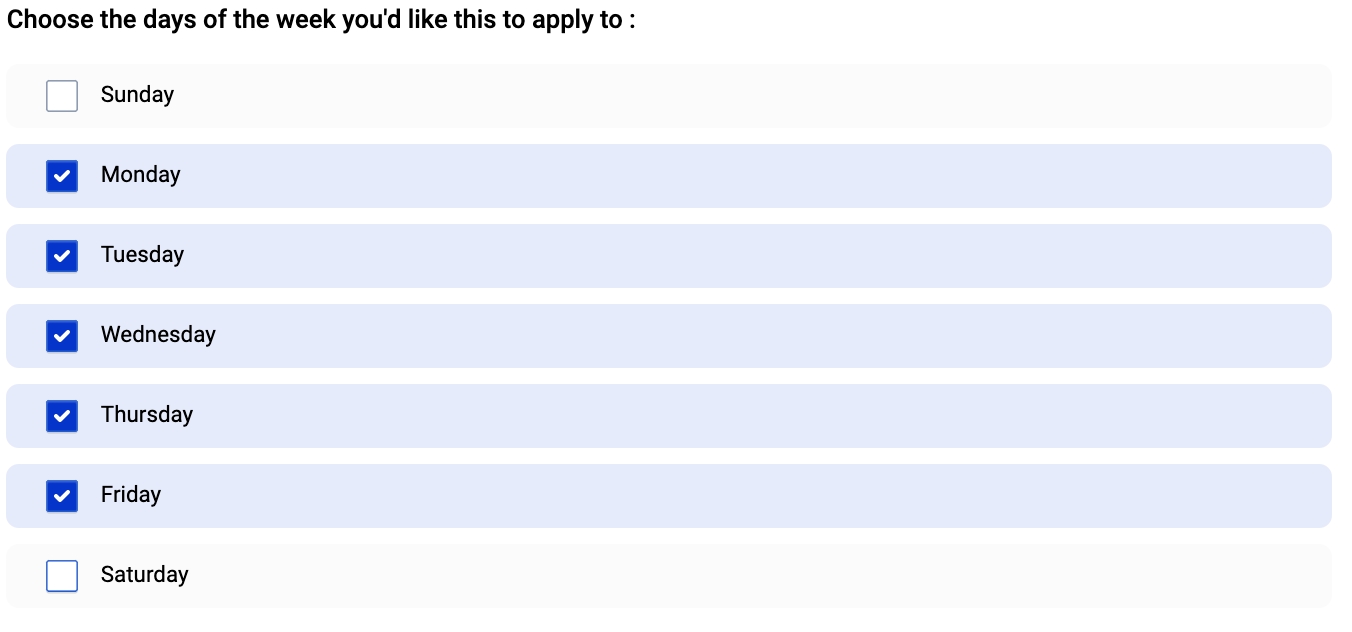
This advanced calendar tool allows users to quickly set their availabilities over large periods.
The parameters available are:
Status: “available” or “unavailable” (figure 25.1)
Date range with the start date and the end date (and hours depending on the platform’s configuration) (figure 25.2)
Weekdays to apply these changes to (figure 25.3)
Click “Save” to save changes.
The synchronization tool helps users import an external agenda’s events into the on-platform agenda and turn them into unavailabilities. To do so, the user enters the external agenda’s URL (figure 26).
Click “Save” to save changes.
Learn more about calendar synchronization here: Calendar Sync Feature - Business Rules
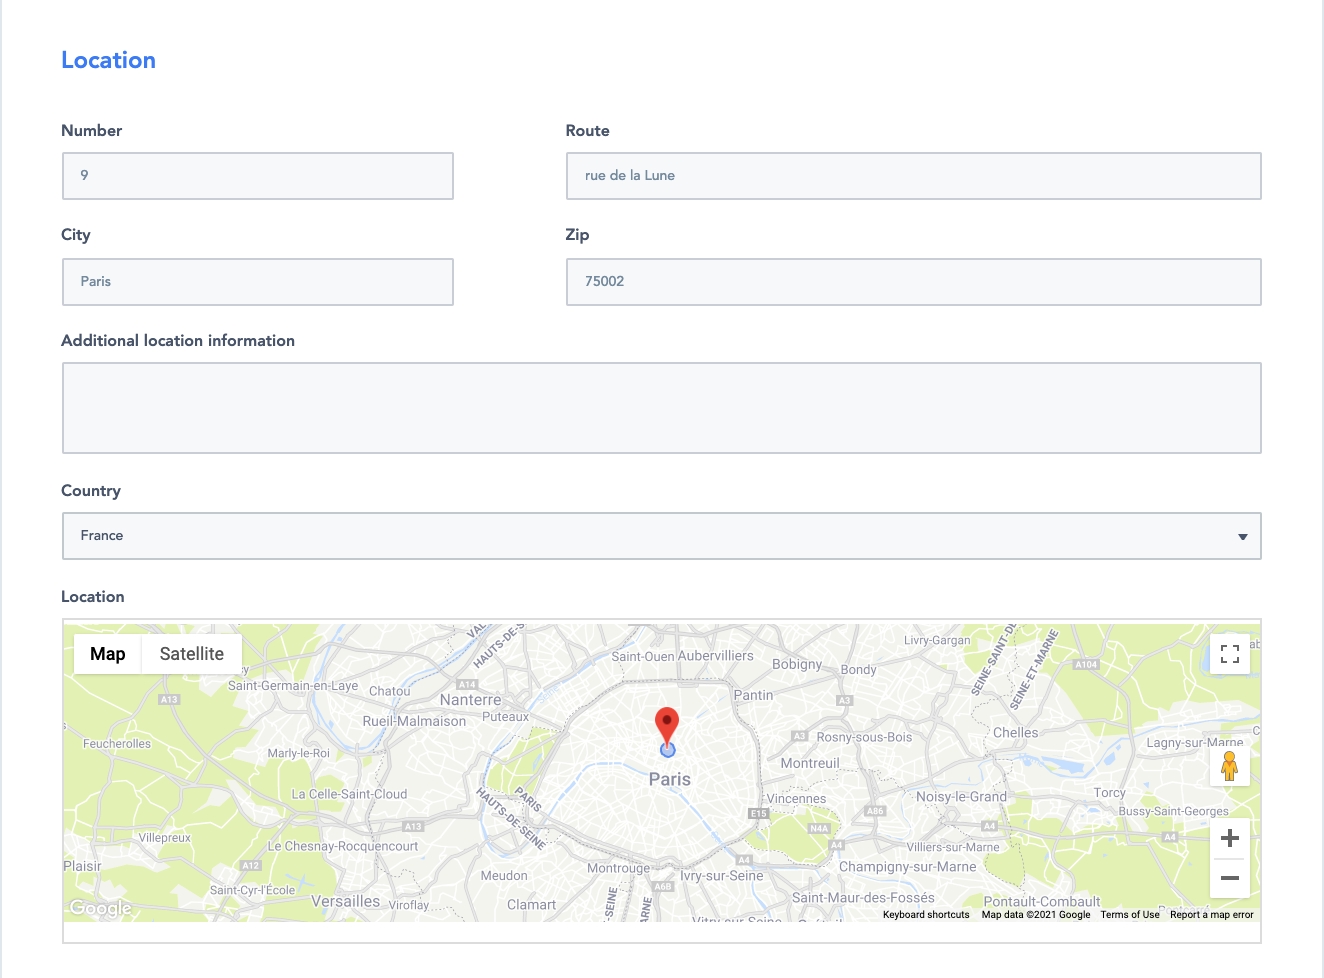
The “address” section manages the listing’s address (figure 27).
Confirm the address and click on “Save” to save changes.
Users can delete listings through the listing status dropdown menu available throughout the listing edition sections (figure 28).
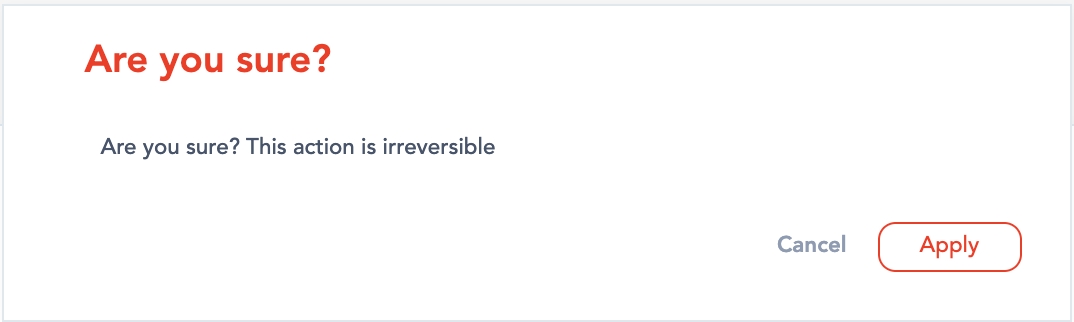
A confirmation message prompts the user to validate the deletion.
A deleted listing is no longer listed in the users' dashboard or search results. However, all related bookings, messages, and payments remain listed for history and tracking purposes.
Business rules:
Managing the features on your platform’s homepage from vendors perspective
Path: Homepage
Users form their initial impressions of a platform through its homepage, which serves as their first interaction point. The main goal of a homepage is to capture users' interest and guide them further into the platform. Therefore, it is essential that the homepage effectively communicates key messages and provides intuitive navigation paths.
The customer homepage has been carefully crafted to optimize customer interactions. Its primary function is to assist customers in discovering services and providing a robust platform for submitting proposals tailored to their requirements. Additionally, users can utilize the homepage to search for specific service providers and request quotes for desired services.
Homepages are generated by default. Users cannot modify content on the homepage.
Administrators with the relevant rights and roles can change several aspects of the homepage.
Vendors can perform searches for services request through the dedicated search bar (figure 1.1).
Multiple criteria are available (depending on the authorized administrator’s configuration, some of these criteria may be disabled):
Location (figure 1.2): users enter a location (country, state, region, city, street, etc.) in an auto fillable field. This field is powered by Google Maps by default.
Categories (figure 1.3): users can select zero to all categories and sub-categories through a drop-down list doubled with a multi-select checking tool.
Keywords (figure 1.4): users can manually enter keywords
Start and end date and/or start and end time (figure 1.5)
All criteria can be combined for a more precise search.
Criteria can be singled out for larger searches.
Users then click the “Search” button (figure 1.6) to launch the search. The results displayed will match the information the user has selected.
On the customer homepage, the user can publish a new service request by clicking the "publish a service request" button.
The selling points banner (see figure 2) features three distinct information blocks, each comprising a logo, a primary catchphrase, and accompanying text. Its primary function is to deliver concise explanations about the platform's purpose, target audience, and key benefits.
This section of the homepage features category blocks (see figure 3). These blocks serve as quick-access links for conducting efficient searches within specific categories.
The video section (Figure 4) serves as an enhanced feature designed to enrich understanding of your platform’s purpose, benefits, target audience, and other relevant details. It is seamlessly integrated into the platform, allowing users to view it directly from the homepage. Adjacent to the video, users can find a customizable title and description, editable by authorized platform administrators. This capability enables administrators to enhance the video's context and ensure it aligns effectively with the platform's messaging.
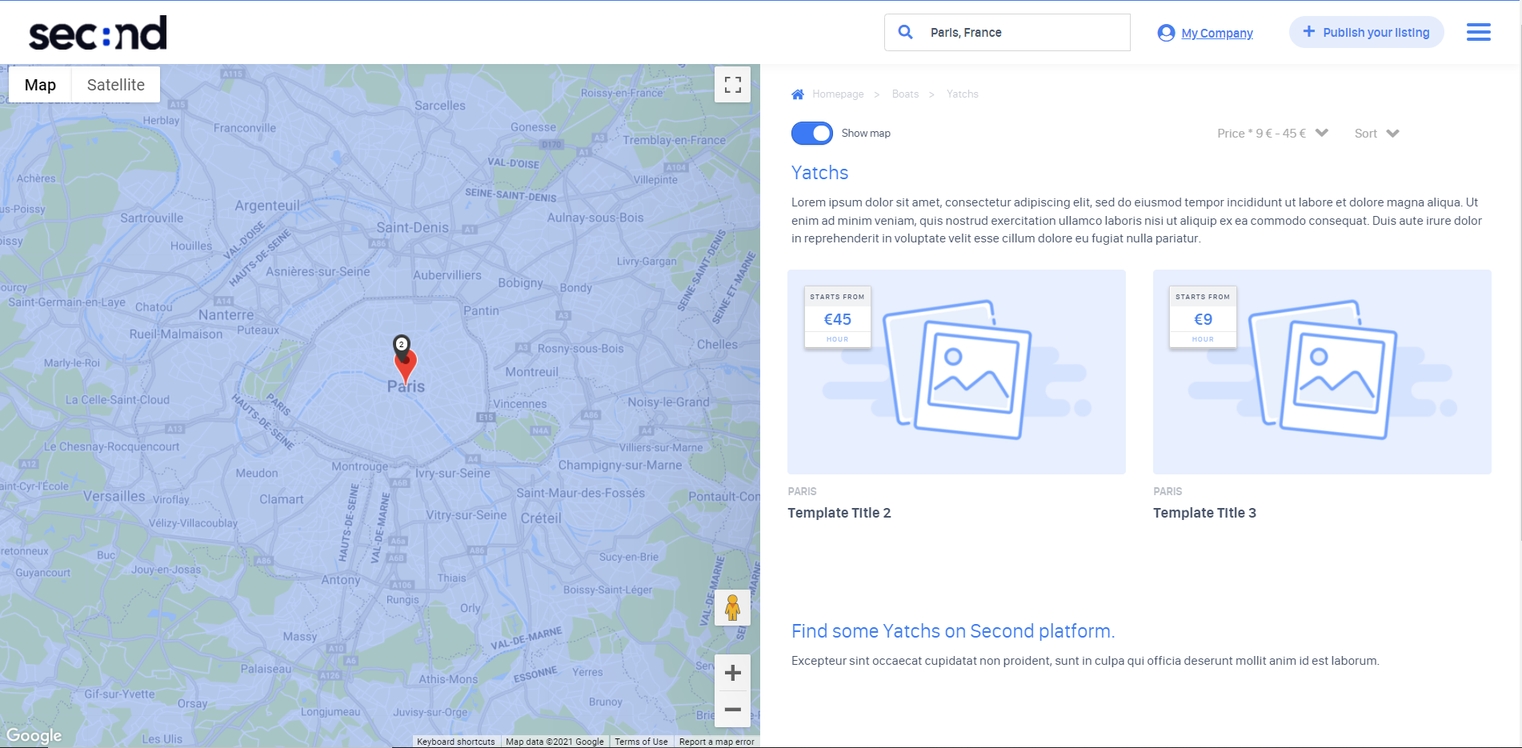
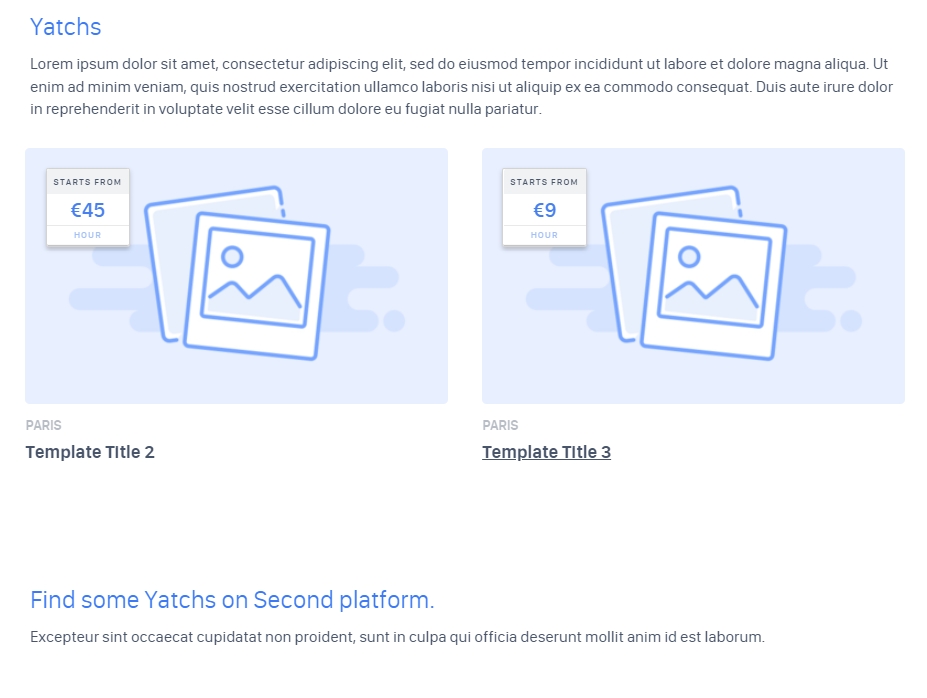
The “Recommended listings” section (figure 5.1) displays a list of automatically curated listings available on the platform.
These can be the “best ranked” listings or “last published” listings according to the platform settings Home Page Media and Home Page Setup
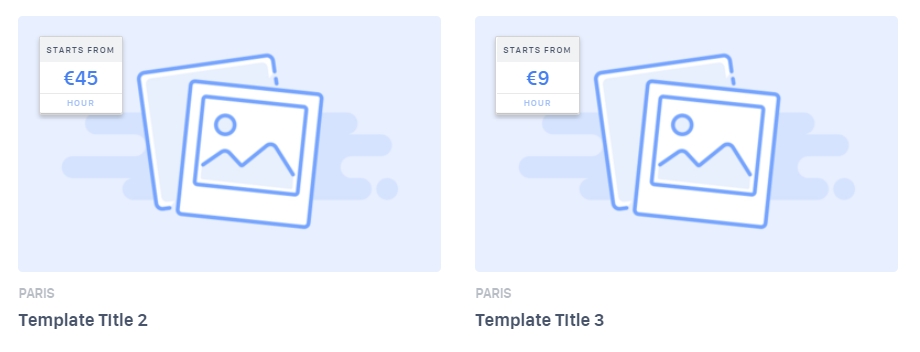
Each card (figure 5.2) displays:
The listing’s title
The listing’s location
The listing’s default price per time unit
The listing’s rating (if it has one)
The favorites icon, see the Favorite listings page for additional explanations.
Users can access all listings available on the platform through the “Show all listings” button (figure 5.3) at the end of this section. Upon clicking, a search results page is displayed.
A “Featured News” section (figure 6.1) is available at the bottom of the homepage. This section displays articles from a third party blog or website according to the configuration set up by the authorized administrator. For more information on how to set it up, see Home Page Setup -> RSS Feed
Users can access in detail each article by clicking the “Read more” button available in each news block (figure 6.2). They are then redirected to the related news page.
The customer homepage of a platform can have up to 6 sections maximum.
As an authorized administrator, each section is managed through the SBO.
Refer to the following documentation to learn more on how to manage these sections: Home Page Media and Home Page Setup
Below are the 6 sections of your homepage (figure from 7.1 to 7.6):
Users cannot delete any element on a homepage.
A homepage cannot be entirely deleted. Authorized administrators can delete some of the above-detailed sections, for more information refer to the following documentation: Home Page Setup and Home Page Media
SBO :
Front :
Business rules:
The assistant is designed to interact with users and address their inquiries, leveraging the capabilities of OpenAI's artificial intelligence to make informed decisions that benefit users. The AI search assistant is a feature developed specifically to help users with a variety of requests. These requests can range from identifying suitable services, submitting or responding to proposals, to locating and connecting with a vendor. Conveniently accessible, the assistant is presented as a chatbox located in the bottom right corner of the homepage (Figure 1).
The chatbot interface is user-friendly, offering a seamless experience as it guides users through their inquiries, ensuring that they receive the best possible support and solutions tailored to their needs. By integrating advanced AI technology, the assistant can quickly.
On the top, we have three icons to assist the user:
The AI Search Assistant is not a chatbot. It uses artificial intelligence to process the marketplace database and analyze user requests.
Enabling AI Search Assistant -> AI Settings
Learn how to configure the AI Search Assistant -> AI Search Assistant Configurations
Managing the features on your platform’s homepage - User search solution
Users' first impression of a platform is formed through the homepage as it is the first interface they see. A homepage’s goal is to capture users' attention and to entice further exploration of the platform. As such, a clear message, as well as understandable funnels, must be explicitly displayed.
WHO CAN USE THIS FEATURE?
All users
Homepages are generated by default. Users cannot modify content on the homepage. Administrators with the relevant rights and roles can change several aspects of the homepage.
A user search-activated homepage is similar to the standard homepage described here: Vendor Homepage or Customer Homepage, with an additional dedicated search bar.
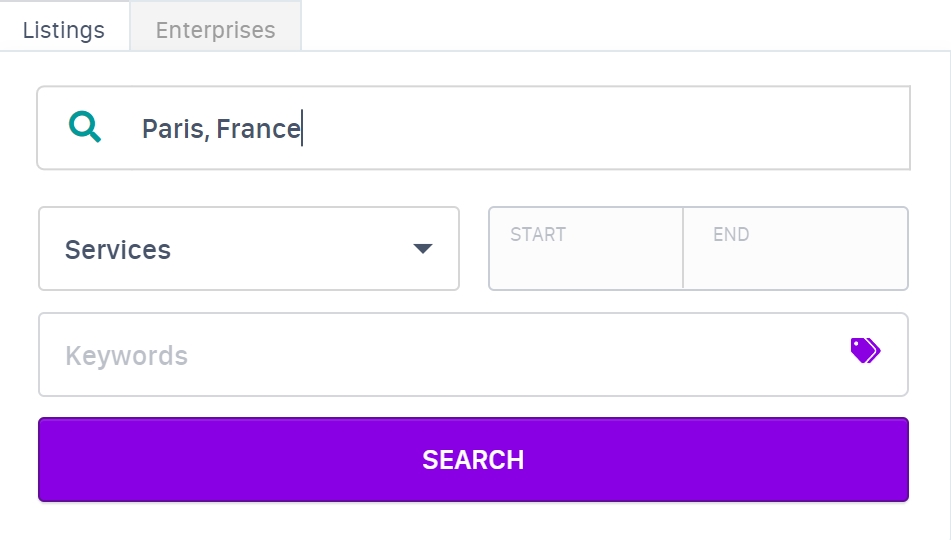
When the user search feature is enabled and the operator also enables Displays search form , users can select, through the related tabs at the top of the search bar (figure 1.1), which type of search they would like to perform.
The user search bar criteria slightly differ from the listing search bar (figure 1.2).
The search criteria are:
Location (figure 1.3)
A user category (figure 1.4). These are different from listing categories
Keywords (figure 1.5)
Search for vendors only (figure 1.6)
All criteria can be combined for a more precise search.
Criteria can be singled out for larger searches.
Users then click the “Search” button (figure 1.7) to launch the search. The results displayed will match the information the user has selected.
Please refer to the following documentation:
Vendor Homepage - Update a Homepage
Customer Homepage - Update a Homepage
Please refer to the following documentation:
Vendor Homepage - Delete a Homepage
Customer Homepage - Delete a Homepage
Front:
Business rules:
Learn how to select the rendering type during the listing creation.
The process of creating a listing consists of three initial steps in which the vendor provides the basic information required regardless of the selected rendering type. Once the rendering type is chosen in the third step, the subsequent steps will adapt accordingly to capture the specific details necessary for the listing.
The listing creation process begins on the homepage. If the "switch" configuration in the SBO is enabled, both vendor and customer roles have the ability to create a listing. When this setting is active, users must select their roles during account registration.
However, if the configuration is enabled with restrictions, only accounts designated as vendors will have permission to create listings.
If the option to publish a service is not visible on the homepage of a switch platform, the user is currently on the customer homepage. To switch to the vendor homepage, click the "Become a Vendor" button located in the top-right corner.
To start the listing creation process, click on "Publish a service" on the homepage. This action will trigger the listing deposit process.
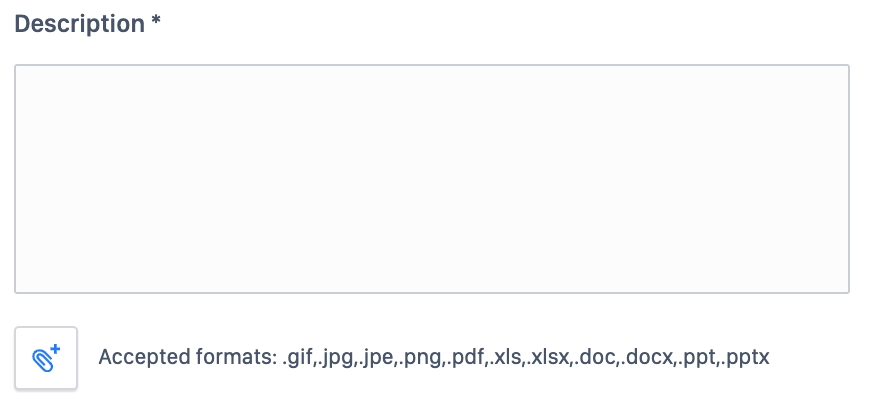
The user is required to specify a title that accurately represents the provided service, accompanied by a detailed description outlining the nature and scope of the service. Both fields are mandatory and the listing title must have a maximum of 50 characters.
Tips: pick a short and clear title for your listing. This is the first thing that customers will see, time to shine!
During the listing deposit process, vendors have the ability to upload multiple file types to enhance the listing's detail and appeal for potential customers.
During the media selection process, vendors can upload various types of media to enhance their listings. The platform supports multiple image file formats, including JPG, PNG, GIF, and WebP. By default, the maximum allowable image file size is set to 12MB. However, this limit can be modified through the SBO configuration setting "Max size of a listing image."
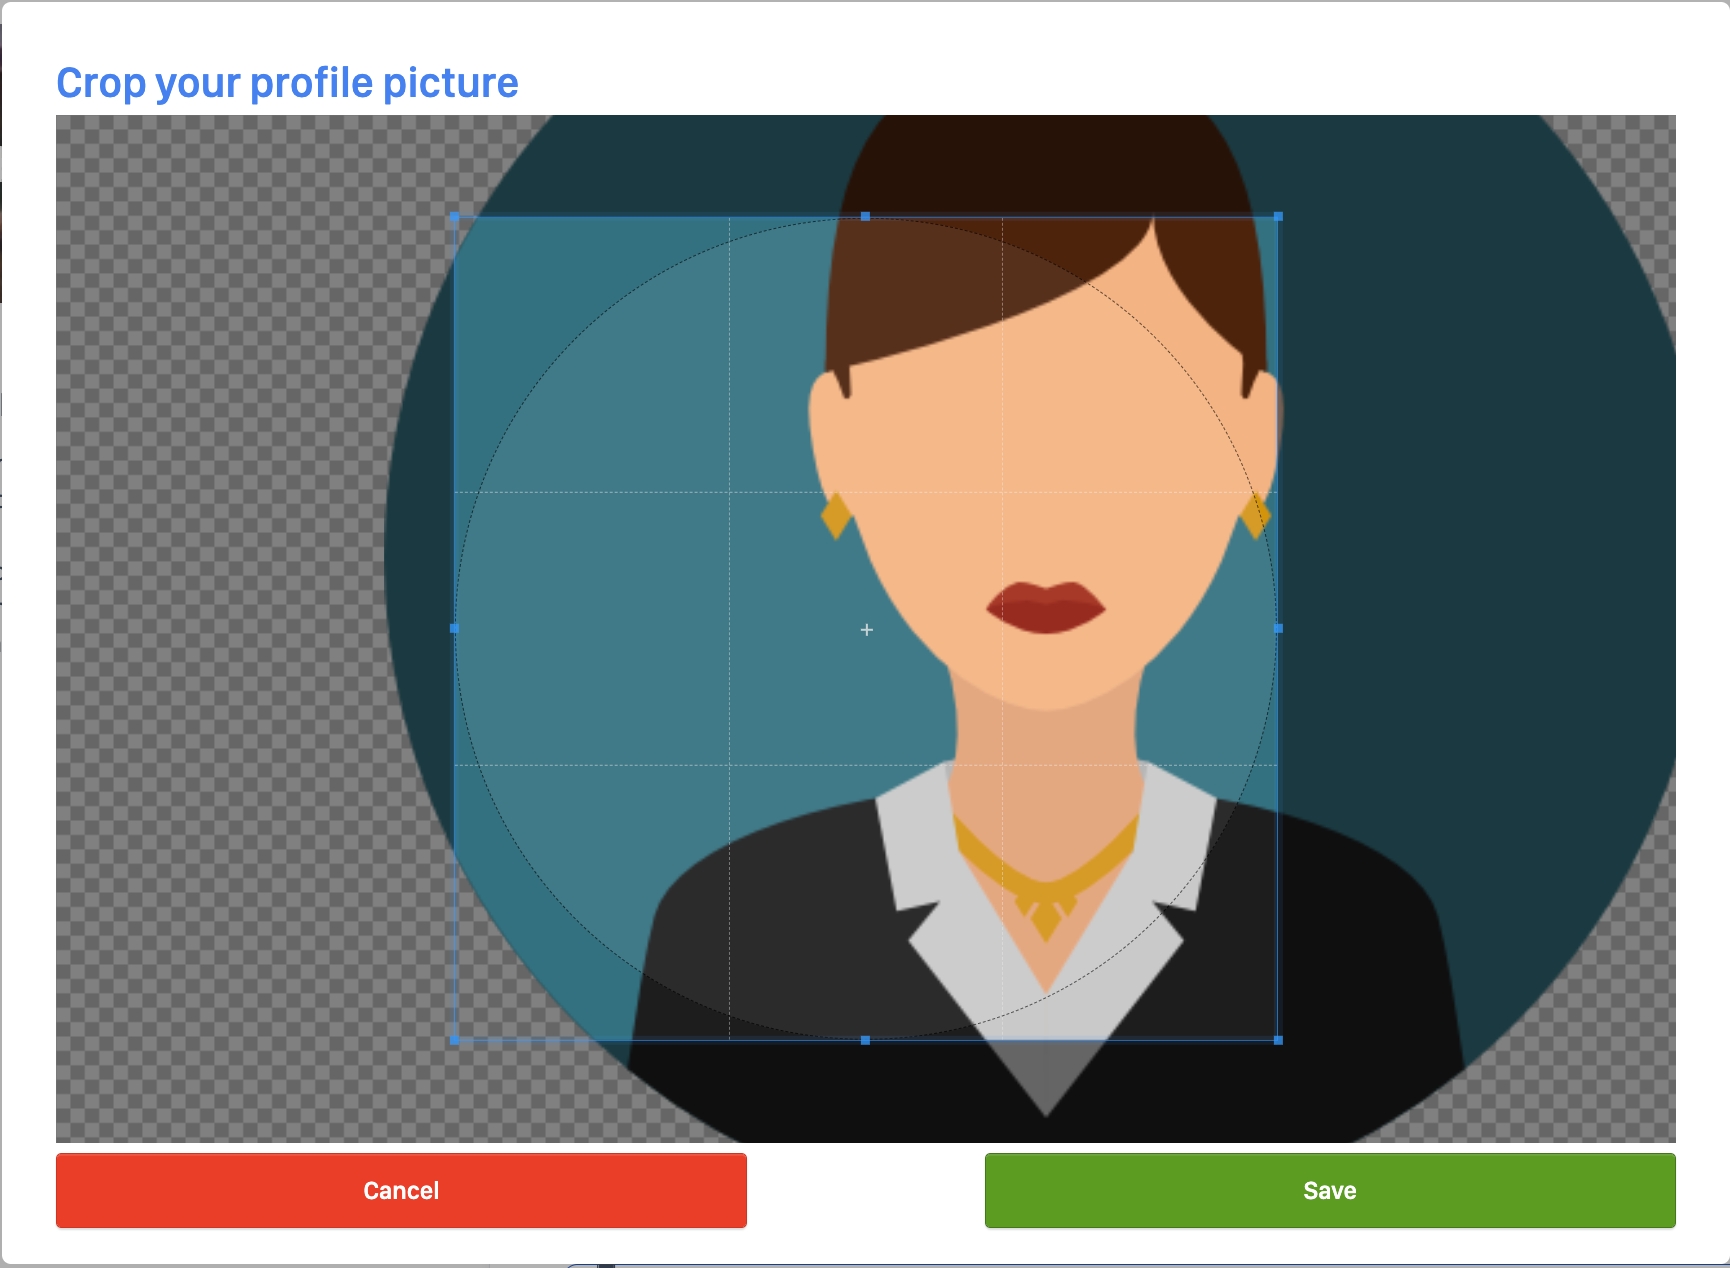
At least one image must be uploaded, as it serves as the listing thumbnail. The administrator can set a max/min number of images through the "Max number of listing images" and "Min number of listing images"configuration in the SBO. Additionally, another configurable option available in the SBO settings for administrators, "Use profile picture as first image," allows the user’s profile picture to be automatically set as the first image in the listing cover.
The system allows users to upload PDF files to the listing. While this is not a mandatory requirement, vendors have the option to include additional details about their services by attaching relevant PDF documents.
The system allows vendors to add videos to their listings by simply pasting the YouTube URL. Once the URL is provided, the solution automatically integrates the video into the listing without requiring any additional steps.
In the third step, the vendor must select the rendering type model, which determines how customers interact with the listing. As previously mentioned in this section, this selection also affects the pricing structure, whether based on time, service, or the number of participants.
To support vendors in this process, an AI-powered feature has been incorporated into this step. For additional information, refer to the Rendering Type Auto Suggestion section.
Note: The rendering type of a listing cannot be modified after it has been published or saved as a draft.
Once the initial steps are completed, the process will proceed based entirely on the selected rendering type. For more details on how the listing deposit process continues, refer to the following content:
Learn how a listing page is displayed.
Path: Homepage > All listings > Listing
Listing pages are the public interfaces displaying services' detailed information. These pages also allow users to book said services.
WHO CAN USE THIS FEATURE?
All users
Offerors are the only user types who can create listings. Askers cannot create listings.
When a user clicks the listing preview card, the listing’s detailed information will be displayed in a new tab.
Each listing page follows the same structure.
The main body is structured as followed:
Listing title (figure 1):
Location (figure 2).
The location indicates where the service will be rendered.
“Favorites” icon (figure 3):
Breadcrumb (figure 4) gives users information on the platform’s internal navigation path.
The menu (figure 5) summarizes the listing’s structured information. Users can directly access a section by clicking one of the menu’s sections.
The media section (figure 6.1) displays the media elements related to the listing.
Supported media formats are files (pdf), images (jpg, png, gif), videos (youtube URLs).
Videos from the media section are youtube videos available directly on your platform to ensure maximum user retention and avoid external redirections (figure 6.2).
Users must consent to cookies to be able to watch videos. If they do not consent, videos will not be readable.
The description block (figure 6) displays additional textual information about a listing.
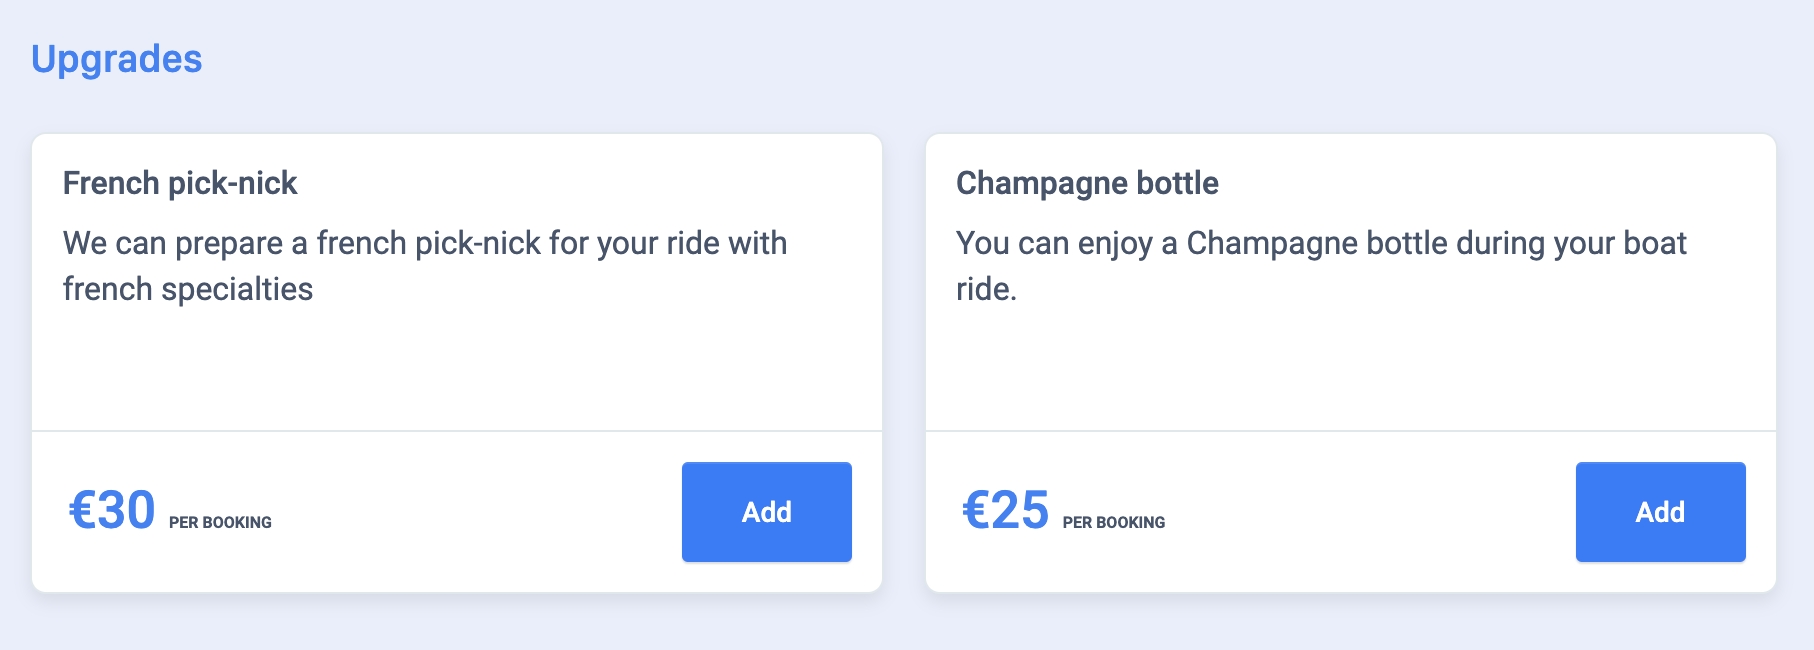
The "Options" section presents the available upgrades that users can add to their booking.
The booking policy section (figure 8) displays information about the cancellation rules and refund rates applied depending on the cancellation date. This information is automatically set according to the offeror’s cancellation policy choice.
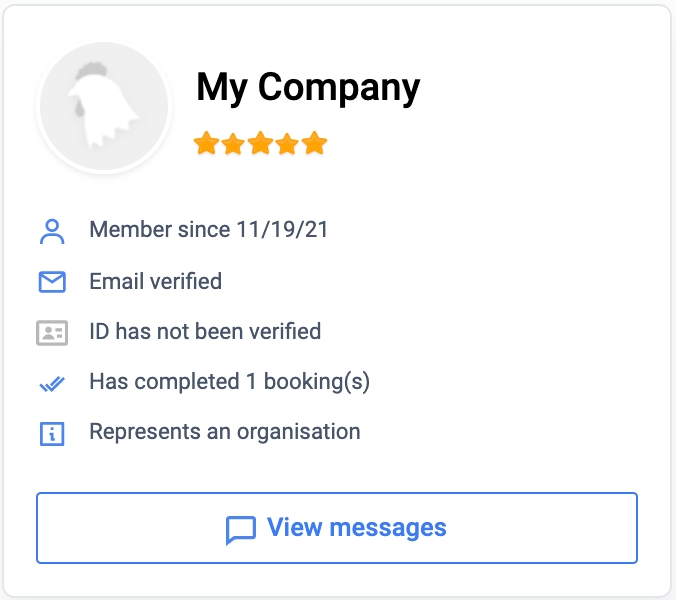
The offeror section (figure 9) displays the following information regarding the listing offeror:
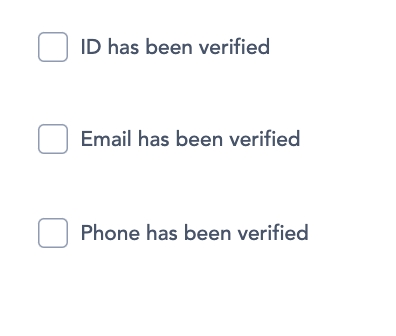
Certified information of the offeror
2 buttons:
“My profile” button to redirect a user to the offeror’s dedicated profile page.
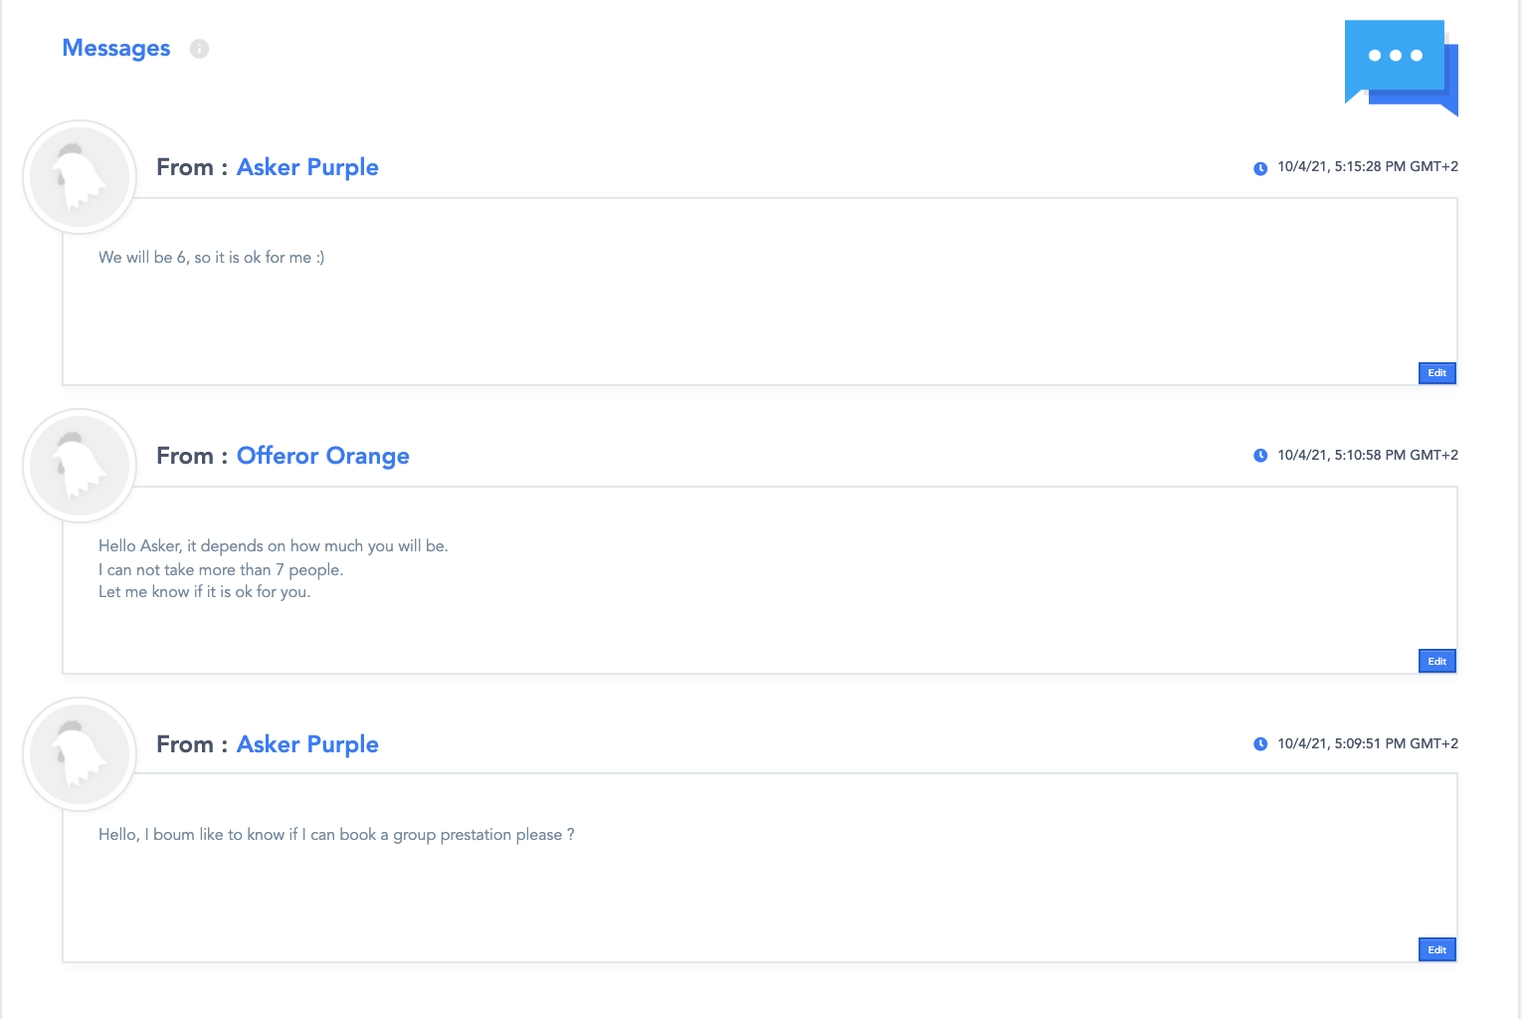
“Contact me” button to send the offeror a message through the platform’s internal messaging system.
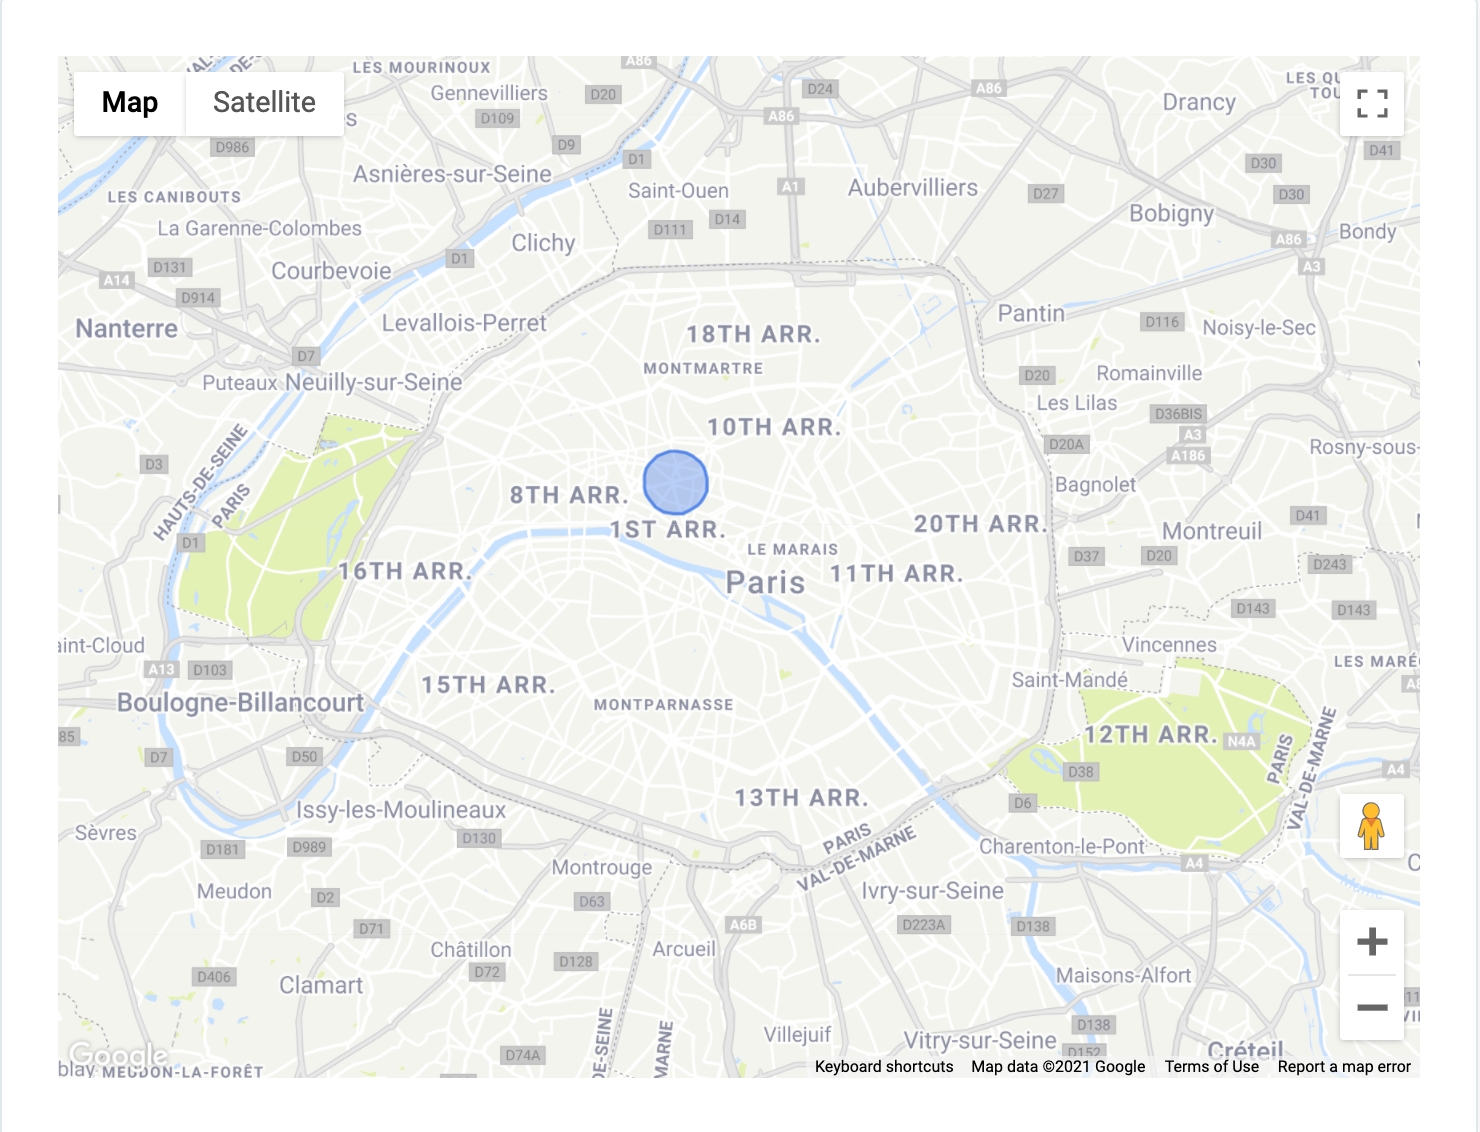
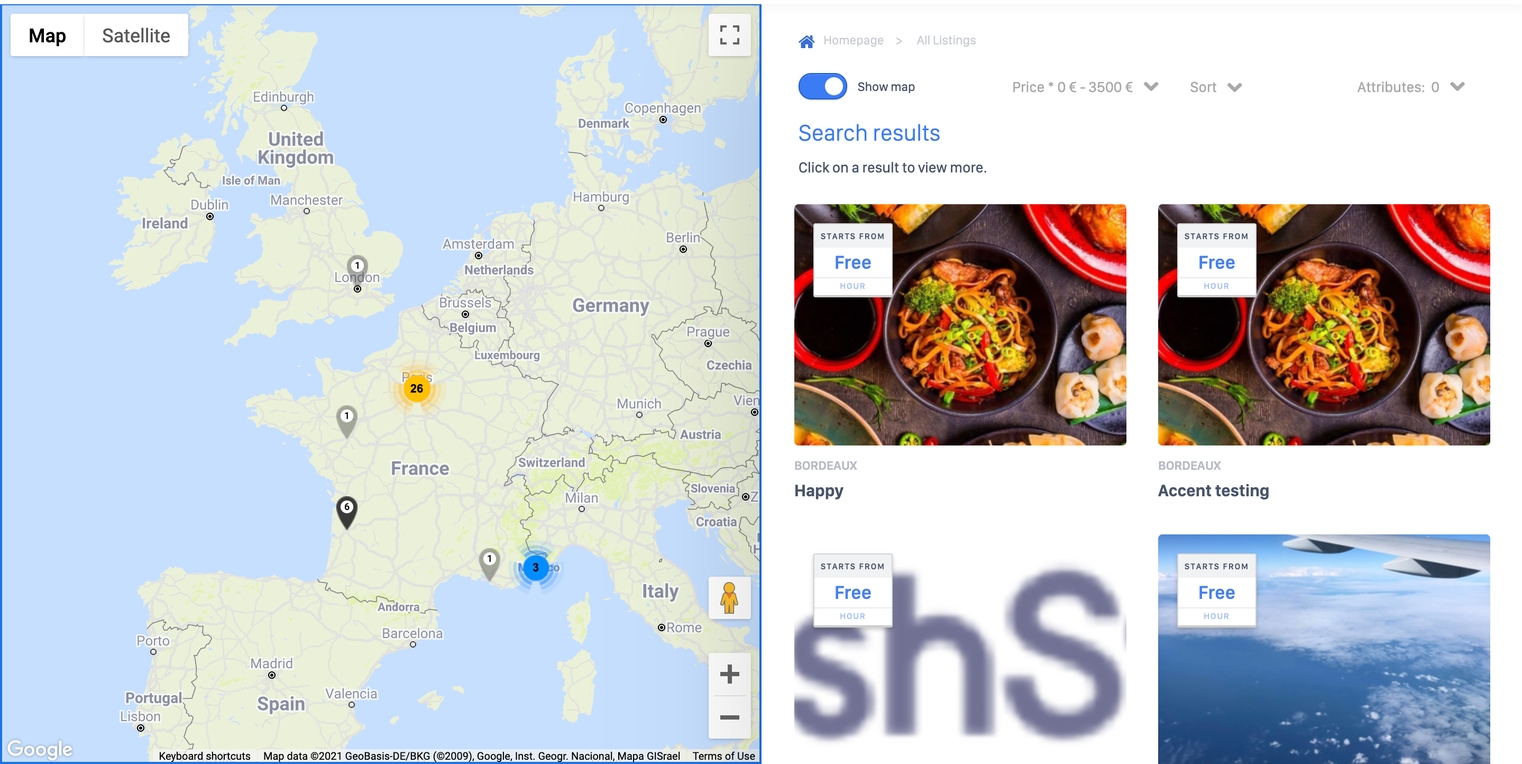
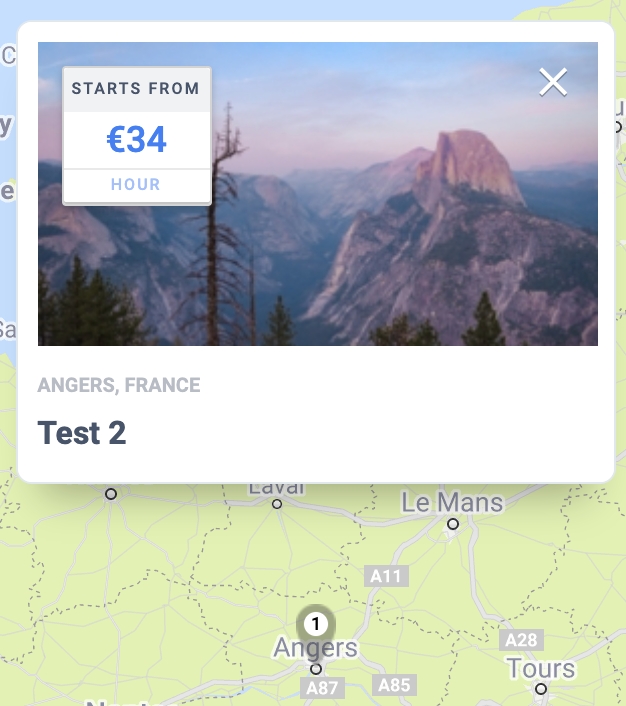
The locations section displays a map (figure 10) which indicates either the listing’s rendering location or an intervention area. Users can navigate through the interactive map through the use of standardized commands (zoom in, out, drag and click).
A blue circle may sometimes be displayed instead of an exact location. This indicates the listing’s rendering/intervention area as a protection/security measure.
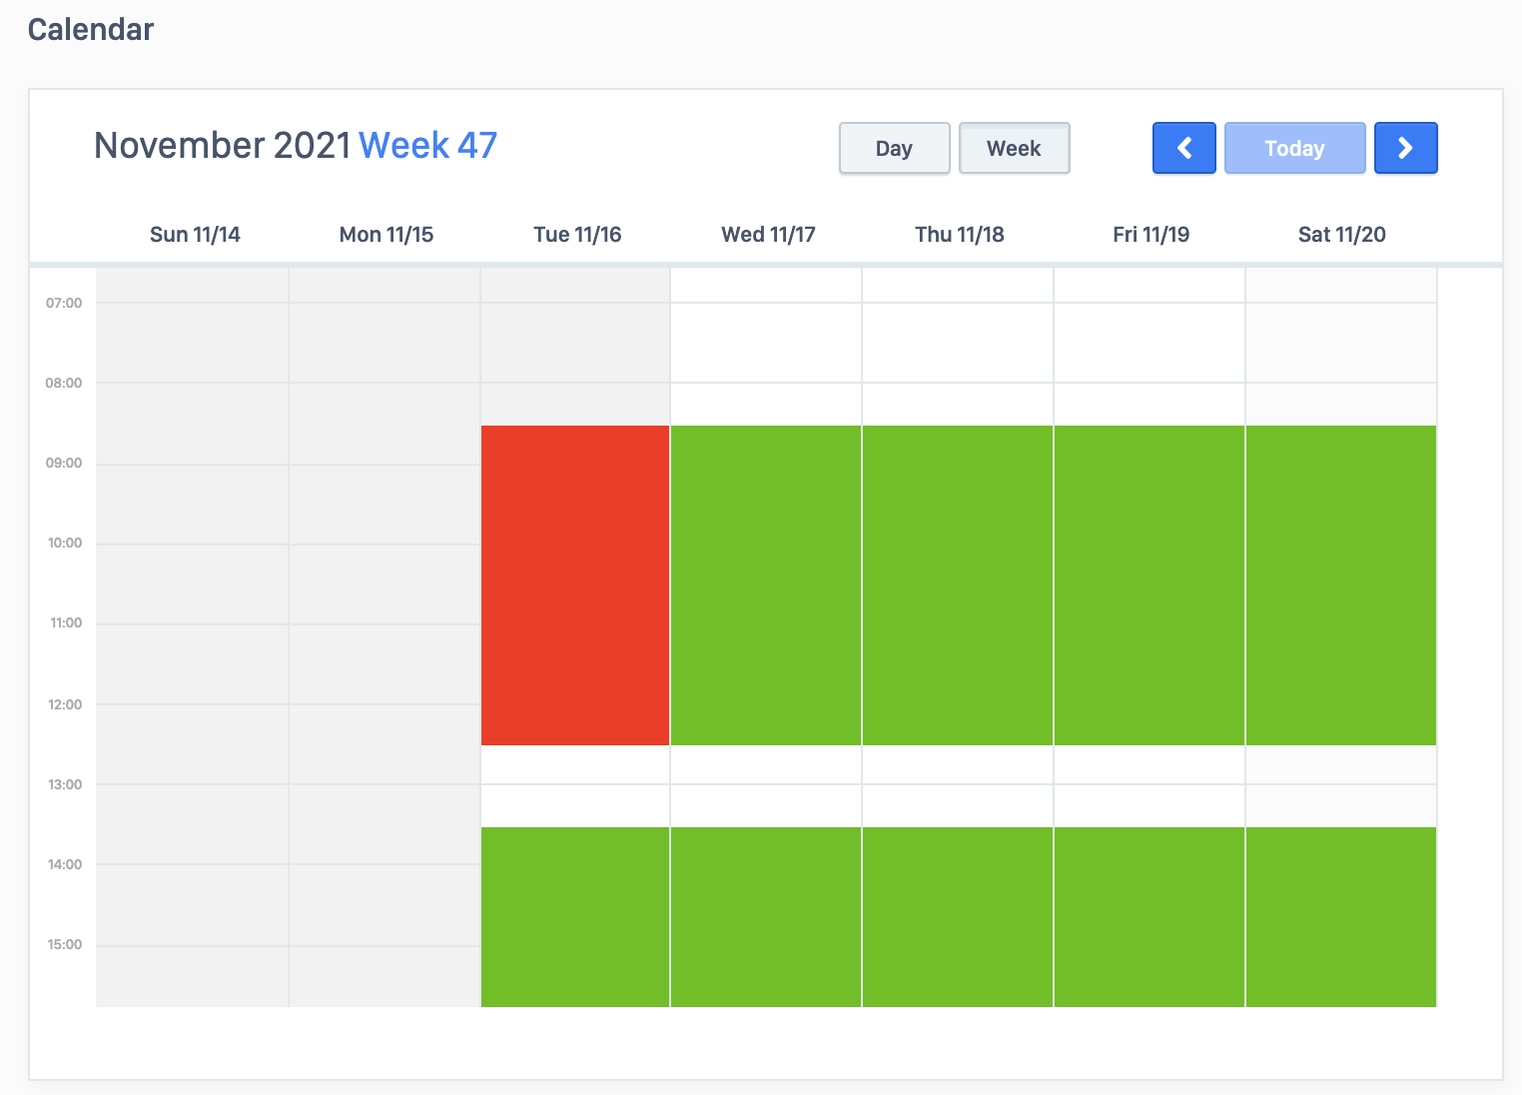
The listing’s availabilities (figure 11) are displayed at the bottom of the listing page under the calendar section. An intuitive colour code is used to visually give availability information at a glance:
Red: the listing is not available
Green: the listing is available
Users can change the calendar view from a daily view to a weekly view. Users can also navigate through the calendar by using the top-right arrows.
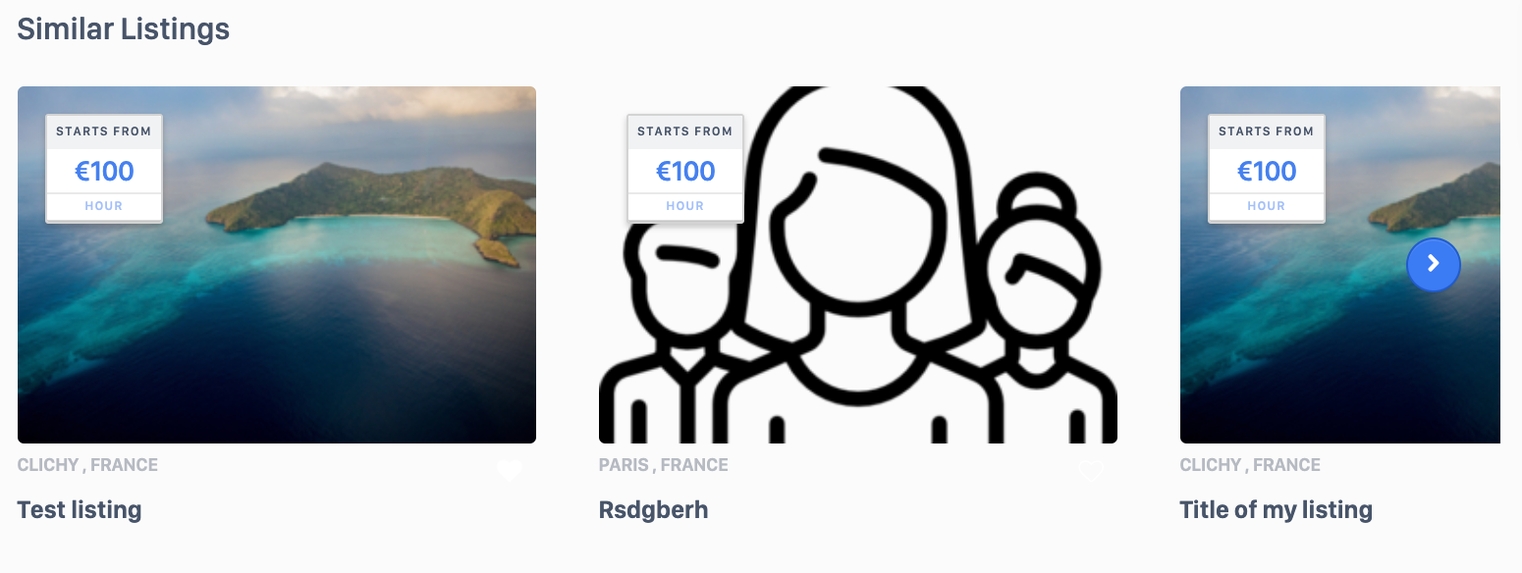
The similar listing section (figure 12) provides a selection of other listings that might be of interest to the user.
This section encourages users to stay longer on the platform by providing alternatives to a given listing. This may increase the chances of finding the right match and conversion rates.
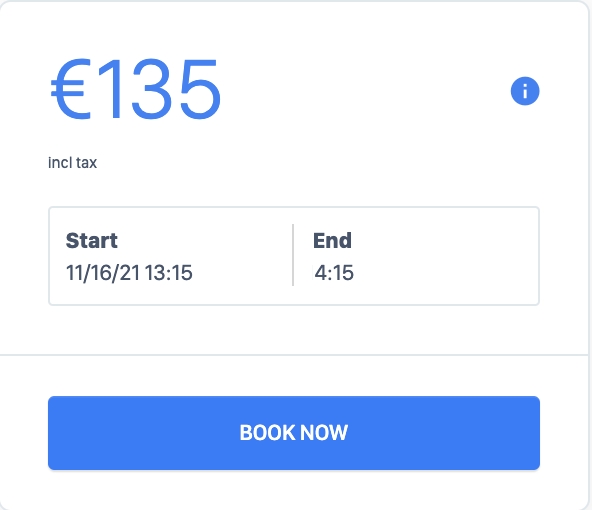
The booking block is related to the booking action. This block is anchored to the page and always remains visible while scrolling through the listing page.
The booking block displays by default the booking’s base price. The following information is managed through this block:
The listing’s preview card available in the search results displays the listing’s default price.
Prices may vary according to the offeror’s pricing rules and selected dates.
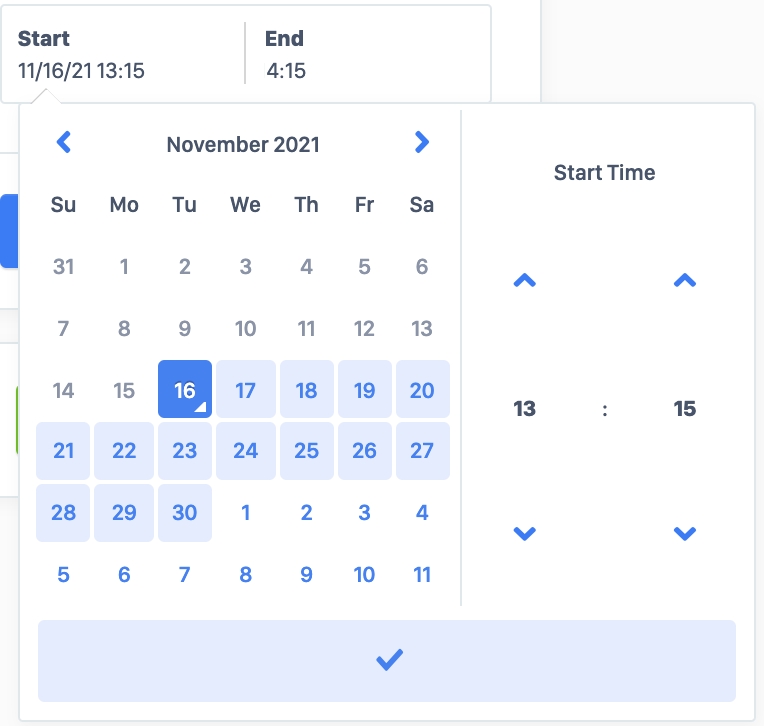
Users select the start date (and time if applicable ) and the end date (or time if applicable) for the booking request. The selectable dates depend on the listing’s availabilities.
The “Book now” button (figure 15) initiates the booking request process for the previously entered dates and conditions.
Customers cannot update listings.
Customers cannot delete listings.
Business rules:
Listing dashboard edition for the Session bundle
Path: Dashboard > Listing > Listing edition
User dashboard page through which users can manage their listings.
WHO CAN USE THIS FEATURE?
Switch: All users
Non-switch: Logged offerors
Users can create a listing through the Front interface, by clicking the “Publish your listing”.
Once at least one listing is created, a user can view all of his listings in the user dashboard’s Listing section.
The user dashboard’s Listing section displays the list of all of his listings. These can be filtered by listing status (figure 1):
All: All listings
Published: Listings published on the platform
Invalidated: Listings declared as invalid by the administrator
In review: Listings being reviewed by authorized administrators, not publicly visible (only admins and the offeror can view the listing)
Hidden: Hidden listings, not publicly visible (only admins and the offeror can view the listing)
Each listing block displays:
The listing status
The listing media elements
The listing location
The listing title
The listing description
The listing price
The “Duplicate” button
The “Edit” button
Users can modify their listings' information through the “Edit” button located next to the “Duplicate” button.
Path: Dashboard > Listings > Listing # > Presentation
Editing a listing presents the listing information in several sections. At the top of each section is always displayed:
The title of the current listing.
A status dropdown button to filter listings
The “Duplicate” button
The “View listing” button (figure 8) to visualize the listing’s public display.
Information banners (figure 9) to guide the user when required
After creating a listing, the vendor can modify the price per participant. All information presented during the listing creation process remains available in this section, including the option to designate the listing as free.
The vendor has the ability to modify the maximum number of participants. This allows for adjustments to increase or decrease the participant limit as needed.
Vendors can also manage their listing’s cancellation policy by choosing between a “Flexible” cancellation policy or a “Strict” policy.
The default value is determined by the platform administrator through the "Cancellation Policy" configuration within the SBO.
Vendors can only select one of the two policies offered by the platform. The parameters of each policy are set by authorized platform administrators.
Default listing availabilities are determined by the platform’s configuration. In most cases, platforms set listing calendars to be unavailable by default. To begin receiving booking requests, offerors must manually configure their availabilities.
Users can change their listing’s availabilities through this calendar interface.
Greyed-out days are past dates and cannot be edited. White days are non-edited dates (figure 24.1).
Clicking a date/time slot opens a pop-up window (figure 2.2) prompting the user to set availability for the selected period:
Make available: the date turns green (and depending on the platform’s configuration, a price (base or specific according to how prices were set) will be displayed)
Make unavailable: the date turns red
Users can also click and drag to select several dates/time slots to do bulk changes.
A “reset availabilities” button (Figure 24.3) is available at the top of the calendar block. This deletes all calendar settings and resets to default settings (usually a calendar with no availabilities).
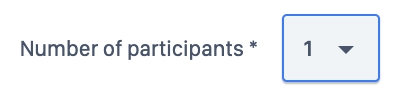
By setting the advanced calendar, you will have to set the number of participants for the sessions you will create, thanks to the dropdown button (figure 2)
The synchronization tool helps users import an external agenda’s events into the on-platform agenda and turn them into unavailabilities. To do so, the user enters the external agenda’s URL.
Click “Save” to save changes.
The “address” section manages the listing’s address.
Confirm the address and click on “Save” to save changes.
Business rules:
Instructions for listing pages - Seat-Based rendering type activated
Path: Homepage > All listings > Listing
Listing pages serve as public interfaces that provide detailed information about available services. These pages also enable users to book services directly. In seat-based listings, availability details are clearly presented and explicitly displayed within a designated section of the listing.
WHO CAN USE THIS FEATURE?
All users
Offerors are the only user types who can create listings. Askers cannot create listings.
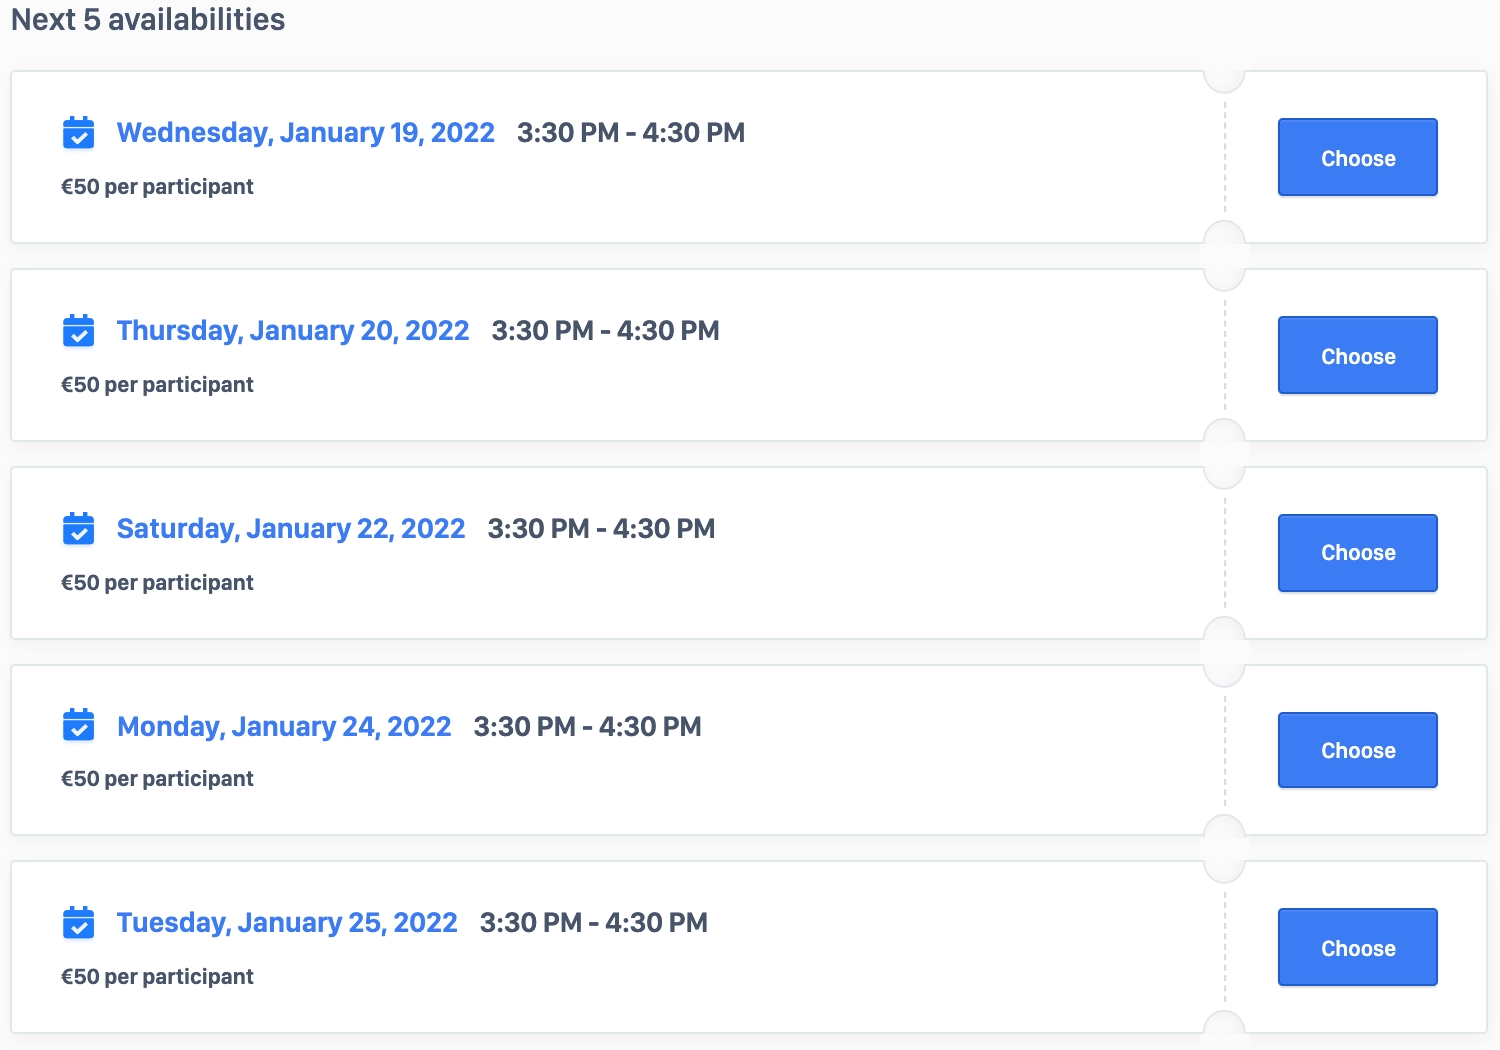
Additionally, listings bear a “Next 5 availabilities” section (figure 1).
This section displays all the upcoming sessions available in the listing.
Each session block (figure 1) displays:
The session date
The session start time and end time
The session price
A “Choose” button to add the session to the booking request.
Business rules:
How to create a listing as a platform user in the Seat-Based rendering type.
Path: Front > Publish a listing
The Listing Deposit for Seat-Based Rendering process involves creating a listing on a platform to showcase services offered or required. This functionality enables vendors to create listings where pricing is determined based on number of seats booked for a session.
In a non-switch platform configuration, only vendors can create listings.
In the seat-based rendering type, the base price is determined by multiplying the price per participant by the total number of participants in a session at the time of booking.
Additionally, vendors have the option to offer a free session by selecting the "Free Session" checkbox.
The system also factors in platform fees per participant, which can be configured by an administrator through the SBO under "Platform Asker Fees" or "Platform Offerer Fees" within the configuration settings.
For the Seat-Based rendering type, the vendor must configure the system to notify the customer of the session duration.
In the final section of this block, the vendor is required to specify the maximum number of participants permitted to attend each session.
In this section, the vendor is required to configure session availability by specifying the start and end dates for each session, along with the corresponding time range. Additionally, the vendor can define the specific days of the week within the selected date range when the sessions will be available.
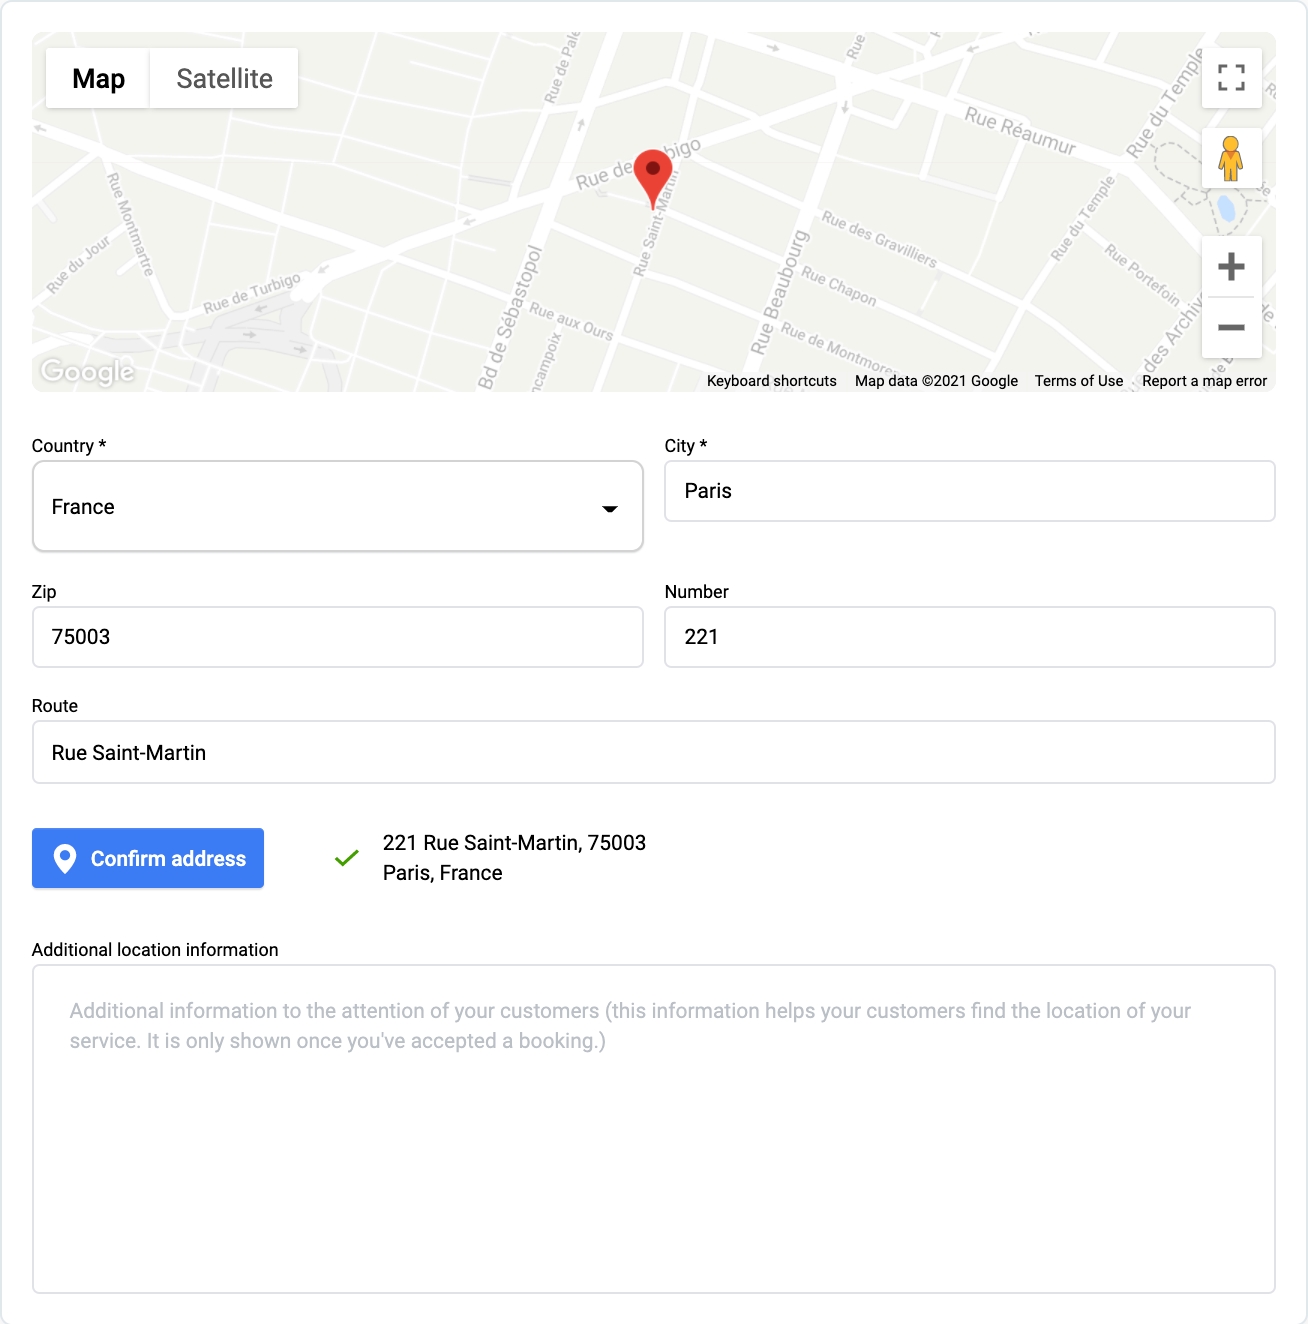
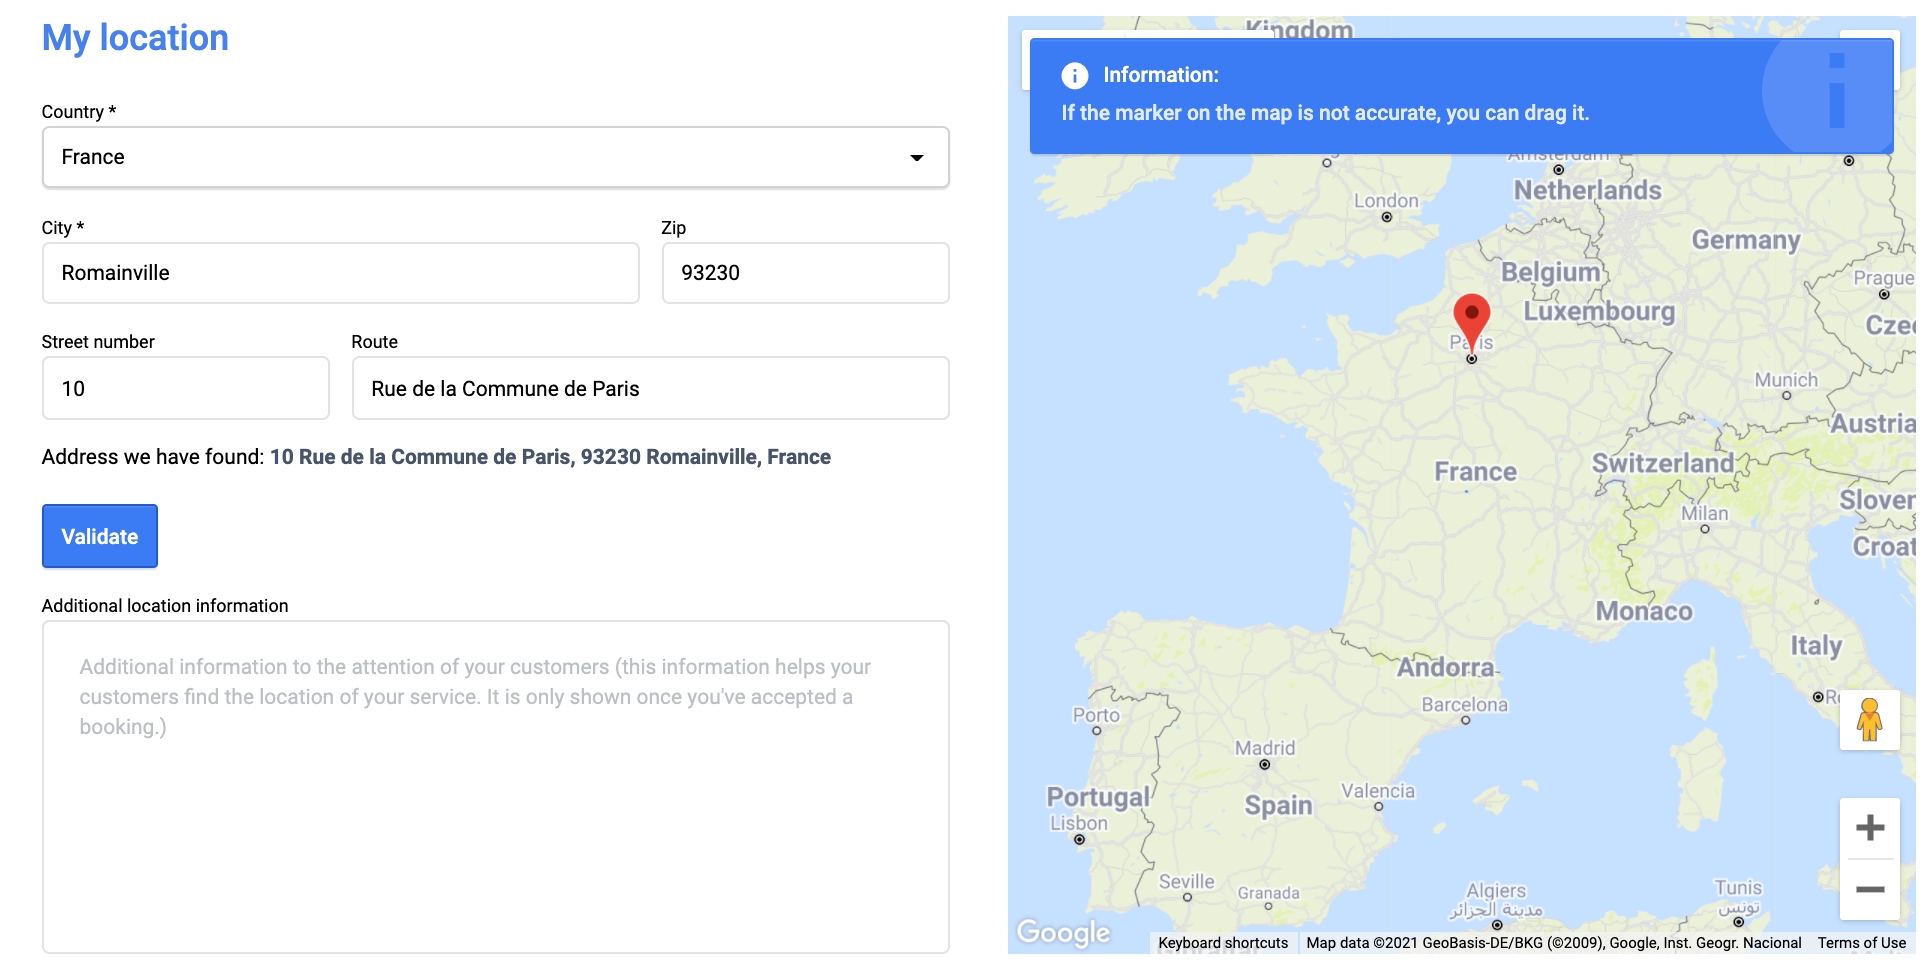
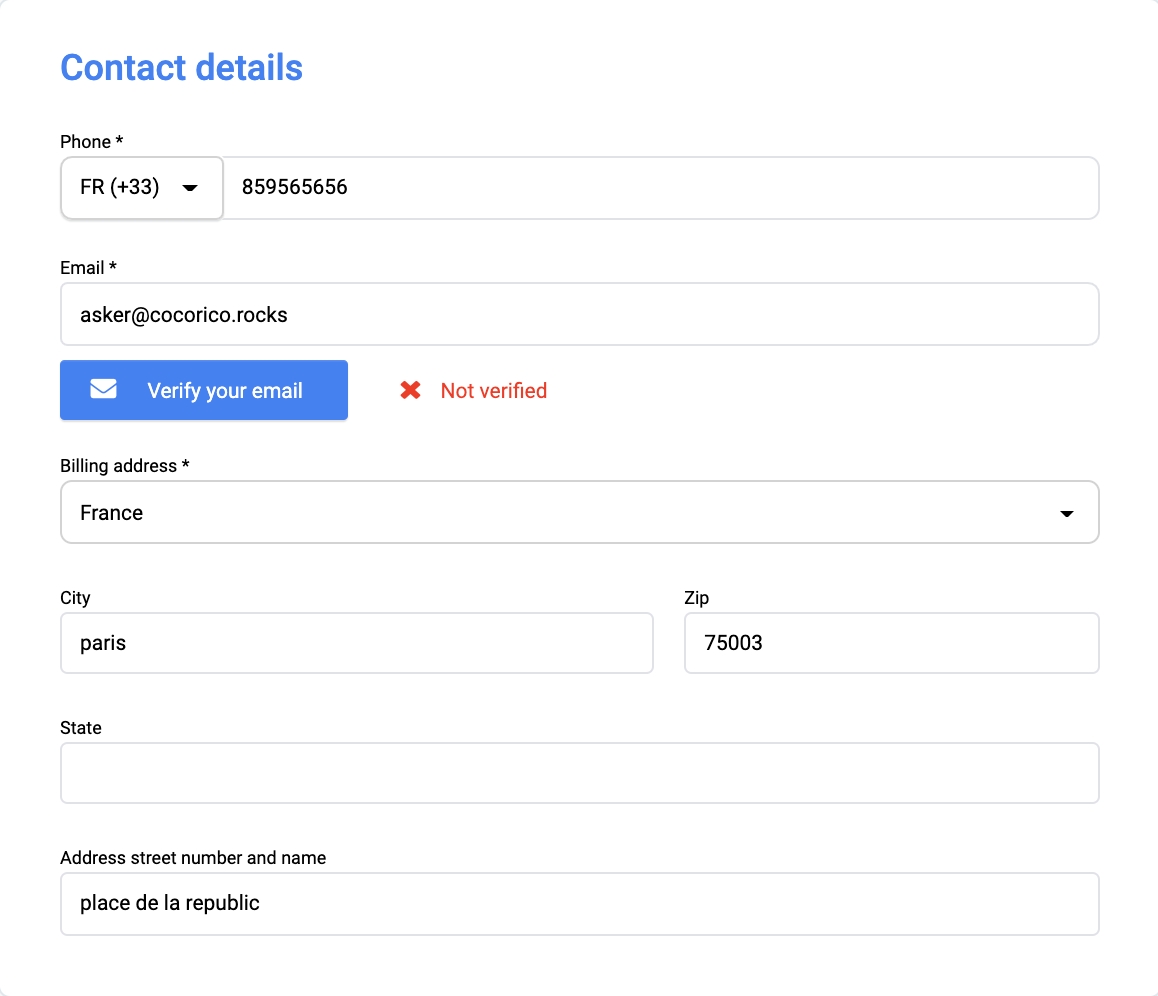
The Address section allows the vendor to provide the location where the service will be performed. The following details must be entered at this step:
Country (dropdown field)
City (mandatory)
ZIP Code
Street Number
Street Name
If the full address is not mandatory on the listing, the user can click on the arrow icon in order to hide the ZIP, Number, and Route.
The “Confirm Address” checks the information and displays the location on the right-hand map.
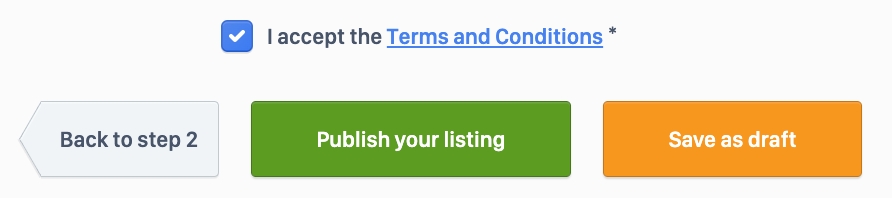
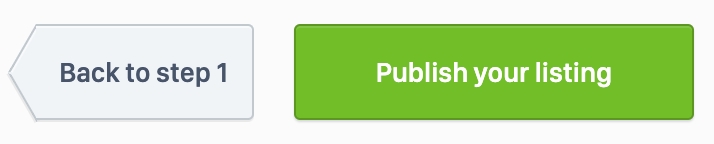
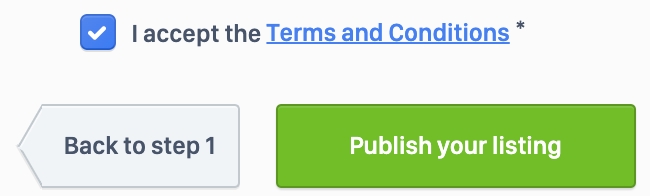
At the conclusion of the listing deposit process, the user must check the "I accept the Terms and Conditions" checkbox and select either "Publish your listing" or "Save as a draft". Choosing "Save as a draft" will create the listing without publishing it, and it will be marked as "Hidden" in the user's Dashboard.
During the listing deposit process, the user can update the listing’s information by clicking “Back to step X” (figure 10). This redirects the user to the previous step in which he can edit the previously entered information.
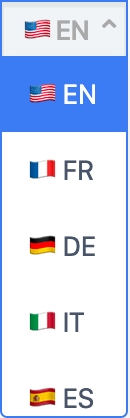
The offeror can also update the listing’s translations manually via the language icon (figure 11.1).
The user then selects the desired language through a list of available languages (figure 11.2).
An automatic translation is set up by default. Any non-manually translated fields are automatically translated.
Users cannot delete a listing during the listing deposit process as it is not published yet. They can, however, interrupt the deposit process. When it happens, in the SBO the listing will be tagged as a Draft Status.
Business rules:
Booking request workflow
Path: Homepage > All listings > Listing > Booking
The booking request process is made out of the checkout + the payment process + the final confirmation
WHO CAN USE THIS FEATURE?
Logged in users
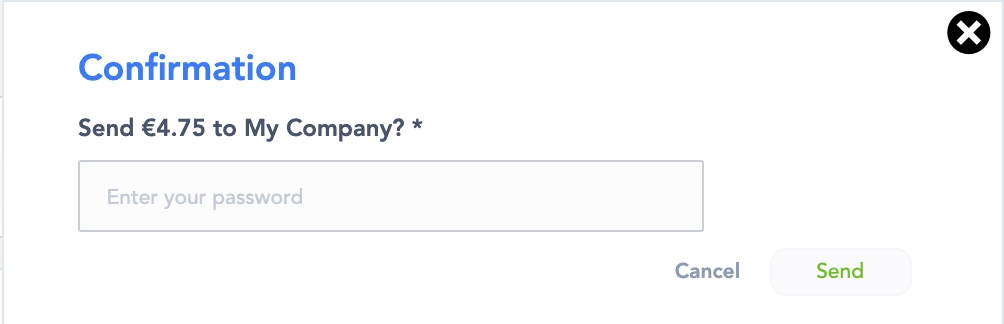
To create a booking request, users select in a listing page the variables required in the related booking block (usually the start and/or end date and/or time, quantities). They then click the “Book now” button (figure 1) which initiates the booking request process.
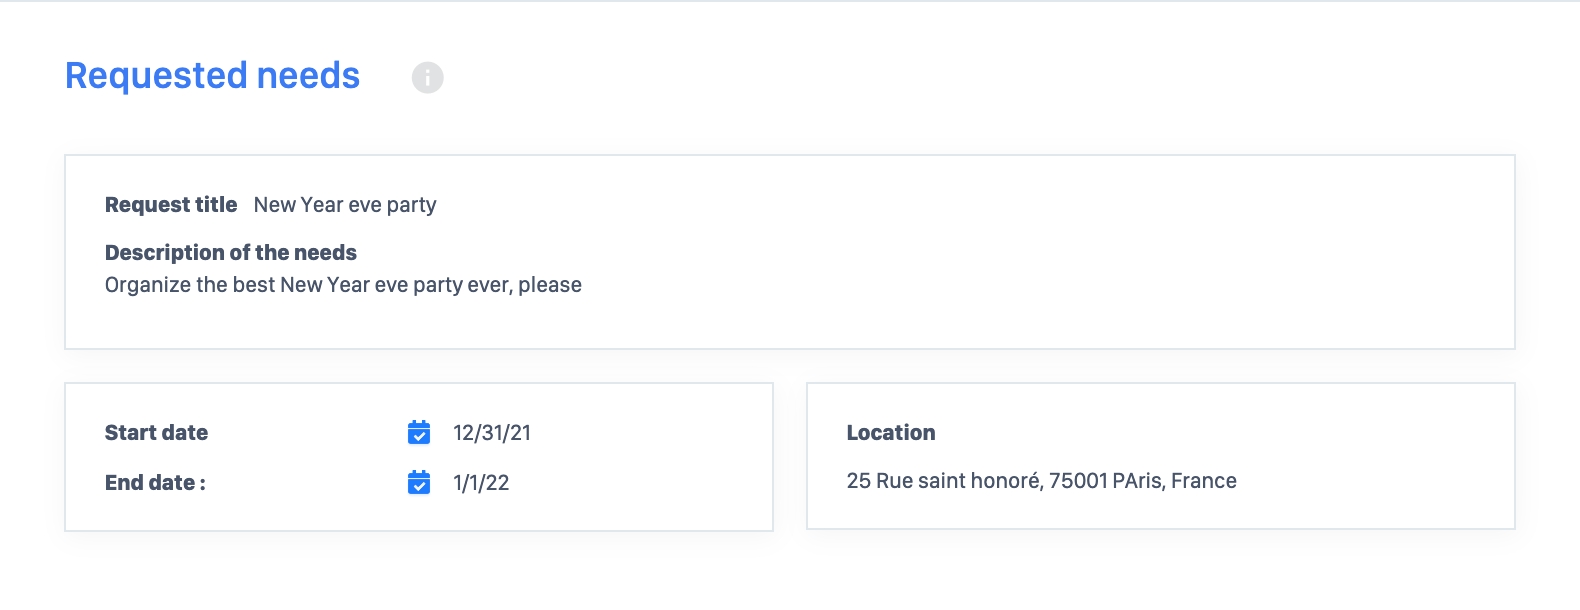
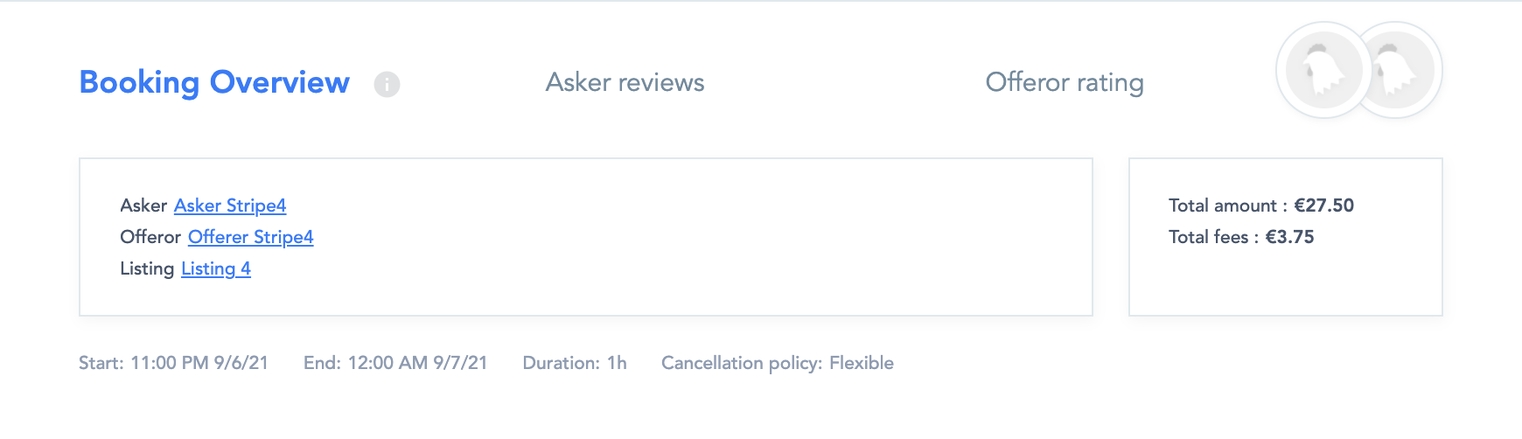
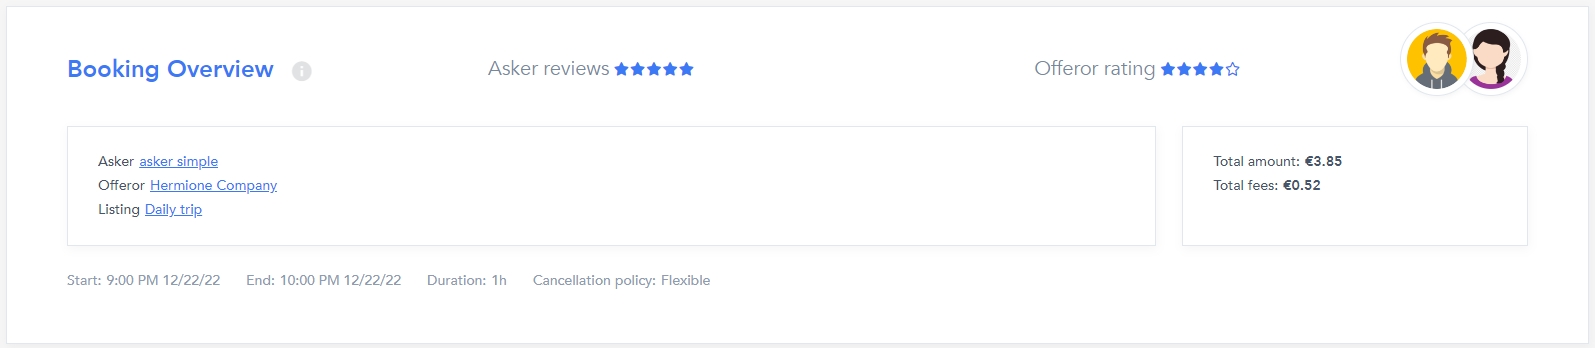
The Checkout Overview page is the initial screen presented to users upon selecting the "Book Now" button. To enhance clarity, the page is divided into multiple sections.
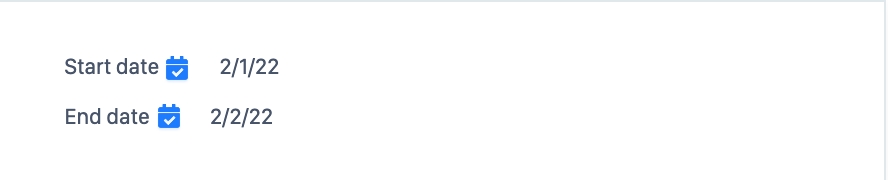
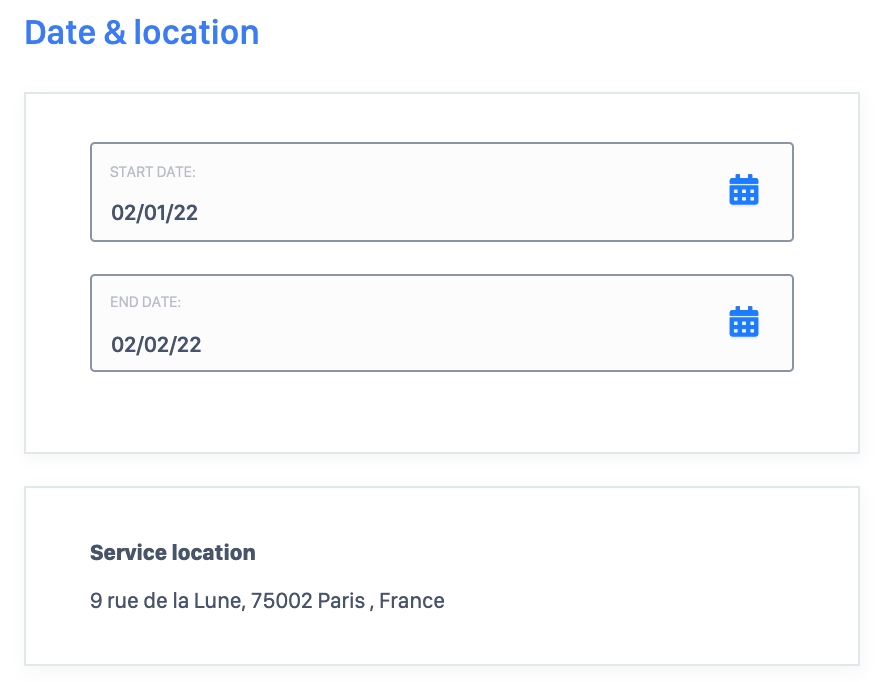
The data block (figure 2) summarizes the requested date, time & duration for the booking request.
The location block (figure 3) summarizes the service location for the booking request.
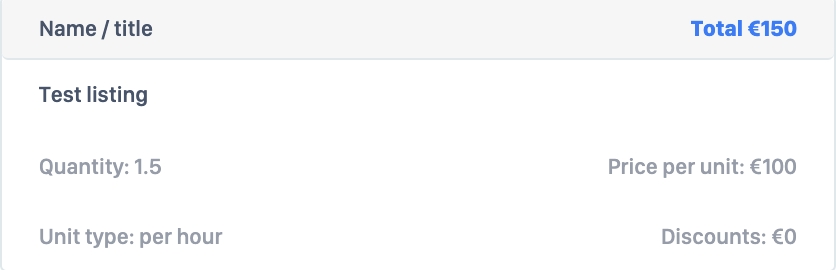
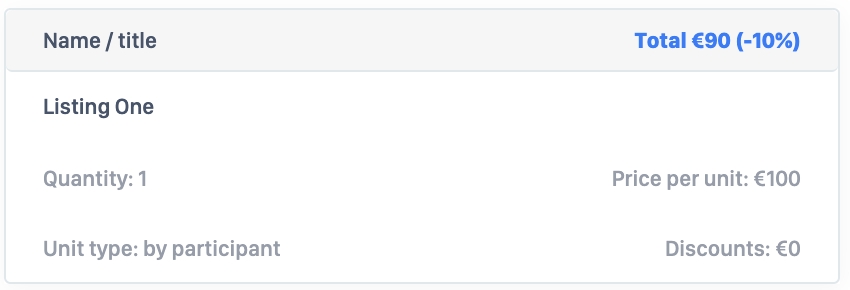
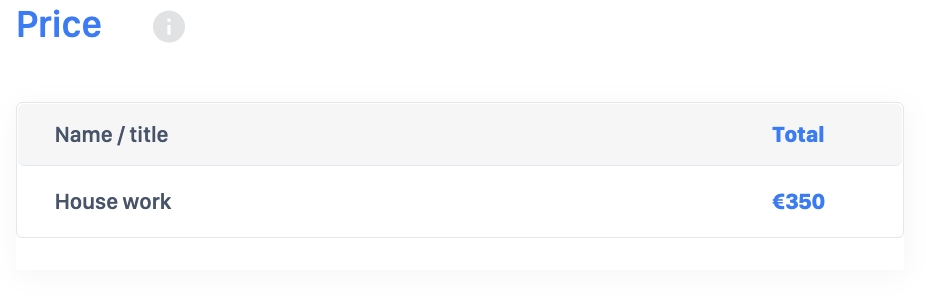
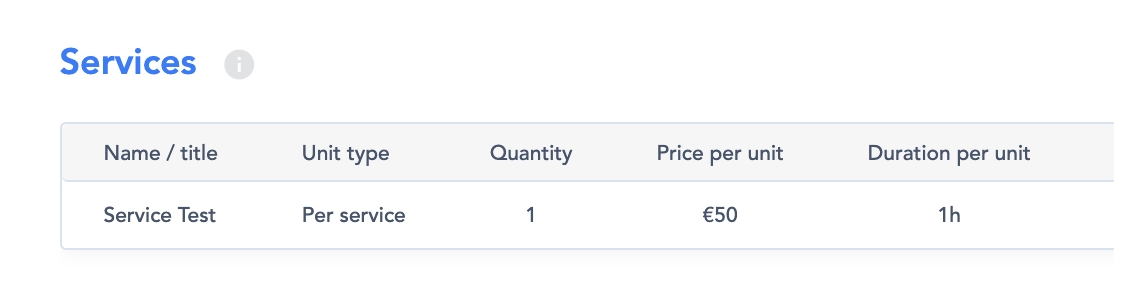
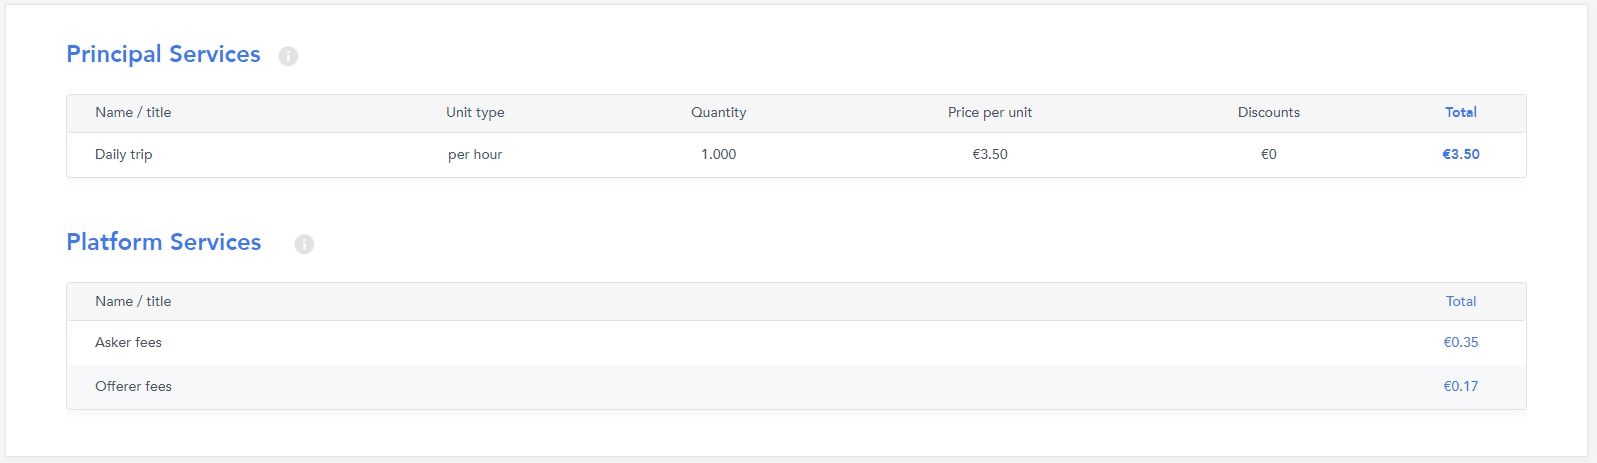
The main services block (figure 4) displays the following information about the services requested in the booking request:
Listing title
Quantity
Time unit
Price per unit
Discounts
Total cost
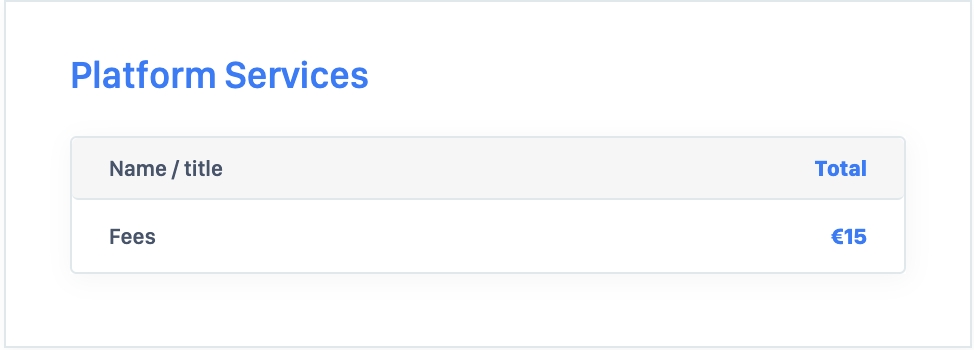
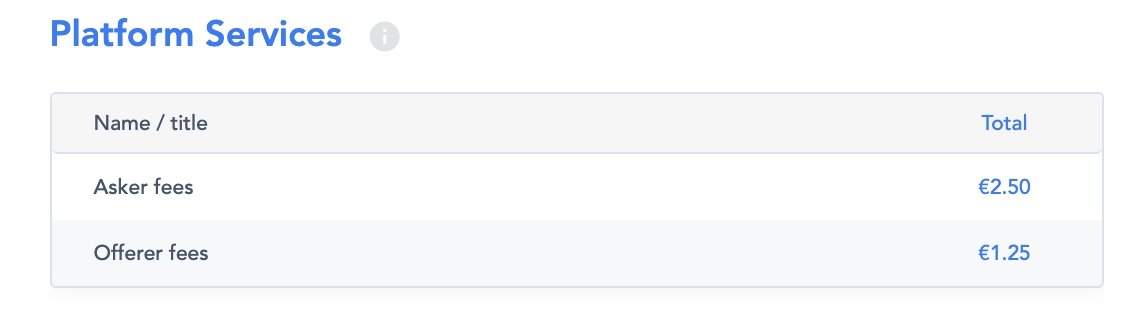
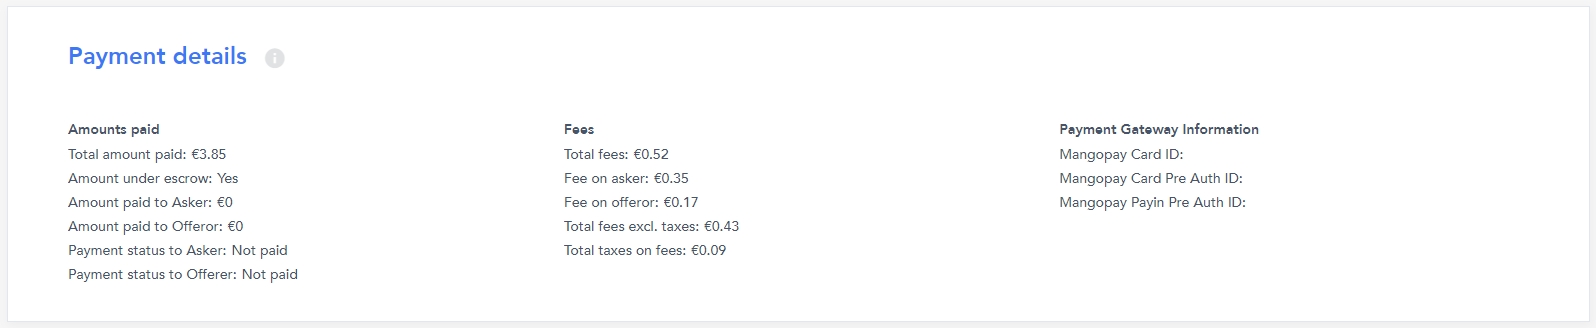
The platform service fees block (figure 5) informs the users of the fees taken by the platform. The displayed fees depend on the platform administrator’s configuration.
The total price block (figure 6) indicates the booking’s total price.
Fees and taxes included
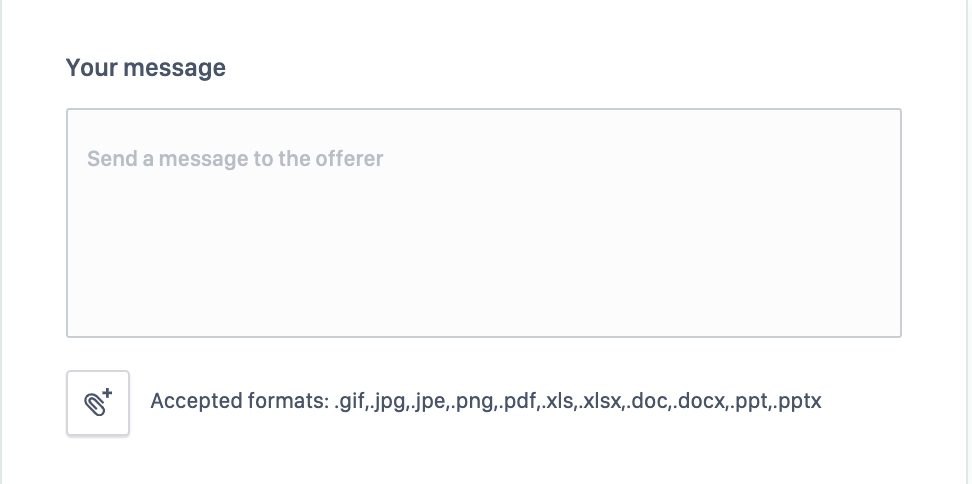
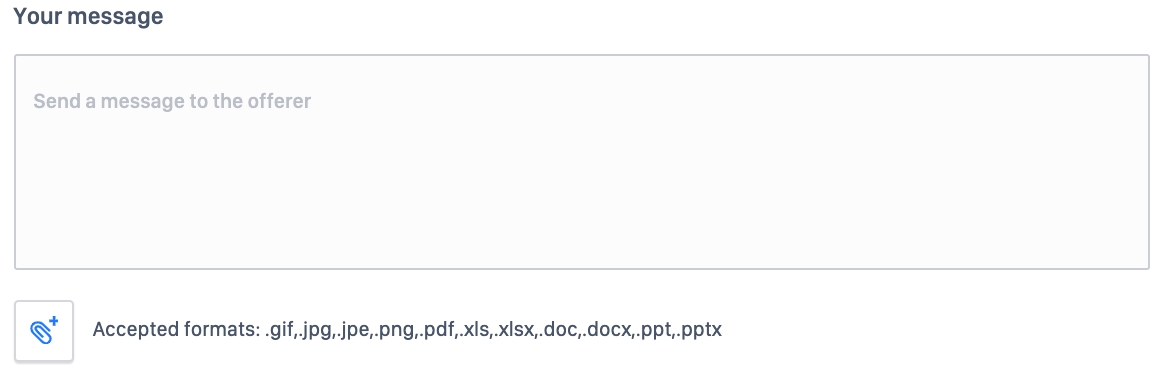
The message block (Figure 7) enables users to submit messages and attach files to the offeror. The "Your message" field can be displayed in the configuration settings via the SBO by disabling the "Add message field in new booking form" option. Additionally, this field can be set as mandatory by enabling the "Message field required" option.
The user needs to accept the platform terms & conditions by checking on the checkbox (figure 8).
To confirm the booking request, the user then clicks “Continue >” (figure 9) which will redirect him to the payment page.
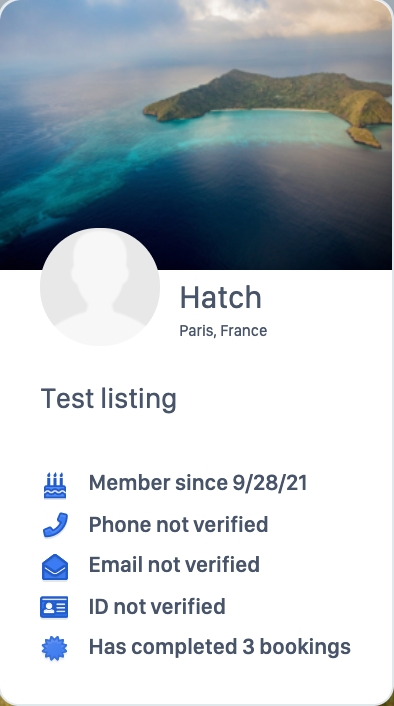
On the right-hand side of the page, the booking-related offeror’s information (figure 10) is displayed in a dedicated information block.
No amounts are charged until the booking request is accepted. Additionally, the platform holds the amount paid until the service is rendered.
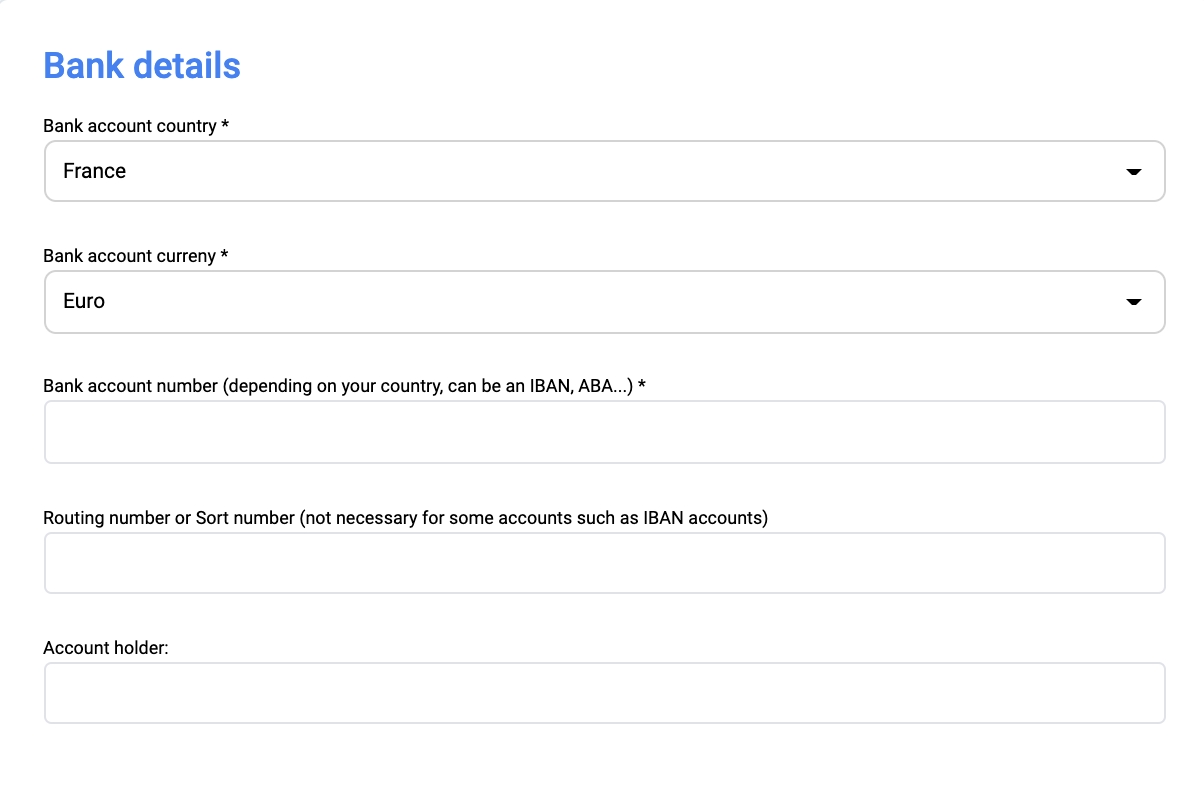
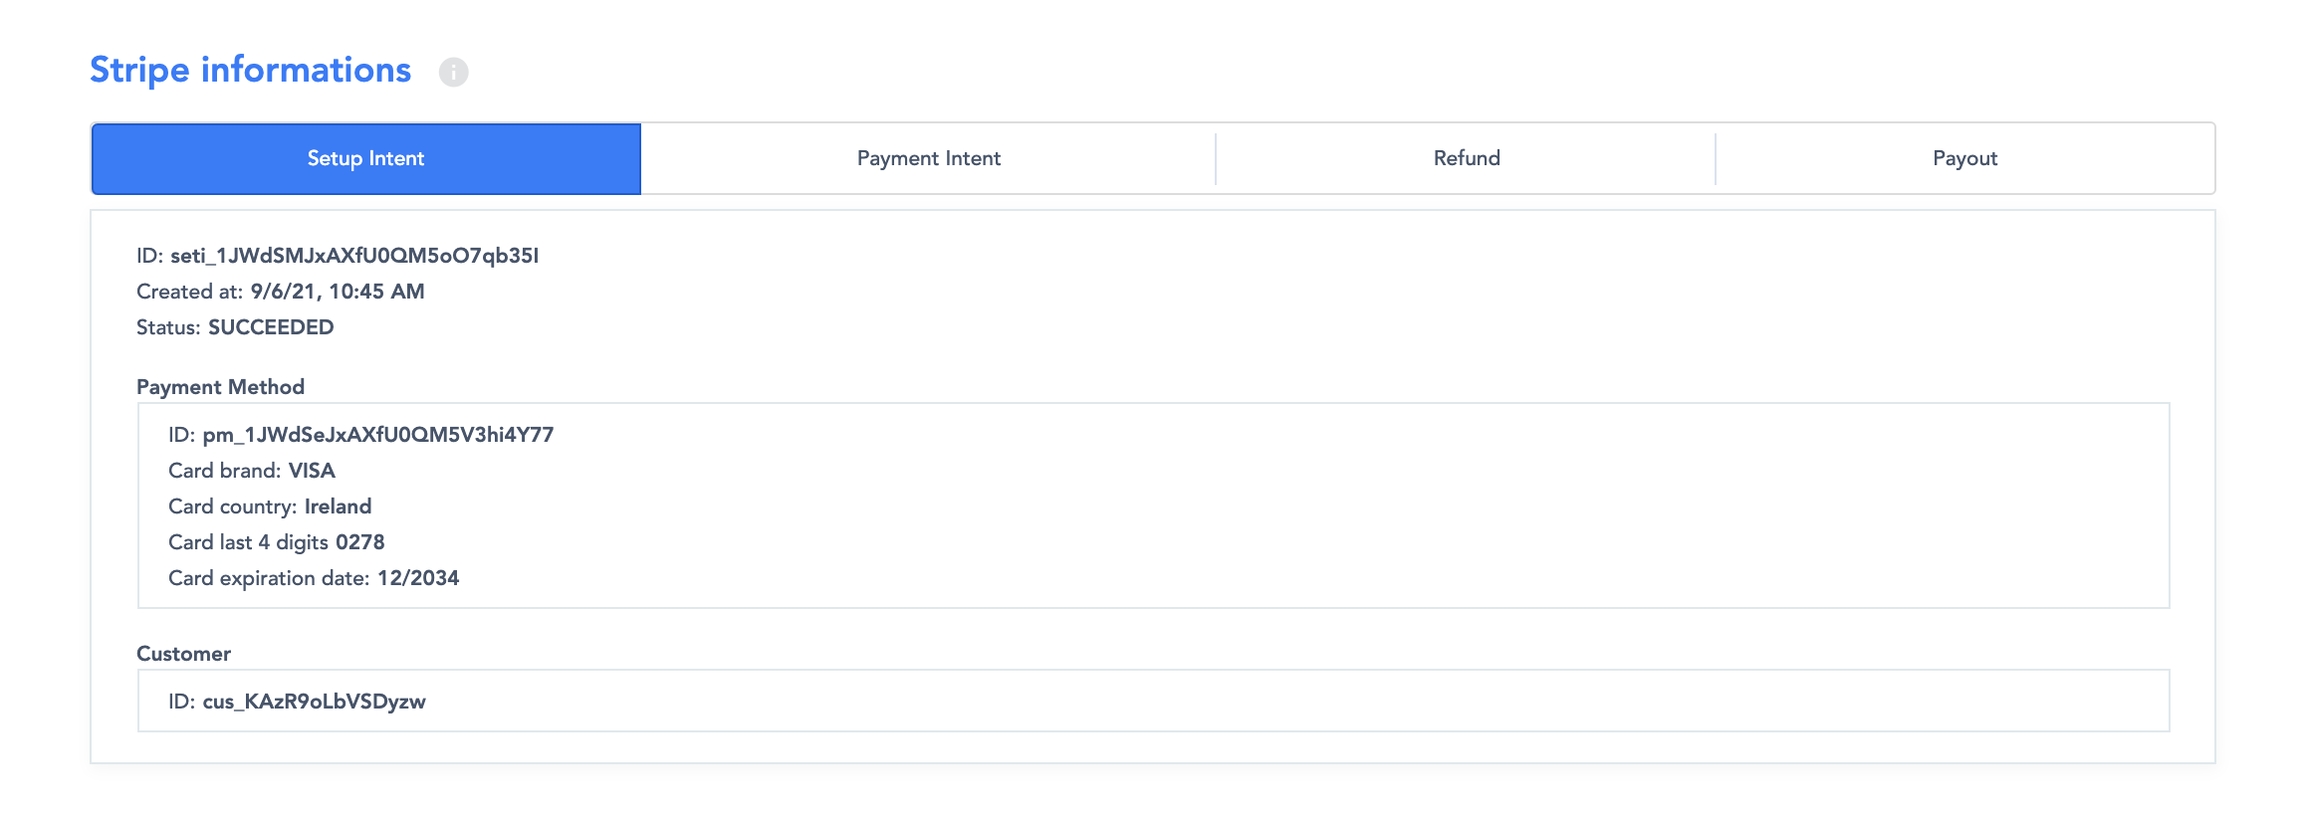
On this page, the user selects their payment method, which is determined by the payment service provider configured. To configure a payment service provider, the "Payment Method" setting in the SBO must be modified. Below is a list of available payment methods based on the payment service provider:
Bank Wire Transfer: Mangopay only
Direct Debit Payment: Stripe only
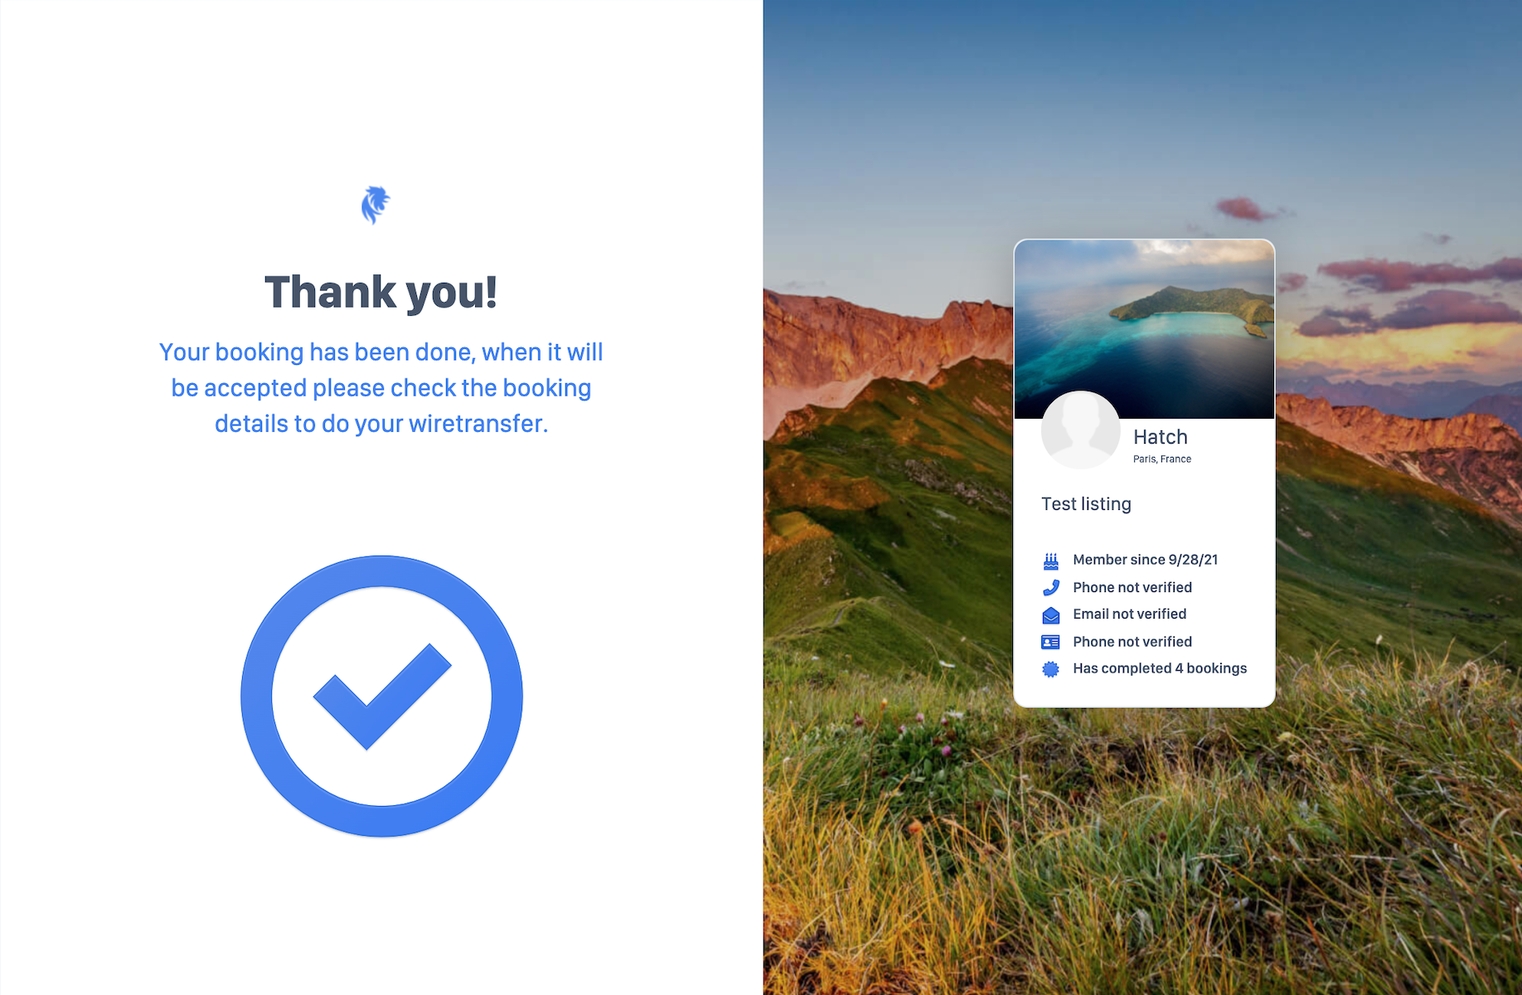
The confirmation page (figure 13) confirms the booking request has been successfully made. This ends the booking request process.
The offeror then receives an alert for a new booking request.
A user can update his booking request during 2 steps of the process.
The user can click “Edit” (figure 14) available on the left-hand side at the end of the checkout overview page to modify the date and time for his booking request.
Similarly, “Edit” is available on the payment page. This redirects the user back to the checkout overview page.
Users cannot delete a booking request.
Users can either stop the booking request process, in which case no booking request is made; or users can cancel booking requests from their dashboard.
Business rules:
The Seat-Based rendering type is a standardized option that administrators can enable within SCND. When activated, vendors can create listings based on the number of participants who will benefit from the service.
For example, in the case of a training class, customers specify the number of participants at the time of booking. The system then calculates the total cost based on the number of seats selected.
Example:
A class offers 10 available seats.
The customer booked 4 seats.
Each seat costs 10 euros.
The total booking cost is 40 euros.
This pricing model ensures that customers are charged based on actual usage, making it suitable for services where capacity is limited.
To learn more about this feature, access
This process follows a structural backbone with slight differences depending on the following rendering type:
The Time-Based is a Rendering Type offering a model that allows vendors to provide bookable services for a specified duration, measured in hours or days. This rendering type is applicable when vendors offer accommodations, such as apartments, houses, or flats, or when providing experiences where pricing is based on the total booking period.
Charges are determined according to the duration of usage, ensuring that the cost aligns with the number of hours or days booked. This model can also be applied to the rental of other assets, including vehicles (e.g., cars, buses, motorcycles) and equipment, allowing vendors to structure their pricing based on time-based utilization.
To learn more about this feature, access
This process follows a structural backbone with slight differences depending on the following rendering type:
How to create a listing as a platform user
Path: Homepage > Publish a listing
The Listing Deposit for Time-Based Rendering process involves creating a listing on a platform to showcase services offered or required. This functionality enables vendors to create listings where pricing is determined based on time increments, such as hours or days.
In a non-switch platform configuration, only vendors can create listings.
The base price represents the standard rate for the service. This rate can be configured on a per-hour or per-day basis by adjusting the "Time Unit" setting in the SBO to 60 for hourly pricing or 1440 for daily pricing. Once the listing is complete, users can further refine their pricing policies on the listing edition page. This includes applying discounts and setting variable pricing for different dates. Depending on the value entered and the platform fees, the potential income is automatically displayed.
The Address section allows the vendor to provide the location where the service will be performed. The following details must be entered at this step:
Country (dropdown field)
City (mandatory)
ZIP Code
Street Number
Street Name
If the full address is not mandatory on the listing, the user can click on the arrow icon in order to hide the ZIP, Number, and Route.
The “Confirm Address” checks the information and displays the location on the right-hand map.
At the conclusion of the listing deposit process, the user must check the "I accept the Terms and Conditions" checkbox and select either "Publish your listing" or "Save as a draft". Choosing "Save as a draft" will create the listing without publishing it, and it will be marked as "Hidden" in the user's Dashboard.
During the listing deposit process, the user can update the listing’s information by clicking “Back to step X” (figure 10). This redirects the user to the previous step in which he can edit the previously entered information.
The offeror can also update the listing’s translations manually via the language icon (figure 11.1).
The user then selects the desired language through a list of available languages (figure 11.2).
An automatic translation is set up by default. Any non-manually translated fields are automatically translated.
Users cannot delete a listing during the listing deposit process as it is not published yet. They can, however, interrupt the deposit process. When it happens, in the SBO the listing will be tagged as a Draft Status.
Business rules:
Displays the conversation history.
Creates a new conversation
Close the chat
The listing creation process is described in the article Service solution:
Only offerors can update their listings via their dashboard. This process is described in the section -
Only offerors can delete their listings via their dashboard. The process is described in the article:
The process is described in the following article:
The Seat-Based Rendering type shares some initial configurations with the Time-Based Rendering type. For instructions on editing the first section, titled "Presentation," refer to the following link:
During the listing edition process, users have the option to add an upgrade to their listing. For detailed instructions on managing upgrades, refer to the section.
The advanced calendar works the same as the basic mode described in the following article:
Learn more about calendar synchronization here:
To delete a listing you can follow the same process as the basic mode, described in the following article:
The listing creation process is described in the article Session solution:
See the following documentation for more information:
Only offerors can update their listings via their dashboard. The process is described in the article: . Askers cannot update listings.
Only offerors can delete their listings via their dashboard. The process is described in the article: . Askers cannot delete a listings.
To deposit a listing, users must be registered and logged into the platform. The options must be utilized to gain access to this feature.
The user fills in the following information to create a listing page as displayed in the following section -
To understand how this step is reached during the listing process creation, refer to the section in the documentation.
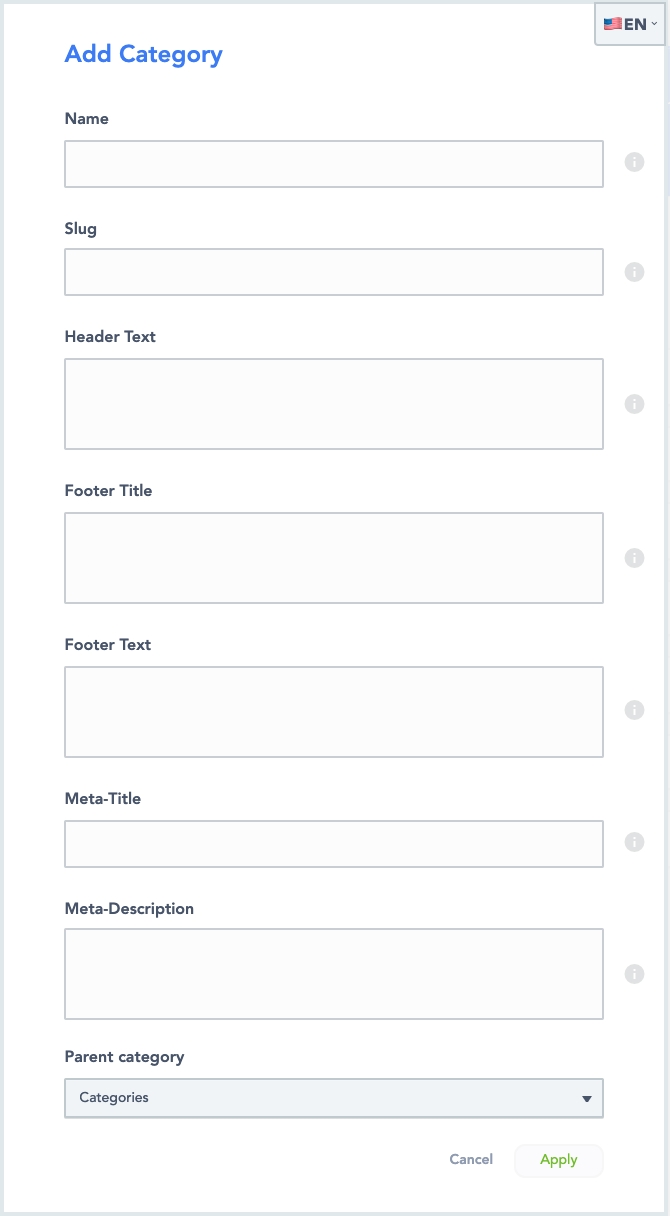
Categories provide a structured way to describe listings and organize them into sections, enhancing the user experience during the search process. They help streamline navigation and improve discoverability. For details on configuring categories, refer to the section.
Attributes provide an additional layer of information to describe a listing. They are structured, searchable entities that are associated with specific categories. The available attributes may vary depending on the category selected for a listing. A "*" symbol displayed on the right side of an attribute field indicates that the attribute is mandatory. For detailed instructions on creating and managing attributes, refer to the section.
The listing information entered by the user can be viewed through the dashboard. To access it, navigate through the following path: Dashboard > Listing > [Listing Name] > Presentation. Further details about this page can be found in the article below: Listings dashboard
Once the listing deposit process is done, the user can set additional information such as the calendar, seasonal price, etc through their dashboard described in the related article:
A published listing can be deleted through the listing user’s dashboard: Listings dashboard
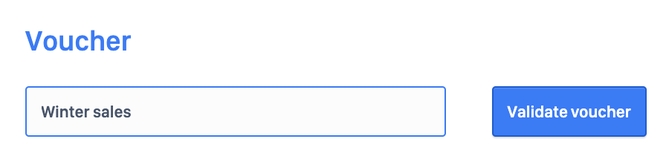
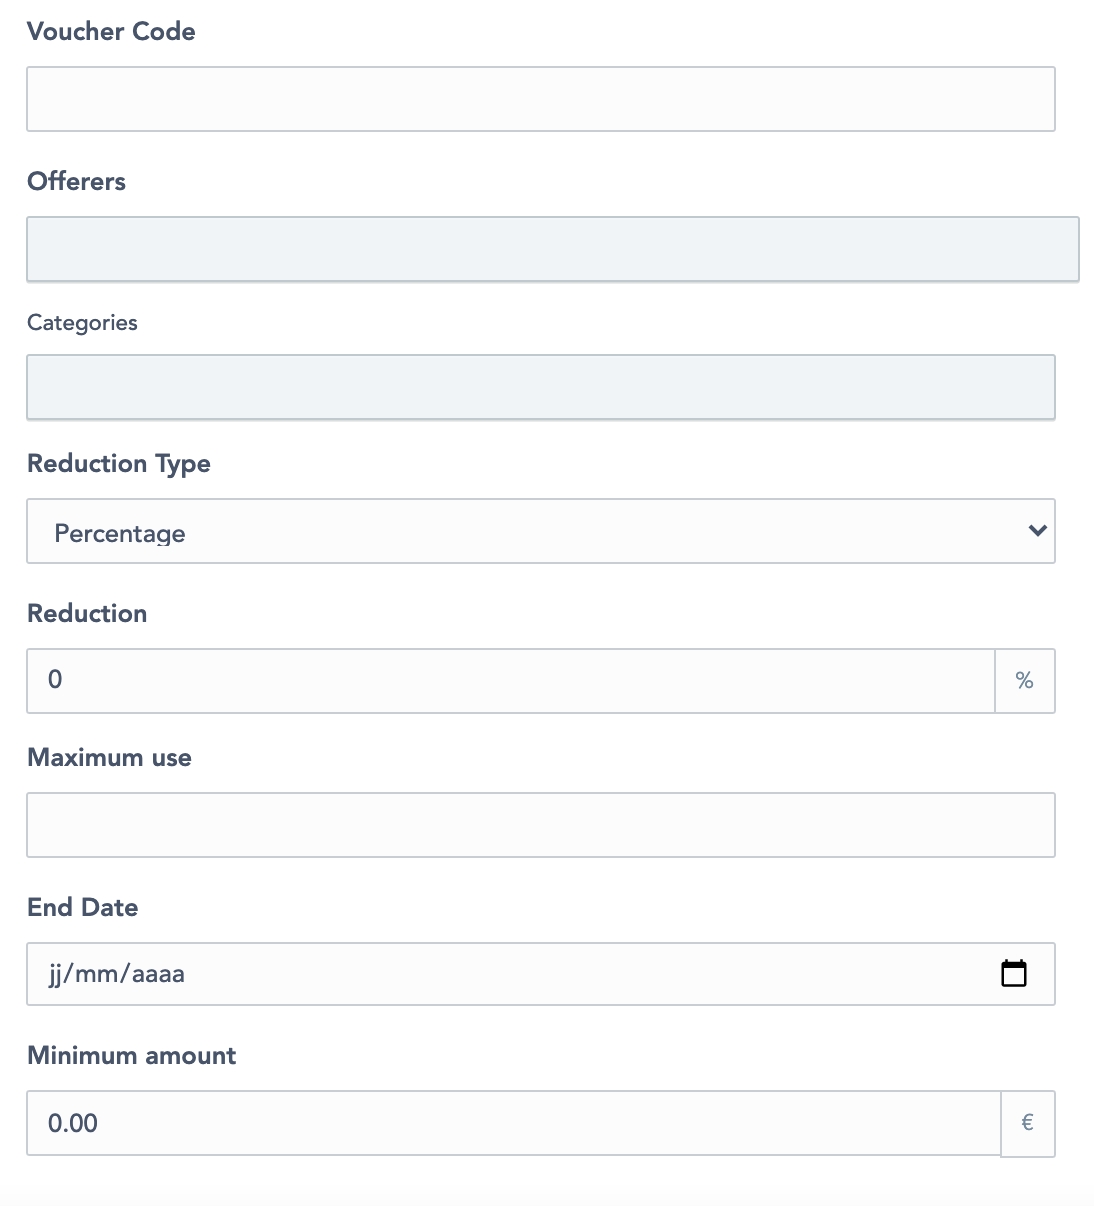
In the Coupon section, customers have the option to apply a discount coupon, which will reduce the total amount payable. For further details, refer to the Section.
Credit Card: and
For more information regarding the payment types and workflows, refer to the section.
The user is then automatically redirected to his platform dashboard, described in the article:
The process is described in the article:
To deposit a listing, users must be registered and logged into the platform. The options must be utilized to gain access to this feature.
The user fills in the following information to create a listing page as displayed in the following section -
To understand how this step is reached during the listing process creation, refer to the section in the documentation.
Categories provide a structured way to describe listings and organize them into sections, enhancing the user experience during the search process. They help streamline navigation and improve discoverability. For details on configuring categories, refer to the section.
Attributes provide an additional layer of information to describe a listing. They are structured, searchable entities that are associated with specific categories. The available attributes may vary depending on the category selected for a listing. A "*" symbol displayed on the right side of an attribute field indicates that the attribute is mandatory. For detailed instructions on creating and managing attributes, refer to the section.
Once the listing deposit process is done, the user can set additional information such as the calendar, seasonal price, etc through their dashboard described in the related article:
A published listing can be deleted through the listing user’s dashboard:


The Flat-rate rendering type enables vendors to offer services that are booked based on a predefined experience. In this model, the vendor provides a detailed listing description that includes information about the service and its total fixed duration.
Customers can only select the start date and time, as the total duration is predetermined by the vendor. The end time is automatically calculated by adding the fixed duration to the selected start time.
If the vendor has more services in the same listing, customers can book multiple services within the same listing and complete payment for all selected services in a single transaction. The total duration would be the combined amount of time for all the booked services.
For example, a vendor offering a Ferrari driving experience in Paris would need to provide details about the experience, including pricing and the total duration in hours.
To learn more about this feature, access
This process follows a structural backbone with slight differences depending on the following rendering type:
When customers log into the platform and are unable to find the specific services they need, a solution is provided where they can create a request for proposal (RFP). This feature allows customers to detail the required service, including any relevant specifications. Once submitted, the RFP is posted in the marketplace, enabling vendors and service providers to review the request and submit bids through the platform. Additionally, the platform supports negotiation between both parties, allowing adjustments to the price or service details until a fair agreement is reached.
To learn more about this feature, access:
Workflow page of booking confirmation with the Session bundle activated.
Path: Homepage > All listings > Listing > Booking
The booking request process is made out of the checkout + the payment process + the final confirmation
WHO CAN USE THIS FEATURE?
Logged in users
To create a session booking, users select the desired session displayed on the left-hand side of the listing page (figure 1).
Users can set the number of participants for their booking (figure 2).
Click “Book now” (figure 3) to confirm the booking request.
The checkout overview pages are similar to the ones from the Time-based rendering type. Learn more through the following documentation: Book a Service (Time-Based)
The session confirmation pages are similar to the ones from the time-based, with the addition of the number of participants (figure 4).
Updating a session booking follows the same process as the one from the time-based rendering. Learn more through the following documentation: Edit a Listing (Time-based)
A booking request cannot be deleted. Users have the option to either halt the booking request process before submission, preventing the creation of a request, or cancel an existing booking request through the dashboard.
The process is described in the article: Bookings dashboard (Time-Based rendering type) - Update a booking
Dashboard:
Business rules:
Instructions for listing pages - Flat-Rate rendering type activated
Path: Homepage > All listings > Listing
Listing pages function as public interfaces that present comprehensive details about available services while also enabling users to book them. When the Flat-Rate rendering type is enabled, these listings provide information at two distinct levels: general listing details and specific service information. To ensure consistency and standardization, service information can be structured using predefined service templates.
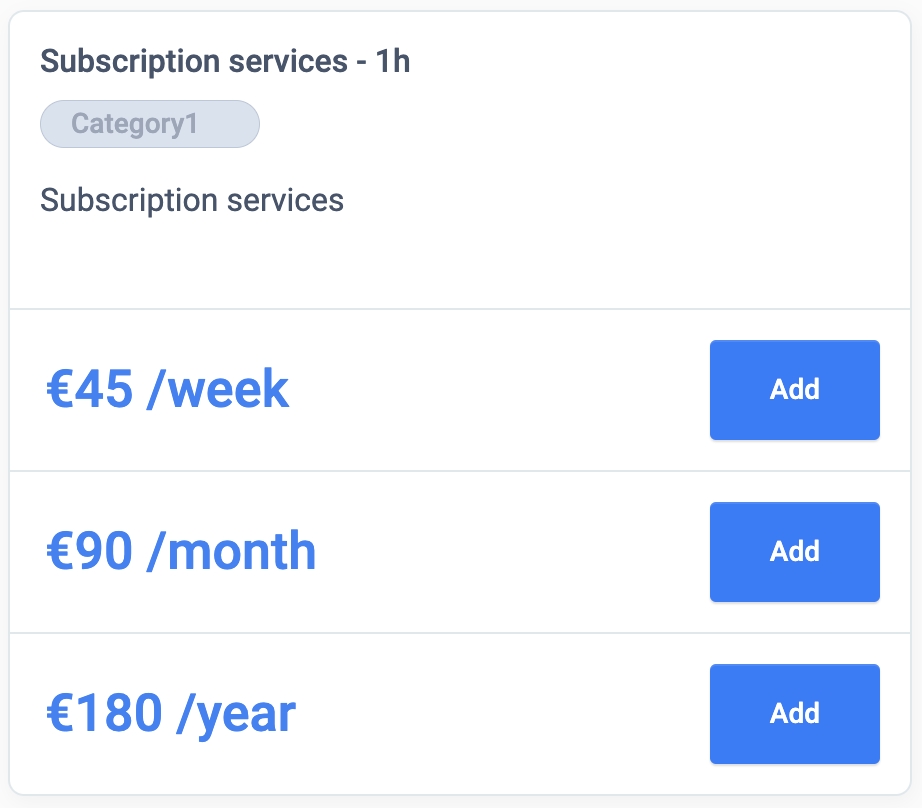
Similarly, when the Subscription feature is activated, listing pages display two levels of information: general listing details and subscription service information. Subscription service details can also be organized using service templates to maintain a structured and uniform presentation.
WHO CAN USE THIS FEATURE?
All users
Offerors are the only user types who can create listings. Askers cannot create listings.
The listing creation process is described in the article Service solution: Create a listing.
Offerors have the ability to update their listings through their dashboard. The procedure for making updates is detailed in the article "Edit a Listing (Flat-Rate)." Askers do not have the capability to modify listings.
Only offerors have the ability to delete their listings through their dashboard. The deletion process is outlined in the article "Edit a Listing (Flat-Rate)" Askers do not have the option to delete listings.
Business rules:
How to create a listing as a platform user with the service bundle activated.
SubscriptionSubscription Path: Front > Publish a listing
The listing deposit refers to the process of setting up a listing on our platform, enabling vendors to showcase and offer multiple services simultaneously. To streamline this process, administrators can define standard service structures using the service template within the SBO (Service Back Office). This feature provides vendors with a predefined framework, making it easier for them to create and manage their service listings efficiently. By utilizing these templates, vendors can ensure consistency and accuracy in their service offerings while reducing the time required for setup.
To deposit a listing, users must be registered and logged into the platform. The Log In and Register options must be utilized to gain access to this feature.
In a non-switch platform configuration, only vendors can create listings.
To understand how this step is reached during the listing process creation, refer to the Rendering Type Selection (Commoditized) section in the documentation.
The user has the option to either utilize a pre-configured service template set up by the platform administrator or create a custom service.
The image below displays all configurable settings available to the administrator, allowing for the modification of various service parameters.
The process for creating a service template is described in the following documentation: Service templates (Flat Rate rendering type)
To utilize a predefined service template established by the platform administrator, the Service Template toggle must be enabled via the slider. To create a custom service, the Custom Template slider should be activated.
Users retain the option to select a service template to prefill their service details. The following fields remain editable:
Category
Title
Description
Price and Duration
Minimum and Maximum Orderable Quantity
In the Flat-Rate rendering type, SCND provides also an option for vendors to establish a subscription model that automatically charges customers at regular intervals based on the configured settings. For additional information, refer to the "Subscription" section. This function can be configured by adjusting the "Service Type" configuration in the SBO
When enabled, during the listing creation process for the Flat-Rate rendering type, a new "Service Type" checkbox will appear below the service template in the service selection section. This checkbox allows the vendor to specify whether the service should be created as a regular service, also referred to as a One-shot service, or as a subscription service.
Subscriptions service templates can also be pre-configured in the SBO.
If the subscription service type is selected, additional options will appear to configure periodic pricing. SCND supports subscription models on a weekly, monthly, and yearly basis. The subscription period is configured through the "Subscription Frequencies" configuration in the SBO
Once the service creation process is complete, the user should click "Proceed to Step 4 of 4" to advance to the next step.
The Address section allows the vendor to provide the location where the service will be performed. The following details must be entered at this step:
Country (dropdown field)
City (mandatory)
ZIP Code
Street Number
Street Name
If the full address is not mandatory on the listing, the user can click on the arrow icon in order to hide the ZIP, Number, and Route.
The “Confirm Address” checks the information and displays the location on the right-hand map.
At the conclusion of the listing deposit process, the user must check the "I accept the Terms and Conditions" checkbox and select either "Publish your listing" or "Save as a draft". Choosing "Save as a draft" will create the listing without publishing it, and it will be marked as "Hidden" in the user's Dashboard.
The user can read the listing information entered through his dashboard.
Path: Dashboard > Listing > Name of the listing > Presentation
This page is described in detail in the article:
During the listing deposit process, the user can update the listing’s information by clicking “Back to step X” (figure 10). This redirects the user to the previous step in which he can edit the previously entered information.
The offeror can also update the listing’s translations manually via the language icon (figure 11.1).
The user then selects the desired language through a list of available languages (figure 11.2).
An automatic translation is set up by default. Any non-manually translated fields are automatically translated.
Once the listing deposit process is done, the user can set additional information such as the calendar, seasonal price, etc through their dashboard described in the related article: Listings dashboard (Time-Based rendering type) - Edit
Users cannot delete a listing during the listing deposit process as it is not published yet. They can, however, interrupt the deposit process. When it happens, in the SBO the listing will be tagged as a Draft Status.
A published listing can be deleted through the listing user’s dashboard: Listings dashboard (Basic solution) - Delete a listing
Business rules:
Workflow page of a booking confirmation
Path: Homepage > All listings > Listing > Booking
The booking request process is made out of the checkout + the payment process + the final confirmation
WHO CAN USE THIS FEATURE?
Logged in users
The checkout overview pages are similar to the ones from the Time-based rendering type. Learn more through the following documentation: Book a Service (Time-Based)
The “Principal services” become “Services”
The service section (figure 6) details the following information:
The service name
The quantity booked
The Price per unit
The unit type
The duration
The discount
Updating a service booking follows the same process as the one from the Time Based Rendering type. Learn more through the following documentation: Booking request (Time-Based rendering type)
Users cannot delete a booking request.
Users can either stop the booking request process, in which case no booking request is made; or users can cancel booking requests from their dashboard.
The process is described in the article: Bookings dashboard (Time-Based rendering type) - Update a Booking
Business rules:
Manage the services offers within a listing
processPath: Dashboard > Listing > Listing edition
Service Management on the Flat-Rate rendering type provides an overview of the available services within a listing, enabling efficient management and customization. Users can select from default services or create tailored services to meet specific requirements.
WHO CAN USE THIS FEATURE?
Switch: All users
Non-switch: Logged offerors
Users can create a listing through the Front interface, by clicking the “Publish your listing”.
The process is described in the following article: Listing deposit (Flat-Rate rendering type)
Once at least one listing is created, a user can view all of his listings in the user dashboard’s Listing section.
The user dashboard’s Listing section displays the list of all of his listings. These can be filtered by listing status (figure 1):
All: All listings
Published: Listings published on the platform
Invalidated: Listings declared as invalid by the administrator
In review: Listings being reviewed by authorized administrators, not publicly visible (only admins and the offeror can view the listing)
Hidden: Hidden listings, not publicly visible (only admins and the offeror can view the listing)
Each listing block displays:
The listing status
The listing media elements
The listing location
The listing title
The listing description
The listing price
The “Duplicate” button
The “Edit” button
Users can modify their listings' information through the “Edit” button located next to the “Duplicate” button.
Path: Dashboard > Listings > Listing # > Presentation
Editing a listing presents the listing information in several sections. At the top of each section is always displayed:
The title of the current listing.
A status dropdown button to filter listings
The “Duplicate” button
The “View listing” button (figure 8) to visualize the listing’s public display.
Information banners (figure 9) to guide the user when required
The Seat-Based Rendering type shares some initial configurations with the Time-Based Rendering type. For instructions on editing the first section, titled "Presentation," refer to the following link: Time-Based > Presentation.
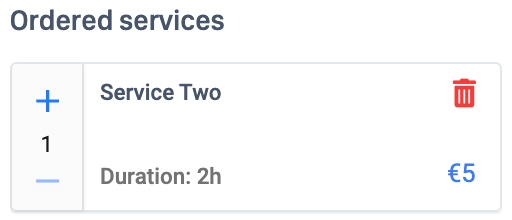
In this section (figure 3) of the dashboard, you will be able to see the service you offer within a listing.
For each service card (figure 4) you can see:
The dots for the drag and drop action
The slide button to activate or disable the service in your listing
The service title
The service price
The service duration
The pen icon allows you to edit the service card.
The service template card (figure 5) is the service template administrator has already created on the platform.
To go quicker in adding a service you can use the service template by clicking the button “+ Use this template” (figure 6).
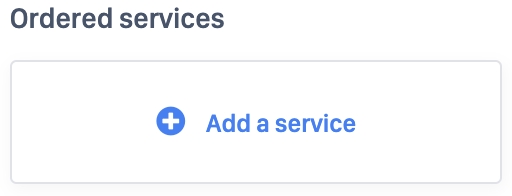
To create/ add a service in your listing you can go on the Services section of the Price & conditions part of the listing dashboard and click the button “Add a service” (figure 1).
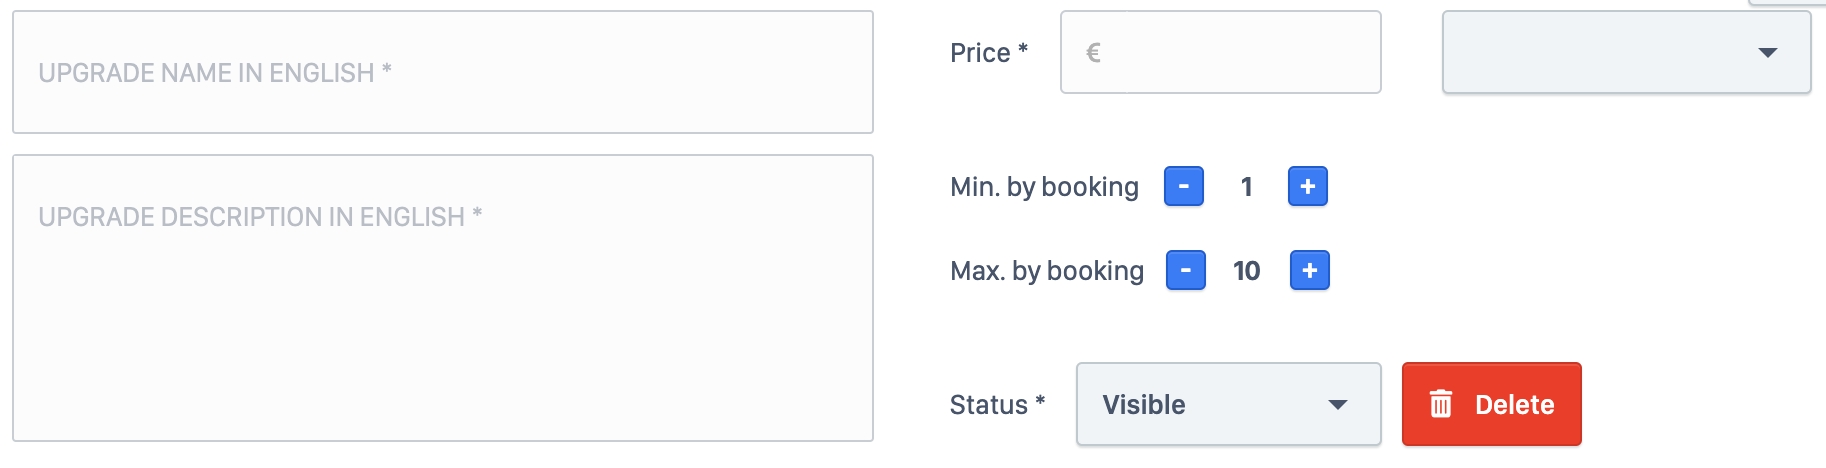
It will open a modal (figure 2) and you will have to fill:
The service title
The service description
The price
The category
The minimum and maximum orderable quantity
The duration
To save your modification, please click the button “Save” in the modal.
To delete a service in a listing, please follow this path:
Path: Dashboard > Listings > Listing > Edit Listing > Price & Conditions > Services > Service card > Edit service card > Delete
You will be able to delete a service by clicking the button “delete” (figure 8 ), in the edit modal of the service card.
There is no confirmation message, it is deleted directly
To create/ add a service to your listing you can go to the Services section of the Price & conditions part of the listing dashboard and click the button “Add a service”
If the subscription configuration is enabled in the application, the vendor has the option to create a new service subscription by selecting the desired service type.
The system displays the available service subscription options, allowing the vendor to select a pricing plan based on the chosen subscription frequency.
Click on Save to complete the process.
The process of updating a service subscription is the same as updating a one-shot service.
To delete a subscription service in a listing, please follow this path:
Path: Dashboard > Listings > Listing > Edit Listing > Price & Conditions > Services > Subscription Service card > Edit service card > Delete
You will be able to delete a service by clicking the button “delete” (figure 8 ), in the edit modal of the service card.
To update a service already created, the user must click on the pen icon and update the information.
A modal will appear displaying the service information, allowing the vendor to modify and save the details as needed.
During the listing edition process, users have the option to add an upgrade to their listing. For detailed instructions on managing upgrades, refer to the Upgrade Management section.
Users can also manage their listing’s cancellation policy by choosing between a “Flexible” cancellation policy or a “Strict” policy (figure 21).
The default value is determined by the platform administrator through the "Cancellation Policy" configuration within the SBO.
Users can only select one of the two policies offered by the platform. The parameters of each policy are set by authorized platform administrators.
Users can add discounts to their listing through the “Add a new discount” button.
Each discount is set in percentages based on a threshold to be defined.
The red trash icon deletes a media element.
There is no confirmation message when deleting a discount.
Default listing availabilities are determined by the platform’s configuration. In most cases, platforms set listing calendars to be unavailable by default. To begin receiving booking requests, offerors must manually configure their availabilities.
Users can change their listing’s availabilities through this calendar interface.
Greyed-out days are past dates and cannot be edited. White days are non-edited dates (figure 24.1).
Clicking a date/time slot opens a pop-up window (figure 2.2) prompting the user to set availability for the selected period:
Make available: the date turns green (and depending on the platform’s configuration, a price (base or specific according to how prices were set) will be displayed)
Make unavailable: the date turns red
Users can also click and drag to select several dates/time slots to do bulk changes.
A “reset availabilities” button (Figure 24.3) is available at the top of the calendar block. This deletes all calendar settings and resets to default settings (usually a calendar with no availabilities).
This advanced calendar tool allows users to quickly set their availabilities over large periods.
The parameters available are:
Status: “available” or “unavailable” (figure 25.1)
Date range with the start date and the end date (and hours depending on the platform’s configuration) (figure 25.2)
Weekdays to apply these changes to (figure 25.3)
Click “Save” to save changes.
The synchronization tool helps users import an external agenda’s events into the on-platform agenda and turn them into unavailabilities. To do so, the user enters the external agenda’s URL (figure 26).
Click “Save” to save changes.
Learn more about calendar synchronization here: Calendar Sync Feature - Business Rules
The “address” section manages the listing’s address (figure 27).
Confirm the address and click on “Save” to save changes.
Users can delete listings through the listing status dropdown menu available throughout the listing edition sections (figure 28).
A confirmation message prompts the user to validate the deletion.
A deleted listing is no longer listed in the users' dashboard or search results. However, all related bookings, messages, and payments remain listed for history and tracking purposes.
Business rules:
The rendering type defines how the platform interacts with vendors and customers to deliver the most relevant information based on the service offered by the vendor. Additionally, the rendering type influences the booking process, which consists of two stages. Vendors are required to provide comprehensive details about their services, while customers must supply necessary information during booking to ensure a seamless service experience.
SCND provides customers with the option to request proposals through two methods: directly contacting a vendor or creating a formal request for proposals (RFP). Vendors can browse a dedicated section containing all submitted RFPs and place bids based on the customer’s service description. To support this functionality, SCND offers two key features: the Request for Proposal Rendering Type and the Quotes Feature.
In SCND, the administrator has the capability to enable all rendering types simultaneously or select specific ones that align with the marketplace business model. To activate the commoditized service described in this documentation, access to the Super Back Office (SBO) is required. Navigate to the left-side menu and follow the path: SBO > Configurations > Features > Platform Configuration > Platform Mode to complete the configuration.
At least one of the Commoditized or Uncommoditized rendering types must be selected.
Instructions for request for proposal pages - RFP rendering type activated
Path: Homepage > All request for proposals > request for proposal
Request for Proposal (RFP) pages serve as public interfaces that present detailed information about available services. These pages also enable users to submit bid proposals. When the RFP bundle is activated, the asker's application becomes visible, allowing users to place a bid offer.
WHO CAN USE THIS FEATURE?
All users
Askers are the only user types who can create requests for proposals. Offerors cannot create requests for proposals.
The request for proposal creation process is described in the article RFP solution: Create a Request for Proposal
See the following documentation for more information: Listing page (Time-Based rendering type)
The RFP mode only contains the description of the request for proposal, with the attached files, you can download them by clicking on the button download (figure 1).
Below the description, users can see the desired start and end dates of the requested service.
The bid card on the left of the request for proposal page allows the offeror to create a bid proposal by clicking on the button “BID” (figure 2)
The expiration date corresponds to the date until which you can make an offer.
You will be redirected to the Bid proposal page: Bid proposals (RFP rendering type)
Only askers can update their requests for proposals via their dashboard. The process is described in the article: Listing page (RFP rendering type) . Offerors cannot update requests for proposals.
Only the asker can delete their request for proposals via their dashboard. The process is described in the article: Bids dashboard (RFP rendering type) - Delete a Bid. Offerors cannot delete requests for proposals.
Front:
Dashboard:
Business rules:
Lean how to use the RFP assistant.
Through an interactive chat, the assistant gathers all the necessary information required for the RFP creation process. If any essential details are missing, the AI prompts the user to provide them. Users who prefer to enter the RFP details manually can bypass the AI-assisted process by selecting the Skip button, which redirects them to the standard RFP workflow.
Once all required information is provided, the system displays a green button, allowing the user to verify the RFP. Upon verification, the user is directed to the RFP creation process with all collected information pre-filled in the corresponding fields.
The AI assistant allows users to request the generation of an image for the Request for Proposal (RFP) cover. This feature utilizes all relevant information provided by the user during the chat to create a customized visual representation. Users can initiate this request at any point, and the AI will generate an image based on the provided details.
The Vision Capability is a configurable feature that, when enabled through the SBO, allows customers to upload files, such as PDFs and images in the chat. The AI then processes these files to support the creation of Requests for Proposal (RFPs).
To learn how to configure RFP Assistant access the section: RFP Assistant Configuration
Understanding the bid proposals page seen when the RFP bundle is activated
Path: Homepage > All Request for proposal > Request for proposal > Bid
The bid confirmation process is made out of the checkout + the payment process + the confirmation
WHO CAN USE THIS FEATURE?
Logged in users
Select a request for proposal, choose the date and starting time, and click “Bid” (figure 1). The bid confirmation process starts.
The checkout overview page is the first page displayed to users after clicking the “bid” button. The checkout overview is visually split into two sections:
The right section
The left section
The request
The request displays:
The title of the request for proposal (figure 2.1)
The date block (figure 2.2) displays the start and end dates during which the asker would like the services to take place.
The location block (figure 2.3) reminds the user where the service will take place.
The offer
The offeror enters information about his offer:
Description (figure 3.1)
Price for the service (figure 3.2) (potential income and platform fees are automatically calculated)
Dates & location (figure 3.3)
The location can not be updated since it is set by the asker.
Message (figure 4) (optional).
Accept the terms & conditions of the platform by clicking the checkbox (figure 5).
Click on “Continue >” (figure 6) to confirm the proposal.
On the right-hand side of the page, the RFP-related asker’s information (figure 7) is displayed in a dedicated information block.
The user can click “Edit” (figure 8) available on the left-hand side at the end of the checkout overview page to modify the date and time for his proposal.
Users cannot delete a proposal.
Users can either stop the proposal process, in which case no proposal is made; or users can cancel proposals from their dashboard.
The process is described in the article: Bids dashboard (RFP rendering type) - Delete a Bid
Dashboard:
Business rules:
Help users to describe listings with the help of AI
The purpose of the AI feature is to facilitate the creation of listings on the front end for customers. It aids in the generation of titles, descriptions, and conditions using AI, thereby streamlining the process and reducing the time required for minor tasks.
During the listing deposit process, the user has the option to receive support from AI. For more information, refer to the section on Activating the Artificial Intelligence feature.
First, the user must select which prompt to use by clicking on the gear icon located in the corner of each field (Figure 1).
Currently, this feature has only been implemented for the following fields:
Title
Description
Rules & Conditions
In essence, if the subscription feature is enabled, whenever a user attempts to access a feature in the application that requires specific permissions, and if the user is not subscribed to the corresponding plan, the application will display all available plans containing the requested feature.
The administrator can edit the text on the top of this page "Subscribe and enjoy many features..." through the SBO translations (SBO > Content > Interface Text)
The logo displayed can be customized using the "Platform Logo" configuration in the SBO. This setting applies to the logo shown on the homepage.
After selecting "Subscribe" or "Upgrade to a Plan," the user is redirected to the payment page, which presents detailed subscription information. This includes the subscription name, start date, and billing frequency. Additionally, the total price, including applicable taxes, is displayed along with a breakdown of the VAT.
In the next step, users are required to enter their credit card details. At present, only credit card payments are supported. Additionally, access to the platform's marketplace is only available when Stripe is configured as the payment service provider.
Understanding the different search result page versions depending on the activated bundles
How to use the search results page
Understand the search results page per category
Understand the user search results page
Push an alert to the user when a listing matches the user’s criteria search
The RFC rendering type changes the search process.
Path: Homepage > Publish a request for a proposal
The listing deposit is the process of creating a listing on a platform to present one’s sold services (or required needs).
This process follows a structural backbone with slight differences depending on the following rendering type:
WHO CAN USE THIS FEATURE?
Switch users: All logged-in users
Non-Switch users: All logged-in offerors
The listing creation process begins on the homepage. If the "switch" configuration in the SBO is enabled, both vendor and customer roles have the ability to create a listing. When this setting is active, users must select their roles during account registration.
However, if the configuration is enabled with restrictions, only accounts designated as Customers will have permission to create requests for proposals.
To start the RFP creation process, click on "Publish a service Request" on the homepage. This action will trigger the listing deposit process.
The user is required to specify a title that accurately represents the service request, accompanied by a detailed description outlining the nature and scope of the service. Both fields are mandatory and the listing title must have a maximum of 50 characters.
Tips: pick a short and clear title for your request for proposal.
This is the first thing that vendors will see, time to shine!. Remember to provide clear information.
During the RFP creation process, customers have the ability to upload multiple file types to enhance the listing's detail and appeal for potential customers.
During the media selection process, customers can upload various types of media to enhance their RFP. The platform supports multiple image file formats, including JPG, PNG, GIF, and WebP. By default, the maximum allowable image file size is set to 12MB. However, this limit can be modified through the SBO configuration setting "Max size of a listing image."
At least one image must be uploaded, as it serves as the listing thumbnail. The administrator can set a max/min number of images through the "Max number of listing images" and "Min number of listing images"configuration in the SBO. Additionally, another configurable option available in the SBO settings for administrators, "Use profile picture as first image," allows the user’s profile picture to be automatically set as the first image in the RFP cover.
The system allows users to upload PDF files to the RFP. While this is not a mandatory requirement, customers have the option to include additional details about their services by attaching relevant PDF documents.
The system allows customers to add videos to their listings by simply pasting the YouTube URL. Once the URL is provided, the solution automatically integrates the video into the RFP without requiring any additional steps.
Proceed to step 2 by clicking “Proceed to step 2 of 2”.
The desired start and end dates for the execution of the Request for Proposals (RFP) provide vendors with an estimated timeline to aid in bid preparation. While these dates are not mandatory, specifying them allows vendors to better anticipate project requirements. To select a date, users can click the calendar icon on the right, which will display a calendar for choosing a specific date.
The Address section allows the customer to provide the location where the service will be performed. The following details must be entered at this step:
Country (dropdown field)
City (mandatory)
ZIP Code
Street Number
Street Name
If the full address is not mandatory on the listing, the user can click on the arrow icon in order to hide the ZIP, Number, and Route.
The “Confirm Address” checks the information and displays the location on the right-hand map.
The user can read the RFP information entered through his dashboard.
Path: Dashboard > Request for proposal > Name of the request for proposal > Presentation
This page is described in detail in the articles:
SBO :
Front :
Dashboard :
Business rules:
Workflow of a booking confirmation page with the voucher bundle activated
Path: Homepage > All listings > Listing > Booking
The booking request process is made out of the checkout + the payment process + the final confirmation
WHO CAN USE THIS FEATURE?
Logged in users
Users cannot create vouchers.
A voucher is applied to the booking request’s total amount minus platform fees. The fees are recalculated based on the new booking amount.
Vouchers expire:
Upon reaching the end date set at its creation
When the voucher is disabled by authorized administrators
Only 1 voucher can be per booking request
During the booking request process, a voucher code can be entered on the Checkout Overview page.
The asker enters the voucher code (figure 1) and validates it. The booking summary now displays the updated total price (figure 2).
Users cannot delete a voucher.
SBO :
Business rules:
Push an alert to the user when a listing matches the user’s criteria search
Path: Homepage > All listing
The search results page displays listings according to the user’s search criteria entered previously in the search bar.
The listing alert will send an email to notify the user when a listing matching his criteria is listed on the platform.
WHO CAN USE THIS FEATURE?
All logged-in users
Listing alerts can be created through the search results page by clicking “Get an alert when a new listing is posted” (figure 1). If there are categories and attributes filtering to the search, they will be also saved in the alert.
A pop-up window opens and prompts the user to enter a title (figure 2).
The listing alert button “Get an alert when a new listing is posted” (figure 4) appears when the bundle is enabled, at the end of the search result page.
Users can see their saved alerts in the “My alerts” section of the user dashboard (figures 5 and 6).
Path: Dashboard > My profile > My alerts
Users cannot update a listing alert
Delete a listing alert:
Path: Dashboard > My profile > My alerts
Click the cross (figure 7) to delete the alert.
Front :
Business rules:
How to use the search results page
Path: Homepage > All listing
The search results page displays listings according to the user’s search criteria entered previously in the search bar.
WHO CAN USE THIS FEATURE?
All users
Users cannot create a search results page. These are automatically generated based on a user’s search criteria entered in the search bar.
A search results page layout is illustrated hereafter (figure 1):
The map on the left side of the page is interactive. It generally uses Google Maps API (but can be replaced by another mapping tool according to the platform’s specifications).
Users can navigate on the map. Pins with the number of listings per location are displayed. Pins are grouped or ungrouped according to the displayed precision and zoom level.
On the map, a black location pointer indicated where a listing is serviced (figure 1.1.1).
When several listings are offered in the same geographical area, users will see a numbered coloured circle indicating the number of listings available in this area (figure 1.1.2). The search becomes more precise as a user zooms in.
By clicking a location pointer, the related listings' preview card will open (figure 1.1.3). A slider is available in the preview card should multiple listings be available on the pointer.
Listing preview cards are displayed on the right side of the search results. These listings match the user’s search criteria.
Clicking a listing preview card redirects the user in a new tab to the listing page.
Each listing preview card (figure 1.2) displays:
The listing’s media elements
The listing’s default based price per time unit
The listing’s location (only the city)
The listing’s title
The listing’s rating (if at least 1 review was made on the listing)
Clicking on the button will open a pop-up window that prompts the user to enter a title for this alert. To finalize alert creation, the user clicks “Create alert” (figure 1.3.2).
Users can navigate through pages with the pagination buttons (figure 1.4) at the end of the page.
Users can update the search results page by modifying their search criteria through the search bar available in the header banner (figure 2.1).
A filter banner (figure 2.2) is also available to help users make more precise searches.
The show map filter allows users to display or hide the map on the search result page.
By enabling (figure 2.1.1) or disabling (figure 2.1.2) the switch button it will determine the map’s display.
The prices filter allows the user to set a minimum and a maximum price for searched listings.
By clicking “Price”, a price card with a range field will appear (figure 2.1.3).
The range field is updated through a slider motion on both ends and validated through the “Apply” button. It will update the search results page to display only listings matching the selected price range.
The sorting tool (figure 2.3) offers 4 different sorting options:
Recommended: it will sort listings based on a proprietary search algorithm that maximizes conversion rates
Price: it will sort listings from the lowest to the highest price
Distance: it will sort listings from the closest to the farthest
Date created: it will sort listings from the most recent to the oldest
The attributes filter (figure 2.4) helps users make even more accurate searches.
Users can select/fill out the desired attributes.
Available attributes depend on the category selected by the offeror and configurated by the platform’s administrator.
A search bar containing the previously entered search criteria is available on the search results page in the page header. Refer to the following documentation for more information: Listings search results page (Basic solution) -
Users cannot delete anything on the search result page.
SBO :
Front :
Business rules:
Understand the user search results page
Path: Homepage > All users
The user search results page displays user profiles in the search results according to the entered search criteria in the user search bar.
WHO CAN USE THIS FEATURE?
All users
User search results pages are automatically created by performing a user search.
The user search results page displays profile blocks filtered according to the entered search criteria.
Each profile block (figure 1) displays:
User picture
User first name or company name
City location
User description
Users cannot delete content from a user search results page. However, users can reissue a new search which will effectively replace the previous search with new results.
Front:
Business rules:
The RFC bundle changes the search process.
Path: Homepage > All listing
The search results page displays listings according to the user’s search criteria entered previously in the search bar.
WHO CAN USE THIS FEATURE?
All users
Users cannot create a search results page. These are automatically generated based on a user’s search criteria entered in the search bar.
Users can perform searches for services through the dedicated search menu (figure 1.1).
Multiple criteria are available (depending on the authorized administrator’s configuration, some of these criteria may be disabled):
Location (figure 1.2): users enter a location (country, state, region, city, street, etc.) in an auto fillable field. This field is powered by Google by default. With the RFC bundle activated, this criteria becomes mandatory.
Categories (figure 1.3): users can select zero to all categories and sub-categories through a drop-down list doubled with a multi-select checking tool.
Keywords (figure 1.4): users can enter manually keywords
Start and end date and/or start and end time (figure 1.5)
All criteria can be combined for a more accurate search.
Criteria can be singled out for larger searches.
Users then click the “Search” button (figure 1.6) to launch the search. The results displayed will match the information the user has selected.
Users cannot delete content from a search results page. However, users can reissue a new search which will effectively replace the previous search with new results.
Front :
Business rules:
As an offeror, add bookable options and extras (a.k.a. upgrades) to a listing.
Path: Dashbaord > Listings > Listings update > Price & Conditions > Upgrades
The options creation tool allows the offeror to set extras either per booked unit or as a fixed fee per booking. If allowed, it is also possible to add several units of each extra.
Options are also referred to as extras or upgrades.
WHO CAN USE THIS FEATURE?
Switch: all users with a listing
Non-Switch: Logged in offerors
To create an option, the offeror clicks “Add an upgrade” (figure 1) on the “Pricing & Conditions” page
Each block prompts the offeror to fill out the following information (figure 2):
The option name to be displayed on the listing page
The option description
The price, either:
Per booking unit
Per booking
The maximum amount allowed per booking
The minimum amount allowed per booking
The offeror can then save his option by clicking “Save changes” (figure 3).
Options are displayed as blocks on public listing pages in a dedicated “Upgrades” section (figure 4).
The options block each display (figure 4):
The option’s title
The option’s description
The option’s price and bookable unit
An “Add” button to add the upgrade to the booking request.
Updating an option is done similarly to the creation process described above.
To delete an option, the offeror should access the following page:
Path: Dashboard > Listings > Listings updated > Price & Conditions > Upgrades
The “Delete” button (figure 2) available in each option block deletes the option.
Bundle configuration:
Business rules:
Creating and managing a quote request when the quote bundle is activated
Path: Front Homepage > Listing > Request a quote
Allow askers to request quotes directly to offerors for uncommoditized services.
WHO CAN USE THIS FEATURE?
Switch users: All logged-in users
Non-Switch users: All logged-in askers.
An asker can request a quote through “Request a quote” (figure 1) available on a public listing’s page.
The user fills in the following information:
The request title (figure 2) (mandatory)
The request description (figure 3) (mandatory)
If required, attach a file (figure 4).
Optionally set a date for the request (figure 5)
Set the location (figure 6)
The location can be a specific address or a non-specific address.
Leave a message to the offeror (figure 7). By doing so, a thread related to this quote is created.
Check “I accept Terms and Conditions” (mandatory) (figure 8) to finalize quote creation.
The asker can read the listing information he has just set with the quote dashboard page.
Once he finalizes the quote request process described above, he will be automatically redirected to the dashboard related to the quote edition.
Path: Dashboard > Quote > quote request > Show quote
This page is described in detail in the article: “Listing dashboard”.
Users cannot delete quotes.
Dashboard:
Business rules:
The following documentation describes the information displayed: Show a Listing (Time-Based)
Additionally, listings bear an “Our services” section (figure 1).
This section displays all the services offered by the offeror in the listing. These services are organized in service template blocks.
Each service template block (figure 1) displays:
The service title
The service duration
The service category
The service description
The service price
An “Add” button to add the service to the booking request.
If an offeror offers several services and/or subscription services, users can filter them by category to only display those of interest, thanks to the dropdown button (figure 2)
The following documentation describes the information displayed: Show a listing (Time-Based)
Additionally, listings bear an “Our services” section (figure 1).
This section displays all the services and/or subscription services offered by the offeror in the listing. These subscription services are organized in subscription service template blocks.
Each subscription service template block (figure 1) displays:
The subscription service title
The subscription service duration
The subscription service category
The subscription service description
The subscription service price per frequencies
An “Add” button to add the subscription service per frequency to the booking request.
If an offeror offers several services and/or subscription services, users can filter them by category to only display those of interest, thanks to the dropdown button (figure 2)
Select a listing and choose the date and starting time (figure 1).
To add a service, click “Add a service” (figure 2). This will redirect the user to the services available in the listing (figure 3). Click “Add” (figure 3) in the service card to add this service to the booking.
The user can set the orderable quantity in the booking (figure 4).
Click “Book now” (figure 5).
Select a listing and choose the date and starting time (figure 1).
To add a service, click “Add a service” (figure 2). This will redirect the user to the services available in the listing (figure 3). Click “Add” (figure 3) in the subscription service frequency to add this subscription service to the booking.
One-shot services and subscription service are not compatible for the booking process.
The users can not book, in the same booking, a one-shot service and a subscription service. It is the same for upgrades too.
The user can set the orderable quantity in the booking (figure 4).
Click “Book now” (figure 5).
A pop-up will be displayed (Figure 2), allowing the user to select from the predefined prompts configured by the platform administrator. Please, check for information on how to manage and create AI patterns.
Once the prompt is configured, a lamp icon will appear in the right corner when the user begins typing in the field. By clicking on the lamp icon, a suggested text will be displayed. To add the suggested text to the field, the user simply needs to click on it, and the field will be automatically populated with the suggestion (Figure 3).
To learn more details on how to configure the platform subscription features access the following section >
If a user is subscribed to a plan but attempts to access a feature not included in their subscription, the system will display the available subscription plans that cover the requested feature. The user will be prompted to upgrade their current plan to gain access. You can find more information in the following section. -
After the payment is successfully processed, a confirmation message is displayed. The user can then review their subscription details by navigating to the menu within the user dashboard.
Users must be registered and logged in to be able to deposit listings.
If the option to publish a service request is not visible on the of a switch platform, the user is currently on the. To switch to the , click the "Become a Customer" button located in the top-right corner.
Categories provide a structured way to describe proposals and organize them into sections, enhancing the user experience during the search process. They help streamline navigation and improve discoverability. For details on configuring categories, refer to the section.
Attributes provide an additional layer of information to describe an RFP. They are structured, searchable entities that are associated with specific categories. The available attributes may vary depending on the category selected for a listing. A "*" symbol displayed on the right side of an attribute field indicates that the attribute is mandatory. For detailed instructions on creating and managing attributes, refer to the section.
If the "" configuration is not enabled, the customer can manually select vendor categories during the proposal creation process. The selected vendor categories (Figure 10) determine which vendors will be notified when the listing is published.
See the following documentation for instructions on how to update a listing:
If the request for a proposal is published the asker can delete the request for a proposal only through the request for proposal dashboard. The process is described in the article:
Learn more on the voucher creation process here:
With the listing alert bundle activated, the search result page is similar to the basic configuration (figure 3). For more information, see the following documentation:
At the bottom of the search results page is an alert button “Get an alert when a new listing is posted” (figure 1.3.1). This button schedules a daily alert system to warn the user via e-mail each time a new listing matching his search criteria is published on the platform. Refer to the following documentation for more information:
According to the platform’s configuration, each attribute is linked to one or several categories:
The main search criteria are entered in the search bar on the homepage: ,
Refer to the following documentation:
Refer to the following documentation:
Refer to the following documentation:
The upgrades feature is linked to the Listing option bundle, describe in the following documentation:
Users can update quotes depending on their roles. Learn more about how to cancel here:


Interfaces from which the users can manage their contents, requests, and other information
User dashboard structure pages
Understanding how to use the different user interface components
Understanding and displaying KPIs in service multi-vendor eCommerce depending on activated bundles - user version
Managing and monitoring the messages received from users
Quotes dashboard (Quote feature)
Managing and monitoring the quotes made on the platform when quote Bundle is activated
Managing and monitoring the bookings made on the platform depending on the activated bundles
Bids dashboard (RFP rendering type)
Managing and monitoring the Bids made on the platform when RFP Bundle is activated
Managing and monitoring the listings made on the platform depending on the activated bundles
Request for proposals dashboard (RFP rendering type)
Managing and monitoring the request for proposals made on the platform when RFP Bundle is activated
Managing and monitoring the payments made on the platform depending on the activated bundles
Managing and monitoring the reviews made by users
Managing your profile as a user that is logged into the platform
Understanding the profile page versions depending on the activated bundles
Profile page (Time-Based rendering type)
Instructions for the user profile page
Instructions for the user profile page
Path: Homepage > All listings > Listing > User profile
The user profile page gives complete information about a user.
WHO CAN USE THIS FEATURE?
All users
The user profile page is created automatically when a user registers on the platform.
A user profile page displays a banner with the user name, location, and rating (if it has at least one rating) (figure 1).
The following information is displayed:
Two additional address blocks (figure 2) may be displayed. These are visible only if the user sets additional addresses.
A user can be either an asker, an offeror, or both. These will be displayed under this section if a user has active listings.
Users can navigate through the user profile’s listings via the arrows at the top of the section (figure 3).
The review section displays reviews made or received by the user.
The average rating will change according to the status of the reviews. The rating stars go from 1 (worst) to 5 (best).
For each review block (figure 4), users can see:
who did the review OR who received the review
the message
the rating in stars
The left side profile block gives more information about the user.
A profile picture is displayed and a “Contact me” button is available (figure 5).
This button will overlay a text area to send a message directly to the user without having a booking request (figure 5.2).
More information about the user is displayed (figure 5):
Account registration date
Verified, or not, contact details (phone, email, ID)
Number of bookings completed
Type: person or company.
User profile registered (not listing) location (optional: exact location can be replaced by a blue circle with a given radius for security purposes).
Only the user can update his profile through the dashboard: User profile dashboard (All rendering types) - Read Profile
Only the user can delete his profile through the dashboard: User profile dashboard (All rendering types) - Delete a Profile
Dashboard
Fill the user profile information
Path: Front > Homepage > User Onboarding
The onboarding is a way to push the user to fill in his personal information
The onboarding is to complete the user's profile information.
This section is to load a profile picture. Having a profile picture will help user to recognize you when you will perform the service.
Users can drag and drop the picture they want to set for their profile (figure 1).
The “about me” part is a text area (figure 2) where the user can introduce himself, talk about what he wants in relation to his profile on the platform. It is a part that introduces the user to other users of the platform.
Users can choose their user category by ticking the checkboxes corresponding to their user category (figure 3).
Learn more on users categories: User categories management
Users can choose their user attributes according to the category selected (figure 4).
The attributes can have different types of fields, such as text area, pick-up dates, numbers, checkboxes, choice lists…
Learn more on users attributes here: User attributes management
User can register their user address by filling all fields (figure 5).
This will not impact the listing address.
The information saved during the user onboarding can be read through the user profile dashboard here: User profile dashboard (All rendering types)
To update the user onboarding information, it can be done through the user dashboard, in the My profile section.
Learn more on the user profile dashboard here: User profile dashboard (All rendering types)
User can not delete an onboarding but they can skip it, at the end on the page they can click on the button “Skip” (figure 6).
SBO:
Dashboard:
Business rules:
Understanding and managing the platforms internal pages eg TnC, Privacy Policy, Who are we etc
Path: Homepage > Content page
Content pages are a platform’s internal pages.
These are usually used to share information about a platform (instructions, user guides, FAQs), the company, and the platform’s added value.
It is important to enter relevant information as it will help users find important information quickly.
WHO CAN USE THIS FEATURE?
All users
Users can not create a content page. Only super-administrators and administrators can create one through the SBO, it is described in the following articles: Contents
Users can find content pages either in the header banner hamburger menu or in the page footer both available on all interfaces accessible by any platform users (figure 1).
Underlined links indicate content pages.
Each content page displays:
The page title (figure 2)
The content (figure 3), can be organized in paragraphs with titles.
Users can also see pictures, videos, or links, according to the page’s content.
Several content pages are mandatory (figure 4) on each platform:
Legal notices
Privacy Policies
Terms and Conditions
Cookies management
These pages are related to the platform rights and are usually systematically required.
Users cannot update content pages.
Super-administrator or an administrator can update the content page in the SBO. The process is described in this article: Pages
Users cannot delete content pages.
Super-administrators or administrators can delete the content page in the SBO. The process is described in this article: Pages
SBO :
Accessing and managing your favourite listings or
Path: Homepage > favorites
The favorites page is a page available on all platforms.
This page presents the user's preferred listings or requests for proposals in a format similar to the standard search results display.
WHO CAN USE THIS FEATURE?
Logged in users
To add a listing to the favorite page, users can either add it from the homepage or a listing’s/Request for proposal page.
On the homepage, in the recommended listings/Request for proposal section, users click the empty heart icon (figure 1.1) on a listing’s preview card.
It will automatically add the listing to the user’s favorites page.
The heart icon becomes full (figure 1.2) to signify the listing has been correctly added to the favorites page.
Users click the empty heart in a listing page under the listing title and location (figure 2.1).
It will automatically add the listing to the user’s favorites page.
The heart icon becomes full (figure 2.2) to signify the listing has been correctly added to the favorites page.
Users have the ability to conveniently access their favorites page from any public page within the platform, as well as from the user dashboard using the dedicated "favorites" button located in the platform header. On the favorites page, users will find a layout similar to the search results page, showcasing exclusively their favorite listings (refer to Figure 3.1). Within this section, users can easily browse through their liked listings, preferred requests for proposals, and favored profiles (see Figure 3.1.1). This setup allows for efficient management and quick access to preferred content across the platform.
Clicking on the favorite listing redirects the user to a dedicated favorite page where all of the user's preferred listings are displayed.
Each favorite listing preview card (figure 3.2) displays:
The listing’s media elements
The listing’s base price
The listing’s price unit: per hour or per day
The listing’s location
The listing’s title
The listing’s rating (if applicable)
Clicking on the favorite Requests for proposals redirects the user to a dedicated favorite page where all of the user's preferred RFPs are displayed.
Each favorite request for a proposal preview card (figure 3.3) displays:
The listing’s media elements
The listing’s location
The listing’s title
Clicking on the favorite profiles redirects the user to a dedicated favorite page where all of the user's preferred profiles are displayed (Figure 3.4).
Each favorite profile preview card (figure 3.4) displays:
User's name
User Description
Users cannot update the favorites page aside from deleting a favorite listing (see below).
A user can delete a favorite listing by clicking the full heart icon.
All business rules:
See all User related data at a glance
Path: Dashboard
The user dashboard homepage displays by default the user’s activity Key Performance Indicators (KPI).
Key Performance Indicator, a quantifiable measure of performance over time for a specific objective. KPIs provide targets for teams to shoot for, milestones to gauge progress, and insights that help people across the organization make better decisions.
The KPI displayed can change depending on the activated bundle and the user's role.
WHO CAN USE THIS FEATURE?
Switch users: All logged-in users
Non-Switch users: All logged-in offerors.
Non-Switch users: All logged-in askers.
KPIs cannot be created. A preset of KPIs are available on all platforms (the displayed KPIs vary depending on the activated bundles).
You can see below the list of the KPI according to the RFP bundle
Accepted bids: Total bids accepted
Canceled bids: Total bids cancelled
Expired bids: Total bids expired due to the asker not responding
Declined bids: Total bids declined by the offeror
Business volume: Total business volume made by the offeror through accepted and paid bids
Unique customers: Number of unique customers
Search result appearance: Number of appearances in the search results for the offeror’s listings
RFP views: Cumulated number of views of the offeror’s listings
My score: Average rating
Bid average price: Average purchase volume per booking
Top customers: Top 10 customers which generated the most business volume
Top RFP: Top 10 offeror listings generating the most business volume
Top countries: Top 10 countries in which the offeror’s bids generated the most business volume
Accepted bids: Total bids accepted by the asker
Pending bids: Total bids pending
Expired bids: Total bids expired due to offerors not responding
Declined bids: Total bids declined by the asker
Booking requests: Number of booking requests made
Average response time: Average respond time of the asker on a bid
Number of bids: The total number of bids made
Purchase volume: Total purchase volume made by the asker through accepted and paid bookings
Users cannot manually update the KPIs.
KPI values are automatically updated.
Users cannot delete any KPI or top list on their user dashboard homepage.
Dashboard:
Business rules:
See all User related data at a glance
Path: Dashboard
By default, the user dashboard homepage displays the Key Performance Indicators (KPI) of that user.
Key Performance Indicator is a quantifiable measure of performance over time for a specific objective. KPIs provide targets for users to shoot for, milestones to gauge progress, and insights that help people across the organization make better decisions.
The KPI displayed can change depending on the activated bundle and the user's role.
WHO CAN USE THIS FEATURE?
Switch users: All logged-in users
Non-Switch users: All logged-in offerors.
Non-Switch users: All logged-in askers.
KPIs cannot be created. A preset of KPIs are available on all platforms (the displayed KPIs vary depending on the activated bundles).
On the user dashboard’s homepage, several KPI blocks are displayed (figure 1).
Each KPI block displays:
a value (based on the date range selected in filters)
a differential (that compares the current value based on the date range selected in the filters with the value for the previous date range)
a title.
A graphic can be opened to check the progression of these KPIs by clicking on the graphic icon (figure 1) in the KPI block. A pop-in modal with a graphic (figure 2) will open.
TOPS KPI blocks (figure 3) are ordered lists of the top 10 values based on a given criteria goal (e.g. top searched countries).
Accepted bookings: The total of bookings accepted by the offeror
Cancelled bookings: The total of bookings cancelled by askers
A cancelled booking is always cancelled by the asker
Expired bookings: The total of bookings expired due to the offeror not responding
Declined bookings: The total of bookings declined by the offeror
Booking requests: The total number of booking requests received
Business volume: The total business volume made by the offeror through accepted and paid bookings
Unique customers: The total number of unique customers who have made a booking to the offeror
Search result appearance: The total number of appearances in the search results for the offeror’s listings
Listing views: The cumulated number of views of the offeror’s listings
My score: The average rating
Average booking amount: The average purchase volume per booking
Average respond time: The average time it takes the offeror to reply to a message or booking request
Booking response rate: The average booking request with an offeror response (regardless of whether it is declined or accepted)
Top customers: The top 10 customers who generated the most business volume through their bookings on the offeror’s listings
Top listings: The top 10 offeror listings generating the most business volume
Top countries: The top 10 countries in which the offeror’s listings generated the most business volume
Accepted bookings: The total of bookings accepted by offerors
Cancelled bookings: The total of bookings cancelled by the asker
A booking cancelled is a booking request pending OR a booking paid that is cancelled by the asker
Expired bookings: The total of bookings expired due to offerors not responding
Declined bookings: The total of bookings declined by offerors
Booking requests: The number of booking requests made
Purchase volume: The total purchase volume made by the asker through accepted and paid bookings
Users can filter KPIs to display more detailed data.
Filter buttons are available in the filter block at the top of the main body (figure 4).
The filters available are:
The user roles filter is enabled only for switch platforms. If a user is both an offeror and an asker, he can select the role dependent KPI data he wants to display (figure 5).
On a non-switch platform, users will see the KPI data according to their default user role: asker or offeror.
Users can filter the KPI displayed according to dates.
Default date range
A default date range is applied when users first access their KPIs. This default range displays KPIs from the first recorded data until the current date.
Quick filters
There are 3 quick filters (figure 6) available:
This month button
The “This month” button (figure 6) displays the KPIs of the current month.
This filter will start at the beginning of the current month and end at the current date.
e.g.: Today is September 13th 2021, the date range will be: from September 1st 2021 to September 13th 2021.
This week button
The “This week” button (figure 6) displays the KPI of the current week.
This filter will start at the beginning of the current week and end at the current day of the week.
e.g.: The date ranges from Monday of the current week to the current day of the week.
Today button
The “Today” button (figure 6), will display the KPI of the current day.
Date time picker
Users can filter their KPI for a given period with the date picker (figure 7) by selecting the start date and end date for the desired period.
Specific day
Users can display KPI for a specific day by selecting an identical start and end date.
Date range
Users can display KPI for a specific date range by selecting different start and end dates.
Listings
This filter is only available for the offeror role.
An offeror can have several listings. To view KPIs regarding a given listing, a “Listings” dropdown button (figure 8) is available.
Monitor progress throughout time.
Each standard KPI block displays a differential value (figure 9).
This value is based on the filter date ranges.
If a user selects the same start and end date in the date filter, the differential value will compare the T and T-1 dates' values.
If a user selects a different start and end date in the date filter, the differential value will compare the T and T-N dates' values.
Users cannot manually update the KPIs.
KPI values are automatically updated.
Users cannot delete any KPI or top list on their user dashboard homepage.
Business rules:
How to create a mediation.
Path: Dashboard > Bookings > Booking
The mediation bundle or mediation management sets up a system where users and the super administrator/administrator can manage a disagreement situation from the platform with automated processes.
WHO CAN USE THIS FEATURE?
Switch users: All logged-in users on a related booking.
Non-Switch users: All logged-in offerors on a related booking.
Non-Switch users: All logged-in askers on a related booking.
To create a mediation the booking must be in “Paid” status.
In the booking details, click “Show” (figure 1) in the booking preview card to open the booking details.
Click “open a mediation” at the bottom of the page (figure 2) in the booking details.
A pop-up window opens prompting the user who initiated the mediation request to enter a message (figure 3). Click “Open mediation” to open a dispute case.
The booking status is updated to “Dispute opened” (figure 4) and an authorized platform administrator will take charge of the mediation.
The booking status is updated. The remainder of the information and actions is managed by authorized administrators.
Users cannot update a mediation.
Users cannot delete a mediation.
SBO:
Business rules:
Managing and monitoring the bookings made on the platform depending on the activated bundles
This page enables users to access bookings request made, received, as well as their status.
This page enables users to access subscriptions request made, received, as well as their status.
How to create a dispute.
Understanding and managing the ‘Contact us’ page used by users to communicate with your organization
Path: Homepage > Contact us
The contact us page allows users to contact the administrator of the platform via a form.
WHO CAN USE THIS FEATURE?
All users
A contact request is created when the user clicks the “Submit” button after filling the mandatory fields of the contact form and accepting the Recaptcha, Privacy policy, and Terms and Conditions.
The contact page is a form (figure 1) users have to fill out.
The following information is requested:
First name
Last name
Email (to allow for administrator reply)
Phone number
The subject of the message
Message
All information boxes are mandatory except for the phone number.
Path: SBO > Users > Contact
Users can not update the contact page
Users can not delete the contact page
SBO :
Business rules:
Understand the search results page per category
Path: Homepage > Category
The search results page per category displays listings in the search results according to the category search criteria and focuses on a child or parent category.
WHO CAN USE THIS FEATURE?
All users
Search results page per category is automatically created by searching a category (whether it be a parent or child category).
A detailed breadcrumb is displayed on the search results page per category.
The breadcrumb (figure 2) displays:
A link the to homepage
A link to the parent category
A link to the n-level child category (n being the number of sub-levels within an initial parent category)
The listings section for a search results page per category (figure 3) displays additional information.
This additional information is configured by the administrator (see Listings categories management for additional information on the management process) and is detailed below:
The header title, which matches the category’s name (figure 3.1)
The header text (figure 3.2) which describes the category
The footer title (figure 3.4)
The footer text (figure 3.5) which serves as additional information
Users cannot delete content from a search results page per category. However, users can reissue a new search which will effectively replace the previous search with new results.
SBO :
Front :
Business rules:
Understanding how to use the different user interface components
Path: Dashboard
Several interface structure elements are available throughout the user dashboard. These elements help make user navigation more fluid.
WHO CAN USE THIS FEATURE?
Switch users: All logged-in users
Non-Switch users: All logged-in vendors
Non-Switch users: All logged-in customers
New elements cannot be created from the user dashboard’s interface.
The user dashboard starts with a summary dashboard (figure 1).
Each structure element is described below.
The navigation bar (navbar) is located at the top of the page (figure 2)
The navbar is made of:
The platform’s logo (figure 3) is visible to all users. The operator can set in SBO > Other > Features > Platform Configuration > Platform Logo
The search bar (figure 4.1) allows users to perform a quick search directly from their dashboard.
Clicking the search bar opens the full search engine (figure 4.2).
The user avatar (figure 5.1) is the access point to the user dashboard’s quick menu (figure 5.2). It is opened by clicking the user name. Logging out is done through this quick menu.
The "Become a vendor" or "Become a customer" button directs users to the main homepage, where they can initiate various actions. For vendors, this includes publishing listings, and for customers, creating requests for proposals (RFPs).
The hamburger menu (figure 7.1) displays content pages set by the administrator. The hamburger menu opens with a single click (figure 7.2 ).
The side menu (figure 8) is located on the left-hand side of the page. It offers smooth navigation and clear visibility through the user dashboard interface.
The user dashboard’s multiple sections are accessible through the side menu:
Dashboard: The user dashboard homepage, displays the user’s KPIs
Messages: Access all messages sent/received by the user
Bookings: Access all booking requests made/received by the user
Listings: (Active only for offeror roles) Access all listings created by the user
Payments: Access all purchases/sales made by the user
Reviews: Access all reviews made/received by the user
My profile: Update user profile information (identity information, payment details, personal data management tools)
Some sections may vary according to the user’s role in the non-switch platform:
Listings: not available for asker-only users
Payments:
Only purchases are displayed for asker-only users
Only payments received are displayed for offeror-only users
The user card is available throughout the user dashboard on the right side of each page (figure 9).
This card displays:
The set user location on a map
The user’s profile picture
The user’s registration date
The user’s information verification status (Email, ID)
The number of bookings completed as an offeror
The user’s legal status (individual or company)
A detailed breadcrumb is displayed on each page of the user dashboard (figure 10). It helps users understand the navigation path in the dashboard and gives them quick access to higher-ranked pages.
Deletion of an interface structure is not possible by any user or administrator.
SBO:
Front :
All business rules:
The KPI are described in detail, in the following article:
Only the super-administrator or administrators (who have the right to do so) can see the message in the “Contact” section of the SBO:
The search results page per category (figure 1) is comparable to the classic search results page , with a few differences (adapted/additional content) indicating the focus on a given category. These are described below and let users know they are on a search results page per category.
The map section is similar to the standard search result page. Refer to the following documentation:
Refer to the following documentation to have information about the standard display:
The matching listings (figure 3.3). Refer to the following documentation:
Refer to the following documentation:
Refer to the following documentation:
Refer to the following documentation:
Instructions on how to use the search engine are provided here: or
A user can edit the information displayed on his user card through the “Edit your profile” button (figure 11). This redirects the user to the “My profile” page. The process is detailed here:


Managing and monitoring the listings made on the platform depending on the activated bundles
Listings dashboard (Time-Based rendering type)
How to manage listings
Listings dashboard (Flat-Rate rendering type)
Manage the services offers within a listing
Listings dashboard (Subscription) — Manage the subscription services offers within a listing
Listings dashboard (Seat-Based rendering type)
Listing dashboard edition for the Session bundle
Listings dashboard (RFC rendering type)
Listing dashboard edition for the RFC bundle
Understanding and displaying KPIs in service multi-vendor eCommerce depending on activated bundles - user version
User KPI (Time-Based, Seat-Based, Flat-Rate, RFC rendering types)
See all User related data at a glance
See all User related data at a glance
This page enables users to access bookings request made, received, as well as their status.
Path: Dashboard > Bookings
A booking is an entity created when a user makes a booking request via a public listing.
WHO CAN USE THIS FEATURE?
Switch users: All logged-in users
Non-Switch users: All logged-in offerors.
Non-Switch users: All logged-in askers.
The process of creating a booking request is described in detail here: Booking request (Time-Based rendering type).
All booking requests are displayed in the booking dashboard in the form of booking blocks.
Each booking block (figure 1) displays:
The related listing’s media elements (slider)
The booking’s total price
The booked listing’s title
The booking’s date
The booking’s location
The booking’s duration
The booking offeror
The message is linked to the booking request if available.
The booking’s status (and if applicable the remaining time before expiration)
The “Open” button in the top right corner of each booking block (figure 1) redirects the user to the booking’s details.
Path: Dashboard > Bookings > Booking #XXXX[…]XXXX
A booking’s detailed page displays (figure 2):
The booking ID
The booking status
A top page banner (figure 3) displays the booking status and its total price.
In the page’s main body, several elements are displayed:
An overview of the listing (figure 4) related to this booking:
The listing’s media elements
The listing’s name
The listing’s default price
The date & location (figure 5.1 & 5.2) are a reminder of:
The booking’s start and end date (figure 5.1) as well as its duration
The location (figure 5.2) where the service will take place and any additional information (e.g.: floor number, apt number, code, etc)
The platform services (figure 6) detail the fees and/or commissions charged by the platform.
At the end of the main body, a price banner (figure 7) indicating the booking’s total price is displayed.
On the right-hand side of this page are displayed additional information elements:
The offeror block with offeror profile information (figure 8).
The status history block (figure 9.1) located under the offeror card displays the evolution of the booking’s status. It is sorted from the most recent to the oldest status.
This block is collapsed by default. Clicking the “+” icon on the right side of the block (figure 9.2) expands the block.
Similarly, a cancellation policy block (figure 10) is displayed right under the status history block. It is by default collapsed and can also be expanded.
Users can update bookings depending on their roles.
As an asker, bookings can be cancelled or mediated (if applicable, see related documentation: Mediation management dashboard (Mediation feature).
As an offeror, bookings can be accepted, declined, expired or mediated (if applicable).
Booking statuses are automatically updated when any of the above-described updates are performed.
Users cannot delete bookings.
SBO:
Front :
Booking requests
Dashboard :
Business rules:
Managing and monitoring the Bids made on the platform when RFP Bundle is activated.
Path: Dashboard > Bids
Users can monitor their proposal statuses and evolution through their user dashboard.
WHO CAN USE THIS FEATURE?
Logged in askers
Logged in offerors
The process is described in detail in the following documentation: Listing deposit (RFP rendering type)
The “Bids” section in the user dashboard displays all proposals emitted or received (depending on the user’s role) as preview cards (figure 1).
Each card displays:
The bid status
The bid ID
The RFP title
The dates when the service can take place
The location at which the service will take place
The offeror name
The asker name
“Show bid” to see the details of the bid.
To view the bid details, click “Show bid”, in which askers can (figure 2):
Accept the bid
Request a negotiation,
Decline the bid, it will automatically decline the offer and the request for proposal will still be available
To update a bid, the asker can either accept, request negotiation or decline the bid.
The checkout overview page is the first page displayed to users after clicking the “Accept” button. The checkout overview is visually split into two sections:
The right section
The left section
Date & location
This block is a summary of the dates of the services and the location.
The price
The price block (figure 4) displays the amount set by the offeror for the service he will perform.
Platform service fees block
The platform service fees block (figure 5) informs the users of the fees taken by the platform. The displayed fees depend on the platform administrator’s configuration.
Total price
The total price block (figure 6) indicates the booking’s total price.
Fees and taxes are included
Message
A message block (figure 7) is available and allows users to leave a message and attach files to the offeror.
The user needs to accept the platform terms & conditions by checking on the checkbox (figure 8).
To confirm the booking request, the user then clicks “Continue >” (figure 9) which will redirect him to the payment page.
On the right-hand side of the page, the booking-related asker’s information (figure 10) is displayed in a dedicated information block.
“No amounts will be charged until your bid request is accepted. Additionally, the platform will hold the amount paid until the service is rendered.”
On this page, the user chooses first of all his payment method:
By credit card
By a bank wire transfer
To select payment by credit card, the user clicks the credit card block (figure 11).
The user then enters his payment information:
credit card number
expiration date
CVC
The credit card payment is done before the service is provided. However, the amount will not be debited until the offeror has accepted the booking request. The payment to the offeror is done once the service has been completed.
The user is then redirected to the confirmation page.
To select payment by bank wire transfer, the user clicks the bank wire transfer block (figure 12).
The user makes the bank wire transfer once the offeror has accepted the booking request.
The user is then redirected to the confirmation page.
The confirmation page (figure 13) confirms the bid has been successfully accepted and payment has been made. This ends the bid confirmation process.
The offeror then receives an alert for an accepted bid.
The user is then automatically redirected to his platform dashboard.
To close a bid’s workflow, the asker must indicate through the platform that the service is done. This allows the offeror to be paid.
On the bid details page, click “Service is done” (figure 14). A pop-up window opens (figure 15) prompting the asker to leave a comment and/or check the terms and conditions. Click “Service is done” to confirm the end of the bid and to pay the offeror.
Clicking “Request negotiation” opens a pop-up window, prompting the asker to leave a message and check the terms and conditions. Click “Send the request” to validate the negotiation request.
The bid status remains pending.
The offeror can either propose a new bid or decline the negotiation (figure 17).
Clicking “Propose new bid” (figure 17) asker’s action.
Clicking “Decline negotiation” (figure 17) opens a pop-up window prompting the user to leave a message and to check the terms and conditions. Click “Decline” (figure 18) to validate the negotiation refusal.
The asker is notified in the bid detailed page grey banner (figure 19) that the offeror won’t send a new bid offer. The asker can hence either accept or decline the current offer.
Users cannot delete bids but they can decline them.
Click “Decline a bid” to open a pop-up window displaying the bid summary. The asker can leave a message and check the terms and conditions. Click “Decline this bid” to decline the bid.
Front:
Business rules:
Path: Dashboard > Platform Subscriptions
For details on the actions required for a user to subscribe to a new plan, refer to the Front Office > Platform Subscriptions section of this documentation.
The platform's subscription dashboard provides users with an overview of all active subscription plans. Each subscription is presented in a card format, displaying the following details:
Subscription ID
Subscription Title
Subscription Subtitle
Monthly Price
Subscription Start Date
Upgrade Option (if applicable)
Status
This dashboard enables users to conveniently review their subscription details in a structured and accessible manner.
Clicking the "Details" button located at the top left corner of each card provides access to subscription details. This section displays information about the status of each subscription period along with the corresponding payment invoice.
This page enables users to access subscription requests made, and received, as well as their status.
Path: Dashboard > Bookings
A subscription is an entity created when a user makes a subscription request via a public listing.
WHO CAN USE THIS FEATURE?
Switch users: All logged-in users
Non-Switch users: All logged-in offerors.
Non-Switch users: All logged-in askers.
The process of creating a subscription request is described in detail here: Booking confirmation pages (Subscriptions).
All subscription requests are displayed in the subscription dashboard in the form of subscription blocks.
Each subscription block (figure 1) displays:
The related listing’s media elements (slider)
The subscription’s price per frequency
The booked listing’s title
The subscription’s period dates
The subscription’s location
The subscription’s duration
The subscription offeror
The message is linked to the subscription request if available.
The subscription’s status (and if applicable the remaining time before expiration)
The “Open” button in the top right corner of each subscription block (figure 1) redirects the user to the subscription’s details.
Path: Dashboard > Bookings > subscription #XXXX[…]XXXX
A subscription’s detailed page displays (figure 2):
The subscription ID
The status
A top page banner (figure 3) displays the subscription status and its total price.
In the page’s main body, several elements are displayed:
An overview of the listing (figure 4) related to this subscription:
The listing’s media elements
The listing’s name
The listing’s default price
The date & location (figure 5.1 & 5.2) are a reminder of:
The subscription’s start and end date (figure 5.1) as well as its duration
The location (figure 5.2) where the service will take place and any additional information (e.g.: floor number, apt number, code, etc)
The platform services (figure 6) detail the fees and/or commissions charged by the platform.
The “subscription” part (figure 7) details the status of the current period of the subscription and displays a summary of past or future subscription periods.
Learn more on subscription period statuses for inter-user subscription bundles here: Inter-users subscription - Subscription Period Status
At the end of the main body, a price banner (figure 8) indicating the subscription’s total price per period is displayed.
On the right-hand side of this page are displayed additional information elements:
The offeror block with offeror profile information (figure 9).
The status history block (figure 10.1) located under the offeror card displays the evolution of the subscription’s status. It is sorted from the most recent to the oldest status.
This block is collapsed by default. Clicking the “+” icon on the right side of the block (figure 10.2) expands the block.
Similarly, a cancellation policy block (figure 11) is displayed right under the status history block. It is by default collapsed and can also be expanded.
Users can update subscriptions depending on their roles.
As an asker, subscriptions can be canceled, by clicking on the “Cancel” button, at the end of the booking page. (figure 12)
As an offeror, subscriptions can be accepted, declined, or canceled.
Subscription statuses are automatically updated when any of the above-described updates are performed.
Users cannot delete subscriptions.
SBO:
Front:
Listing page (Subscription)
Listing deposit (Subscription)
Booking confirmation pages (Subscription)
Dashboard:
Listings dashboard (Subscription)
Business rules:
Managing and monitoring the quotes made on the platform when quote Bundle is activated
Path: Dashboard > Quotes
Users can monitor their quotes statuses and evolution through their user dashboard.
WHO CAN USE THIS FEATURE?
All users
The process is described in detail in the following documentation: Quote requests (Quote feature)
The “Quotes” section in the user dashboard displays all quotes emitted or received (depending on the user’s role) as preview cards (figure 1).
Each card displays:
The quote status (the statuses details are explained in the following documentation: Quote feature - Business rules)
The quote title
The potential dates requested by the asker
The location of the service
The message related to the quote
The offeror name
The asker name
To view the quote details, click “Show quote” (figure 2).
The quote details display:
The quote number (figure 3), in the banner of the page
“View message” (figure 4): displays the quote’s messaging thread
The quote status (figure 5)
The quote detail (figure 6)
The status history (figure 7)
The offeror’s details (figure 8)
Users can update quotes depending on their roles. Learn more about how to cancel here: Bookings dashboard (Time-Based) - Update a Booking
Users cannot delete quotes but askers can cancel a quote request.
Path: Dashboard > Quotes > Show quote > Cancel
Click the button “Cancel” (figure 9) available on the quote details page.
Front:
Dashboard:
Business rules:
Managing and monitoring the request for proposals made on the platform when RFP Bundle is activated
Path: Dashboard > Request for proposal > Request for proposal edition
User dashboard page through which users can manage their requests for proposals.
WHO CAN USE THIS FEATURE?
Switch: All users
Non-switch: Logged askers
Users can create a request for proposal through the Front interface, by clicking the “Publish your Request for proposal.
The process is described in the following article: Listing deposit (RFP rendering type)
Once at least one Request for proposal is created, a user can view all of his “Request for Proposals” in the user dashboard’s Request for proposal section.
The edition part of a Request for proposal in RFP mode is similar to the basic one described in the following article: Listings dashboard (Time-Based rendering type)
In the RFP Request for proposal dashboard users do not have the section about:
Price and conditions
Settings
Calendar
In this section, the asker can manage dates linked to his request for proposal
The service execution date is about settings the start date and end date the asker would like the service to be performed.
By filling dates (figure 1) it will be suggested in the bid to the offeror but the offeror can update it. It is not fixed dates.
The end date (figure 2), is the date when the asker will stop receiving bids from offerors, according to the number of bids the dates can be updated.
Once the asker has accepted a bid, he can close the Request for Proposal he has published, to do so he can click the button “Close this RFP” (figure 3), at the top left corner and the status will be updated to “Hidden”
By closing the request for proposal, the request will not be seen by other users on the platform.
Other parts of the Request for proposal edition can be updated the same way it has been created.
To delete a Request for proposal users can follow the same process as the basic mode, described in the following article: Delete a listing
Front:
Dashboard:
Business rules:
Managing and monitoring the messages received from users
Path: Dashboard > Messages
Messages can be sent through the platform in given circumstances: when performing a booking, when browsing a listing page, or from a public profile page.
A message is always sent between two users, usually an offeror and an asker (this varies according to the platform’s configuration). When a message is first sent, a dedicated thread is created and allows users to follow their exchanges. There are 2 types of threads:
Thread linked to a booking
Thread not linked to a booking
WHO CAN USE THIS FEATURE?
Switch users: All logged-in users
Non-Switch users: All logged-in offerors
Non-Switch users: All logged-in askers
A thread is automatically created upon each booking request. The offeror receiving the request can either directly accept the booking or decide to first discuss with the asker.
A thread is automatically created when a message is sent from the contact button available on each listing page or profile page.
The messages dashboard displays all messages in a date organized threads.
Users can search through their messaging threads via the in-built keywords search bar ( figure 1). A thread is displayed in the search results should it contain at least one iteration of the searched word.
Each messaging thread is displayed as a thread block (figure 2.2) displaying:
The recipient user and his rating
If applicable, the listing’s title
The message sent
An intuitive “reverse” arrow icon lets users respond quickly to a messaging thread. This icon opens a pop-up message box (figure 2.2) in which the user can write his message as well as attach files via the paper clip icon.
Clicking the discussion bubble icon redirects the user to the detailed view of the messaging thread.
Path: Dashbaord > Messages > Discuss with…
Entering a thread’s detailed view gives quick access to related information.
The “Access listing” button (figure 3.1) located at the top of the thread block redirects the user to the related listing (if applicable).
The “Access booking” button (figure 3.2) redirects the user to the related booking (if applicable).
The “Access profile” button (figure 3.3) redirects the user to the related recipient user’s profile page.
Clicking the recipient user’s avatar or name in a messaging thread also redirects the user to their profile page (figure 3.4).
In the main conversation body, messages are displayed in a staggered fashion according to who is sending the message (figure 4). Each message indicates the sender, the message, and the date.
Users can write a message and attach a file in the dedicated field located at the bottom of the thread (figure 5).
Users cannot update sent or received messages. Authorized administrators can update messages through the SBO for moderation purposes. See: Users messages management
Users cannot delete sent or received messages. Authorized administrators can delete messages through the SBO for moderation purposes. See: Users messages management
SBO :
Front:
Listing pages
Booking requests
Managing and monitoring the payments made on the platform depending on the activated bundles
User’s payment history
Invoices with the service bundle activated.
Managing your profile as a user that is logged into the platform
How to manage my profile information
Profile page changes due to the user search bundle being enabled.
Invoices with the service bundle activated.
Path: Dashboard > Payments > Purchase
Invoices are payment receipts delivered to detail and keep track of payments through the platform.
Platform fee invoices are automatically generated by the platform. Service invoices are not generated by the platform.
WHO CAN USE THIS FEATURE?
Switch: All logged-in users
Non-Switch: Logged-in askers
Non-Switch: Logged-in offerors
Invoices are automatically generated by the platform when a payment is done. Invoices to offerors are delivered when payouts are made, in other words, when the service has been provided and the payout is manually done by the platform administrator.
To access invoices, click the invoice icon (figure 1) in the payment section of the user dashboard. The invoice is displayed in a new tab.
With the service bundle enabled, the invoice displays the service name and not the listing name.
Invoices cannot be updated.
Invoices cannot be deleted.
Dashboard:
Business rules:
User’s payment history
Path: Dashboard > payments
User payment history is displayed on the payment dashboard page. Users can also access invoices through this page.
WHO CAN USE THIS FEATURE?
Switch users: All logged-in users
Non-Switch users: All logged-in offerors
Non-Switch users: All logged-in askers
As an asker, payments are made during the booking process.
According to their role, users can see all transactions made or received on this page. On switch platforms, both views are available via dedicated buttons located on the top right corner of the dashboard page.
Each transaction (figure 1) displays:
“No. Transaction”: a unique transaction ID.
“No. Booking/ Quote”: the related booking’s ID.
“Invoice date”: invoice creation date.
“Payment type”: type of payment (standard booking payment, refund due to cancellation, refund due to mediation).
“Total”: The total amount paid or received.
“Invoice/receipt” icon: transaction invoice download link.
This invoice concerned only the fees charged by the platform, it is not related to the service.
The offeror has to send himself the invoice of the service.
Users cannot update payments.
Askers can cancel a booking request which will automatically create a refund.
Users can open a mediation (if the bundle is enabled) to request administrator intervention and potentially have the administrator update the payment terms if deemed relevant and justified.
Users cannot delete payments.
Askers can cancel a booking request which will automatically create a refund.
Users can open a mediation (if the bundle is enabled) to request administrator intervention and potentially have the administrator update the payment terms if deemed relevant and justified.
SBO:
Business rules:
How to manage my profile information
Path: Dashboard > My profile
User dashboard page in which users can manage their profile information.
WHO CAN USE THIS FEATURE?
Switch users: All logged-in users
Non-Switch users: All logged-in offerors.
Non-Switch users: All logged-in askers.
A user's profile is automatically created upon registration. All the information filled in during the process is automatically added to the “Identity” section of the Profil section.
While navigating through the user dashboard’s profile page, some elements remain always visible at the top of each page:
Profile status (figure 1)
“My profile” button (figure 2) to redirect the user to the profile’s public view.
The user dashboard profile page is split into several sections:
Users can set a profile picture through the presentation section by:
a Drag and drop motion of a picture or a pdf in the dedicated block (figure 3.1), or
Clicking “Click here to select your files” (figure 3.2) and selecting the desired media elements in the file browser. An out-of-the box optimal size for the image would 626x626 pixels.
The user can re-size his profile picture in order to be well displayed in the avatar Icon of his profile.
By loading a picture, the user can now move his mouse to well set the picture at the right place.
The selected media elements appear under the upload block once the upload is complete (figure 5).
A text area (figure 6) is available for the user to post an introduction for his profile or company.
This text can be edited freely. Once done, the user clicks “Save” to validate the changes (figure 7).
User profiles can be associated with dedicated categories (if applicable and set up by the platform admin). This is especially useful for platforms with user search profiles activated.
Users can link categories to their profiles via the dropdown button (figure 8).
Authorized platform administrators create user categories.
User attributes depend on the selected user categories. User attributes provide additional information on the user.
Authorized platform administrators create users' attributes.
The user can set information about his location by filling in the following fields (figure 17).
The identity section allows users to view/edit their identity information:
Type of individual (legal or physical person, cannot be updated)
Company name (if legal person)
Last name
First name
Date of birth
Nationality
Country of Residence (cannot be updated)
Phone number
Billing address
All of the above-listed information is mandatory for compliance reasons. Moreover, this information must be filled in and (automatically) checked by the payment service provider to be able to receive payments (figure 9.1 & Figure 9.2).
The payment details section is mandatory for any user looking to receive payments. Payments cannot effectively be sent over to the user recipient should this information be missing/incorrect(figure 11).
This interface and information required may change according to the implemented PSP and payment regulations.
The user group section allows the user to invite another user onto the platform by clicking “Add a new user” (figure 12) and filling in the pop-up window the invited user’s email and role. An invited user becomes linked to the inviter user’s group.
Authorized platform administrators define roles.
Whenever a user performs a search for a listing or an RFP on the platform, they have the option to enable notifications. This feature alerts them whenever a new listing or RFP that matches their search criteria is created.
When a new alert is created, it becomes accessible for viewing and management in this section.
The Data section gives users control over their platform data. This section is split into two subsections: an offeror section and an asker section.
Users can selectively download/export parts of their user data through “Download your data” (figure 10).
The Settings section allows the user to manage his account’s settings:
If the Request for Proposal (RFP) rendering type is enabled, and either the platform configuration "Switch" is enabled or the user is registered as a vendor when the setting is disabled, selecting this option allows the vendor to receive notifications whenever a newly created RFP matches their profile.
Enabling this option allows the profile to receive quote requests from other users.
The user can indicate several spoken languages to streamline discussions with other users:
The mother tongue (figure 13): is automatically set when the user registers to the platform based on the platform’s language. This can be changed manually.
Spoken language (figure 14): users can set several additional spoken languages by selecting them through the dropdown button. Selected languages will appear as tags that can be easily deleted if needed.
“Password” (figure 15) allows the user to change his platform password.
To do so, the user must enter his old password, then his new password twice in “New password” and in “Verification.”
Users can set their account’s time zone (figure 16). When creating or viewing listings, availabilities are displayed based on the saved timezone (time conversions are automatically managed by the platform).
Vendors can upload PDF files containing its terms and conditions.
Upon uploading and saving a file, customers must review and accept the vendor's Terms and Conditions to proceed with the following requests:
Booking Request
Booking Cancellation
Quote Request
Quote Acceptance
Quote Decline
Quote Cancellation
Bid Acceptance
In each of these scenarios, the vendor's Terms and Conditions will be displayed for review and acceptance.
Users can update their profile information in the user dashboard’s “My profile” section. All the information is editable aside from the profile’s legal status and country of residency.
Users can delete their profile picture through the following path:
Path: Dashboard > My profile > Presentation > Presentation
Clicking the trash icon (figure 18) will delete the profile picture.
To be able to delete a user profile from your platform, the administrator needs to check the following rules:
The user can not be deleted if it has a booking status as “new”
The user can not be deleted if it has a “payment in error” status
The user can not be deleted if it has a pending transaction. Eg: A payout is not complete/done.
Path: Dashboard > My profile > Settings
Clicking the cross in the language label (figure 19) deletes the spoken language.
User can delete their account through:
Path: Dashboard > My profile > Settings
and by clicking “Delete your account” (figure 20). A confirmation message will prompt the user to give final confirmation.
Front:
SBO :
Business rules:
The Backoffice enables the configuration of the platform, management of users / transactions / listings / content, and overall supervision of all activities. It is exclusively reserved to platform ope
How to access the Backoffice
Understanding how to use the different Backoffice interface components
Understanding and displaying KPIs in service multi-vendor eCommerce
Defining, categorizing and managing the listings and its structure
Defining and managing the use of Vouchers
Managing the different transactions involved in service completion ie. bookings, bids, quotes, payments
Defining, categorizing and managing different platform users
Creating user roles and managing their rights as an administrator
Customizing the structure, page content and user communication within your marketplace
Managing technical configurations determining platform user flows
Managing disputes between users as an authorised administrator
Managing external clients (apps) that need access to your platform (via APIs)
Managing service templates available by users during the deposit listing and listing edition processes
Managing the UX & Design in addition to the company information displayed
How to access the Backoffice
Path: Back office
Never share your login information. Users can each have individual credentials.
WHO CAN USE THIS FEATURE?
Operators who possess an active account and appropriate credentials are granted access to all or specific back-office functionalities. Vendors and customers are not authorized to access the back office.
Upon the creation of your Operator account, an official notification email will be dispatched to you. This email will include essential details such as the Back-office URL, providing you with access to the platform.
Changing the URL access string affects all users. You will have to share the new URL with them, without which they will no longer be able to access the back office.
Upon the initiation of the platform, the inaugural user is endowed with the utmost level of permissions, assuming the role of super-administrator by default. This designation is established during the initial setup process. Detailed instructions for configuring the initial user account can be found in the technical documentation.
Spoofing alert: always confirm that the URL you’re viewing corresponds to the URL of your Backoffice login page before entering your credentials.
When accessing the Back office, a login form is displayed:
As a user, you'll find an account creation notification in your email inbox, corresponding to the email address associated with your Back office account. This notification serves as a confirmation of your recent account setup.
When you first log in, you will be prompted to create your own password. This password will be set by you and will be used for future logins.
To recover your password, click on the “Forgot your password ?” (figure 2) link beneath the login form:
Enter your email address to receive an email containing a link to reset your password:
Do not forget to check your spam if you do not see the email in your main inbox.
Password policy: for security purposes a strong password policy is enforced. Password requirements:
Minimum password length: 10 characters
Contain at least:
1 uppercase character (A-Z)
1 lower case character (A-Z)
1 digit (0-9)
1 special character
New password must be different from the previous one
User should not user the first part of his email address
Two-factor authentication (2FA) is a specific type of multi-factor authentication (MFA) that strengthens access security by requiring two methods (also referred to as authentication factors) to verify your identity.
We highly recommend that all Backoffice users activate 2FA authentication
To set up the 2FA for your account, log in into the back office and click on the avatar menu. You will see in the menu the “Two-factor authentication” (figure 4 ).
Once the 2FA is configured you will have 2 steps to login into the back office.
Enter your credentials
Fill in the 2FA 6-digit code generated to be able to login into the back office (figure 6).
You can remove the 2FA authentication on the back office by clicking on the “remove” button (figure 11), in the Two-factor authentication menu.
Please view the Administrator Management page to see how to delete an account.
SBO:
Understanding how to use the different Backoffice interface components
Path: Backoffice
WHO CAN USE THIS FEATURE?
The navigation bar (navbar) is at the top of the page (figure 1)
The navbar is composed of:
The search field (figure 2) is displayed only on pages which offer items that are searchable (listings, bookings and users).
To perform a search, enter your query in the field and hit “Enter” on your keyboard.
The icon will display an alert with the number of unread emails (if any): (figure 3).
The user’s name and avatar (figure 4) are displayed on the right top corner of the page. They cannot be changed.
Clicking anywhere in that zone displays a dropdown menu (figure 5). It allows the user to:
Change their password
Change the interface language
Log out
The menu (figure 6) is located on the left-hand side of the page. It enables navigation throughout the back office interface.
Sub-menus are grouped into a main-menus. Sub-menus are accessible by clicking on the main menu name, or by clicking the arrow next to the main menu. This will expand the sub-menus.
The “minimize” button will collapse the left-hand sidebar menu, only showing each menu section icon.
By clicking on an icon, the menu expands back to its full presentation.
The button “See my platform” will redirect the user to the platform’s front office.
The main body of the page will display different items depending on the information you are viewing.
The filters feature helps filter and sort items through different filtering and sorting options.
Date Range
With the calendar filter feature, the items will be displayed within the selected date range (figure 7).
Fill in each date with the date picker. Click on a date field to display a selection calendar (figure 7.1). This calendar can be navigated with the left and right arrows. The chosen day will be highlighted with a blue circle.
This action should be performed for both the start date and end date.
Once the time and date are filled, click “Filter” (figure 7.2), and the results will be filtered following the selected values.
Sort
It is possible to sort items by:
The ‘Smart’ criteria will list the most relevant items for the admin.
Listings are displayed in the order defined below :
Listings who's status is "in Review", from the newest listing with that status to the oldest
All other listings except those with the status "Invalidated", from most recently updated to oldest
Listings who's status is "Invalidated", from most recently invalidated to oldest
Bookings are displayed in the order defined below :
Bookings who's start or end date is in the future, from nearest start date (which could be in the past) to farthest start date
All other bookings, from nearest start date to today to oldest start date
The ‘Creation date’ criteria will show the last created items to the latest ones.
The ‘Update date’ criteria will show the last listing items to the oldest ones.
The “Exports” button (figure 7.3), exports the listing data from the back office to your computer.
By clicking the button, a list with file extensions will appear. Choose the format you want to use and it will automatically be saved into your computer. That file can be directly reviewed from your local environment.
The export feature will save the filter choice.
There are two display modes available on the back office. Modify the display with the switch button (figure 8)
Click the left side of the button to display the card mode (figure 8.1). Click the right side of the button to display the list mode (figure 8.2).
The result per page button (figure 9) always is at the bottom of a page. This dropdown button allows choosing the number of items displayed per page. Choose between, 15, 50, or 100 items displayed on the current page.
The interface structure cannot be updated, except for the platform logo.
Deletion of the interface structure isn’t possible.
Backoffice:
As an offeror, payments are received once the service is done. A service is considered done depending on the platform’s configuration and parameters. However, by default, a payment is sent manually by authorized administrators through their dashboard. To learn more about how payments are sent by administrators, please refer to .
For enhanced security measures, SCND employs a dynamically generated URL for accessing the back office (e.g., yourdomain.com/randomlygeneratedstring). This URL is established during the initial setup of the platform by configuring the "second_admin_alias" parameter. Subsequently, administrators can modify this string via the "Parameters" interface within the Backoffice:
After the initial setup, access to the back office is granted solely to the Super-administrator. Acting as the primary account holder, the Super-administrator assumes the responsibility of and extending for collaboration within the back office environment.
The number of password requests is limited. The rate limit can be viewed and changed through the interface.
Password strength policy can be adjusted through the interface.
You will need to install an on your smartphone to follow this procedure (ex. Google Authenticator).
Scan the QR-code with your (not just a QR code scanner), this will generate a 6-digits code which will be displayed on your device. Enter the code in the “6-digit code” field and click “Add” (figure 5) to enable the two-factor authentication for your account:
Depending on the , users will view different sections of this interface.
Displays the platform logo which can be changed through the (by default displays the Second logo).
The email icon links to the general platform inbox. More on that here:
To update the logo platform please have a look at the following article:


Managing Mediation between users as an authorised administrator
Path: SBO > Mediation
The mediation feature, sets up a system where users and the super administrator/administrator can manage a disagreement situation from the platform with automated processes.
WHO CAN USE THIS FEATURE?
Logged super-administrators or administrators
Askers or offerors can initiate this process from their booking summary.
Each opened mediation block displays:
The mediation status
The booking related to the mediation
The booking asker
The booking offeror
The total amount of the booking
To see the mediation details, click the “pen” icon when hovering your mouse in the mediation block.
Each mediation detail page displays:
mediation ID (figure 1)
The message from the user who opened the mediation (figure 2)
An overview card (figure 3) providing a summary of the refund made for this mediation (if done):
Asker and asker name and amount
Offeror and offeror name and asker name
Platform fees
Authorized administrators can manage refunds in case of a mediation (figure 4).
Authorized administrators can adjust the refund amounts by either:
Sliding the buttons from left to right automatically updates the refund amount for the other user.
Enter numerical values in the numerical fields to automatically update the refund amount for the other user.
The commission fields are prefilled with the default values applied to the concerned users.
Click “save changes” (figure 5) to save the refund amounts. At this stage, the refunds are not done yet.
Clicking “Resolve mediation” (figure 6) to apply the refund and solve the mediation (figure 7).
Asker refunds are automatically done and listed in the “Payments” section (figure 8) accessible as follows:
Path: SBO > Bookings > Payments > Payout
However, offeror refunds need to be manually executed by authorized administrators (figure 9).
The payout process is described in the following documentation: Payments management
Refunds executed through mediation always withdraw the funds from the user's wallet the platform administrator determined to be in debt.
The mediation must be done directly through the SBO. We do not advise doing a transaction to solve a mediation outside of the platform as it can not be recognized by the system.
Mediations cannot be deleted.
SBO :
Dashboard:
Bundle configuration:
Business rules:
Attributes are a good way to help users to have more information about the listings and also to search with more accuracy by using filters on the search result page.
Path: SBO > Listings > Attributes
Attributes provide supplementary information for each listing and are dynamically displayed based on the selected category of the listing. Each attribute is accompanied by a self-explanatory tooltip for user clarity.
Attributes are organized into attribute groups, which cluster attributes by themes to enhance their comprehensibility and visibility. These attributes do not follow a hierarchical structure and can be removed at any time, even if they are associated with listings, as they serve as additional information rather than core data.
Within the user interface, attributes can be configured with various input types, including multi-selection, checkboxes, date pickers, numeric fields, and free text fields.
WHO CAN USE THIS FEATURE?
Attributes and group attributes are created by a super-administrator/administrator and are used by the offerer to enrich the information of his listing.
A group of attributes can have zero to several attributes.
To create an attribute group, click ‘Add a group of attributes’ (figure 1) at the top of the page.
Fill the field “Name” to name the attribute group and select the categories related to the attribute group (figure 2).
If no category is selected, the attribute group will be linked to all categories.
To save the changes, click ‘Apply’.
Once there are attribute groups, you can add attributes.
Click ‘Add an attribute’ (figure 3) and a form will appear (figure 4).
Let’s see the information that needs to be filled in to create an attribute:
Switch buttons “Mandatory attribute” and “Visible at listing deposit” at the top of the form allows to make this attribute mandatory or make it visible for offerers on the deposit listing page. Click on the switch button to activate the feature.
A ‘Mandatory attribute’ is always ‘Visible at listing deposit’, but a ‘Visible at listing deposit’ is not always mandatory.
Fill in the “attribute-name”. This field is mandatory to create an attribute.
The “attribute tooltip” gives a brief description of the attribute.
The “attribute group” is the attribute group you select for this attribute. You can choose it with the dropdown list.
The “type” is the attribute type you choose for these attributes. This will allow the offerers to enter information.
Checkbox: Offerers have to tick the checkbox if this attribute matches their listing.
Number: Offerers have to enter a number value
Date: Offerers have to enter a date value
Free text: Offerers can put a text value
Select list: Offerers can select the right information from a given list.
The checkbox “Add to the search engine”, allows you to have filters on the search result page of your platform.
To save your information you can click the button “Apply” or cancel with the button “Cancel”.
You can see groups of attributes with the attributes that compose them.
For each group attribute card (figure 5), you can see the group name attribute and attributes associated.
Each attribute block (figure 6) is composed of:
The name of the attribute
The number of listings using this attribute
Edit a group attribute by clicking “edit” (figure 7) of the group attribute.
Then manage the group name, and also the category of the group attribute it will be (figure 8).
Edit an attribute by clicking “edit” of the attribute card (figure 9).
The edit button will open a form to edit information about it. The form is the same as “create an attribute”.
Delete a group attribute by clicking the trash icon (figure 10).
Deleting a group attribute will also remove the attributes related to this group.
To delete an attribute, click the trash icon in front of the attribute to delete(Figure 11).
SBO:
Front:
Dashboard:
Enables the administrator to view platform bookings, conduct searches, and export data.
Path: SBO > Services > Bookings
The bookings are the services given when an agreement is made between the asker and the offerer to perform the desired service.
The booking allows all parties to agree on the date and if possible the place. It is a written record of this agreement. All of this is done via the platform.
WHO CAN USE THIS FEATURE?
This is for logged super-administrators and administrators with good roles/permissions.
Only the platform users (askers/offerers) can make a booking. Also, a booking is created when an asker books an offerer’s commoditized services.
On the SBO, super-administrators and administrators can see all the bookings made on the platform.
Each booking block (figure 1) is composed of:
The booking start time and date
The booking end time and date
The asker
The booking status
The offeror
The listing title
The fees: the fees the platform makes through the booking system.
Platform fees = total asker fees + offerer fees
The booking price = (time unit number * price) + asker fees
Booking ID
When hovering your mouse on a booking block or selecting one of the bookings, a sidebar menu will appear #1. Click the folder icon to see the booking details.
BackOfficeThe keyword search field (figure 2) is displayed at the very top of the interface, next to the BackOffice logo.
To perform a search, enter your query in the field and hit “Enter” on your keyboard.
The filters feature helps filter and sort items through different filtering and sorting options.
Date Range
You can select the start and end dates to filter listings within that range (figure 3).
Once the time and date are filled, click “Filter” (figure 3), and the results will be filtered following the selected values.
The smart sorting feature available on the booking dashboard enhances the operator's efficiency in managing bookings on the platform. It prioritizes the display of relevant bookings based on specific principles outlined below.
Future Bookings Priority:
If a booking's start or end time occurs in the future, it will be displayed first.
First Incoming Bookings:
Among bookings with future start or end times, the system prioritizes displaying the first incoming bookings.
The first visible information on the booking details interface is the booking ID (figure 2).
The table of content (figure 3) displays important parts of information about a booking such as the Status or payment details...
There is a booking overview card (figure 4).
This card has the following information:
The asker who made the booking
The offeror who did the booking
The listing title that has been booked
The price
The total amount = the price of the booking + the asker fees
The total fees = the asker fees + the offeror fees
The booking start time and date
The booking end time and date
The total duration booked by the asker
The Cancellation policy applied to the booking
Cancellation policies
Flexible: per default (it can be changed depending on the platform parameters) :
If the asker cancels more than 1 day(s) before the start of the booking, he is reimbursed 100 % of the amount paid
If the asker cancels less than 1 day(s) before the start of the booking, he is reimbursed 50 % of the amount paid
Strict: per default (it can be changed depending on the platform parameters) :
If the asker cancels more than 1 day(s) before the start of the booking, he is reimbursed 50 % of the amount paid
If the asker cancels less than 1 day(s) before the start of the booking, he is reimbursed 0 % of the amount paid
The status card (figure 5) allows you to follow the step of the payment procedure.
The statuses are displayed from the oldest to the most recent.
Status:
Draft: The asker entered all the information but did not go through with the payment until the end.
Error: Payment error
Pending: Waiting for the offeror's answer about the booking request (accept / decline / or let expiration)
Cancelled by asker: Cancelled by asker (before or after acceptation)
Paid: Accepted by the offerer, and the asker paid the booking (pay in done)
Expired: There has been no answer from the offerer and the booking has expired
Accepted: The booking is accepted by the offerer.
Accepted status is used on a platform without payment OR with bank wire payments.
A service card is used to summarize the booked services (figure 6).
The services card gives visual information about:
The title of the listing/or the services selected during the booking
The unit type chosen can be
per hour,
per day,
per service (optional according to the activated rendering type)
per session (optional according to the activated rendering type)
The quantity booked
The price per time unit
The duration per time unit (optional according to the activated rendering type)
The discount applied
The total price = Price per unit * Quantity
The platform services card (figure 7) shows in detail the fees charged by the platform
Asker fees: the asker paid fees for his booking
Offerer fees: the offerer paid also some fees for using the platform
Total amount = Total principal services + asker fees
An administrator can see the payment detail (figure 8 ) of a booking.
These pieces of information may vary according to the PSP chosen
The table of content (figure 9) in the payment details card allows the super-administrator or administrator to navigate through PSP information.
It is up to the offerer to manage his bookings. Super administrators/administrators cannot update a booking.
Super administrators/administrators cannot delete a booking.
Front:
Booking requests
Dashboard:
Profile page changes due to the user search bundle being enabled.
Path: Dashboard > My profile
User dashboard page in which users can manage their profile information.
WHO CAN USE THIS FEATURE?
Switch users: All logged-in users
Non-Switch users: All logged-in offerors.
Non-Switch users: All logged-in askers.
Please refer to the following documentation: User profile dashboard (All bundles)
Users can choose whether or not their profile should appear in user searches.
Path: Dashboard > My profile > Presentation
Tick “Show me in the directory” available in the top right corner of the user profile dashboard page (figure 1) to appear in search results.
Please refer to the following documentation: User categories
Please refer to the following documentation: User attributes
Please refer to the following documentation: Update a profile
Please refer to the following documentation: Delete a profile
SBO:
Front:
Dashboard:
Business rules:
Understanding and displaying KPIs in service multi-vendor eCommerce
Path: SBO
The homepage works as a dashboard where the operator can observe and compute the KPIs of the platform.
The Key Performance Indicator is a quantifiable measure of performance over time for a specific objective. KPIs provide targets for teams to shoot for, milestones to gauge progress, and insights that help the organization make better decisions.
WHO CAN USE THIS FEATURE?
Logged super-administrators and administrators, can use this feature.
Second displays a set of KPIs that are specific to service marketplaces and based on industry leaders reports. These exhaustive list of KPIs are always displayed on the interface, and cannot be altered. If needed, additional KPIs can be monitored outside the platform.
On the homepage, we can see several KPI blocks (figure 1). Each of them is composed of :
a value (based on the date range selected in filters)
a differential (comparison between the current value based on the date range selected in the filters and the value for the previous date range)
a title.
A chart can be displayed to observe the progression of a given KPI. To do so, click the dedicated icon (figure 1) within the KPI block, and a pop-up (figure 2) will appear.
The “TOPS” section (figure 3) is a series of selected KPIs about the top 10 values based on a focused goal.
Every time the SBO Homepage is accessed, the default date range is applied to display KPIs until a specific date range is specified.
The KPI displayed with these settings will be valued from the first recorded data until today.
With the filter block (figure 4), the user can choose to see KPIs and top lists for:
The current month with the button “This month” (figure 4.1)
Took the first day of the month and the actual day you are in the month.
i.e: Today we are the 13 September 2021, the dates will be: 01 September 2021 to 13 September 2021.
The Current week with the button “This week” (figure 4.1)
Took the first day of the current week until the current day of the week.
i.e It is from Monday to the current day of the week.
The Current day with the button “Today” (figure 4.1)
With the date time picker (figure 4.2), the KPIs can be filtered by a date range. The user has to fill in the starting date and the ending date for the desired period.
Apply the dates by clicking “Show” (figure 4.2).
Specific day
User case: KPIs displayed are based on the data saved for the chosen day.
Date Range
User case: KPIs displayed are based on the data saved during the chosen date range.
Provide platform’s progress over time
Each KPI block can display a differential value (figure 5).
The differential only concerns the classic KPI blocks and not the “Top list” blocks.
The differential is always based on the previous date range in the date filters.
There are two ways to display differential values:
Based on the same start and end date in the date filters.
Based on a date range with different start and end date
User case: The super-administrator or administrator, selects a single day in the date filter.
The differential value display will be based on the selected date, it will compare the T date and T-1 date. The differential will be displayed in percent (or value when it is impossible to display a percent).
User case: The super-administrator or administrator, selects a date range in the date filter.
The differential value display will be based on the selected date range. It will compare the values from the date range to the previous date range based according to the filter’s entries.
The KPIs can be displayed according to one or more listings thanks to the listing filter (figure 6)
By clicking on it, it will display a list of all listings of the platform (figure 7), you can select one or multiple listings in the filter.
The KPI value displayed, the graphics and the differentials are based on the value saved for the selected listing(s).
If there is no chosen listing, KPI, graphics, and differentials are based on all listings.
The sum of all collected fees from askers
The sum of all collected fees from offerers
This is the usually called “GMV” of the platform. It is the sum of all bookings made including the collected fees.
Number of published listing
Only the listing with the “Published” status will be counted
The number of times a listing details page was viewed.
By default, this KPI includes all views of all listings but can be modified by selecting one or more listings through the listing filter.
Number of users registrations
How long does a booking last on average (in the current time unit)
Total number of bookings made by the platform
All booking statuses are included
Total number of accepted bookings
Total number of declined bookings
Total number of expired bookings
Total number of cancelled bookings
A booking cancelled is a booking request pending OR a booking paid that is cancelled by the asker
Number of booking requests
How much of the user base has at least one published listing.
The top 10 offerors who let booking requests expire
The top 10 offerors who refused the most booking requests
The top 10 offerors who accepted the most booking requests
The 10 most searched locations from the front-end search bar
The 10 categories that were most searched by users through the front-end search bar
The values of KPIs are automatically updated. When an action is performed on the platform the values are promptly updated.
No manual update is required and therefore there is no option to do so.
No related resources
Managing and monitoring the reviews made by users
Path: Dashboard > Reviews
A review is a combination of both written and numbered feedback evaluating the service’s quality and provision once done.
Reviews are only available once the booking is over. A booking is considered over X days after the booking start date/end date (depending on the platform’s configuration)
WHO CAN USE THIS FEATURE?
Logged-in users who have an accepted booking.
Offerors can review askers
Askers review the service (hence the listing, not the offeror).
Users receive a notification to leave a review via an automated e-mail.
In the user dashboard, an alert banner (figure 1) is visible and prompts the user to leave a review.
By clicking “Review now” (figure 2) in the alert banner, a pop-up window will open.
Through the pop-up window, the user can:
Rate the booking through stars (figure 3). Stars go from 1 star = bad to 5 stars = excellent.
Leave an optional comment (figure 4)
Once satisfied with the review, the user then clicks the “Review” button (figure 5).
Reviews are taken into account in the platform’s search algorithm, constantly updating the search results as reviews are published.
The user dashboard review section is split into two views:
Reviews made
Reviews received
Both views are identical:
The main display starts with the alert banners (if available) enticing the user to leave reviews on finalized bookings (figure 5).
Right below, the review blocks are displayed. Depending on the selected view, the review blocks display made or received reviews.
Each review block (figure 6) displays:
The name and picture of the user who made or who received the review
The rating in stars given or received
The date and time the review has been made or received
The booking ID related to the review
The “View booking” button redirects the user to the detailed booking view
The comment was given or received
Users cannot update given or received reviews, but authorized super-administrators can update them through the SBO for moderation purposes.
Users cannot delete given or received reviews, but authorized super-administrators can delete them through the SBO for moderation purposes.
SBO:
Business rules:
‘Categories’ is used to broadly group the listings of your platform.
Path: SBO > Listings > Categories
A category groups together the listings/services according to their purposes.
What is it used for?
It is used to classify services into a category.
They can be classified in a hierarchy
Categorizing services allows the platform users to easily find their way around the platform.
Each category will have a dedicated search result page. Its content can be optimized via the fields related to that category in the SBO.
WHO CAN USE THIS FEATURE?
It is up to the super-administrators/administrators to create the categories and subcategories, the offerers will just have to choose among them.
Super-administrators and administrators can create categories.
You can add a new category by clicking ‘Add a category’ (figure 1). It will open a modal that can be filled.
Let’s have a look at the information needed for a category (figure 2).
The tooltip offers a description of each field.
The name: This is the name given to a category that will be seen by every user of the platform.
Only the name and types are mandatory fields.
The slug: The slug is a word that will be used in the URL.
If it is not set, it will automatically be based on the category name.
The header Text: This is a short description of the category. It will appear on the category page above listings (search result).
The footer Title: This is the title before the footer text at the bottom of the category page (search result)
The footer Text: This is the description of the category that will appear at the end of the category page (search result).
The meta-Title: This is important for the platform’s SEO. The meta-title will be displayed on the tab of your web browser. It gives an idea of what category you are in, and it will be used in the Search Engines Results Pages (example: Google, Bing,…).
The meta-Description: It goes hand in hand with the meta-title. Also important for the platform’s SEO. It is the description of the category content displayed by the page result of a web browser.
The parent Category: It helps with the hierarchy of the categories. Select the parent category by clicking on the arrow, then a list of the existing categories will appear. It will then be possible to choose the place of a category on the category tree.
Types: Specify the rendering type for the category. For example, if the admin selects a time-based rendering, only those listings can be included in the category's group
Types section are not requested when displaying RFP categories.
When a child category is added under a parent category, it is mandatory for the child category to include at least one rendering type that has been selected in the parent category.
If a category doesn’t have a parent, only select ‘Categories’.
When the necessary fields are populated, click on “Apply” (figure 2) to save the new category, or click “cancel” (figure 2) to discard the modifications.
All the categories of a platform are visible through the categories dashboard.
Categories can have hierarchies. There is a main category, called the parent category, that can contain sub-categories. Categories can be managed according to the needs of the platform.
Here are two examples :
One parent category with two sub-categories (figure 3).
Category1 = Parent category
category 1_1 = sub-category one
category 1_2 = sub-category two
Another example can be (figure 4): One parent category has a sub-category that also has a sub-category.
Category 2 = Parent category
Category 2_1 = sub-category
Category 2_1_1 = sub-category of the sub-category
Category 2_2
For each category block, you can see:
The name of the category
The number of listing related to the category. It may help understand which categories are the most used over the platform.
To edit a category, click on the button “edit” in a category block (figure 5).
The fields are the same as “create a category” seen earlier in this article.
The categories' hierarchy is manageable. It is based on a drag-and-drop functionality (figure 6):
Identify the category you want to change position in the category tree.
Using the drag-and-drop icon on the left side of the category block, click and hold the category while moving it to the desired position. It can be upwards, downwards, to the right, or left.
A category can be deleted by clicking on the trash icon located on the right side of the category block (figure 7).
When clicking on it, a confirmation message will appear.
When a category is still used by at least one listing, the trach icon will have a light grey color.
You can not delete a category if there are listings associated.
Tips: Modify the categories about the related listings to be able to delete the category.
SBO:
Front:
Managing listings on your platform
Path: Backoffice > Listings > Listings
A listing is a container that, depending on your configuration, will display:
The services offered by a vendor
OR
A customer request for services (if the RFP bundle is activated)
Listings are displayed on the front end. They are also the items displayed on the search results page.
Core concept: in the back office listings are displayed through 2 views:
List view: displays listings in a list that can be searched, sorted, and exported
Detailed view: displays the detailed information of 1 listing. Also gives access to additional features for each listing individually.
Only vendors or customers can create listings. This is done through the frontend of the platform.
You can read about adding listings here: Listing deposit pages
When clicking on the “Listings” link on the sidebar menu you arrive on the list view page. This page lists all the listings of the platform.
Each item in the list (figure 1) is composed of:
A picture
The listing title
The location (City)
The listing status
Categories the listing is associated to
Update date
Number of times this listing has been booked, and a link to those bookings
The vendor associated to the listing (with a link to their user page)
The default price as set by the vendor (displayed in the default currency of your platform)
The UID of the listing
The keyword search field (figure 4) is displayed at the very top of the interface, next to the Back Office logo.
To perform a search, enter your query in the field and hit “Enter” on your keyboard.
The filters feature helps filter and sort items through different filtering and sorting options.
Date range
You can select start and end date to filter listings within that range (figure 10).
Once the time and date are filled, click “Filter” (figure 10.2), and the results will be filtered following the selected values.
You can choose among different sorting policies:
The ‘Smart’ policy displays the most relevant items for operators. Listings are displayed in the order defined below :
First: listings who’s status is "In Review", from the newest to the oldest listings in that status.
Second: all other listings except those with the status "Invalidated", from the most recently updated to the oldest.
Third: listings with the “Invalidated” status
The ‘Creation date’ policy will sort listings from the most recently created listings to the oldest ones..
The ‘Update date’ policy will sort listings from the most recently updated listings to the oldest ones.
This section describes a file export (CSV). You can alternatively use the API to export your data.
The “Exports” button (figure 11), allows you to download the data associated with your current search results. To download all items, remove and search criteria.
By clicking on the “Exports” dropdown, a list with file extensions will appear. Choose the format you want to use and it will automatically be saved into your computer. That file can be directly reviewed from your local environment.
Be mindful of data privacy requirements and regulations. Do not download user data unless authorized to do so, and only if absolutely necessary. Treat exported data with the highest regard for security and delete any exported files after use.
Click on the “eye” icon to open the listing as it is viewed by customers and vendors. A new tab will open.
From the Backoffice, you can click the “pen” icon to access more information about a listing and start editing it.
First, we see the presentation card (figure 2) to have an overview of the listing.
On this card, we see the following information :
The listing title (depending on the language)
The listing description (depending on the language)
The listing rules and conditions (depending on the language)
If your platform offers multiple languages, you can click on the flag at the top right of the presentation card to display the content in other languages.
Category card
The category card (figure 3) displays the category(s) that the listing is associated with.
Default Price card
The default price card (figure 4) displays the default price that was set by the vendor. Keep in mind that many other price rules may have been configured, meaning that this is not necessarily the price paid by customers.
The price card displays:
Default Price: this is the public price that is displayed for this listing. If no other rules have been configured, this is the price that customers will pay per unit.
Policy & Duration: vendor defined minimum and maximum orderable quantities per booking
Cancellation: shows the cancellation policy enabled for this listing
The location card
The location card (figure 5) displays the location associated with the listing.
The location card displays the following fields:
Number
Route (street name)
City
Zip
Additional location information
Country
These values determine the geolocation displayed on the map.
Side card information
The side card lists (figure 6) the following information:
UID: The unique ID of the listing
Offeror: the vendor who created the listing
Booking: the number of bookings made for this listing
Creation date: The listing’s creation date
Update date: The listing’s updated date
Average rating: the average rating of the listing
Reviews: the number of reviews the listing has
Each underlined value is clickable and redirects to the referenced items:
By clicking the user’s name, it will redirect to the user’s details page in the back office
By clicking the Booking or Review number, it will redirect to the related list page, with only the related listings or reviews.
The impersonate feature enables operators with the required permissions to access a customer or vendor dashboard and account as though they were logged in with that user’s account. This feature enables an operator to view all of the personified user's information and to carry out all actions to which he is entitled.
This feature is useful in many contexts:
to view all of a vendor’s configurations
to assist users, potentially even by carrying out actions in their stead through their account
To impersonate a user, click on the spy icon:
Operators can update specific information for listings through the detailed view interface. Other information of the listing can only be changed through the vendor or customer dashboards by using the “impersonate” feature.
4 statuses are available for listings:
Published: the listing is published on the platform. Authorized vendors and customers can view it.
Hidden: only the vendor that created the listing can view it.
Invalidated: the listing has been declared invalid by the operator. The vendor cannot change this status once it is acquired.
In review: the listing is under review by an operator. Only operators and the vendor that created can view it.
A platform-wide policy can be defined to set the initial listing status once it has been created by a vendor. By default, listings are “Published” as soon as they are created, however, you can set the default status to “In review” through the Configurations interface.
The status of a listing can be updated in two ways.
By using the dropdown of a listing card (figure 7). Clicking on it will reveal the list of available statuses. Clicking a status will immediately change the current listing status.
From the detailed view of a listing, on the right hand side, a card with three dropdown buttons (figure 8) is displayed. The first dropdown button also allows operators to change the listing status.
A certified listing displays a specific icon on the front end and benefits from a boost in search engine rankings. The technical documentation describes the ponderation of the certified status on listing rankings in search results.
Go to the listing’s detailed view to set the certified status (figure 8).
The platform rating is a non-disclosed rating that operators can attach to a listing. The rating score will have an impact on the listing’s ranking in search results. A ranking above “5” will boost the listing in the search results, and a rating below “5” will make the listing drop in rankings. The technical documentation describes the ponderation of this setting on search results.
Go to the listing’s detailed view to set the rating (figure 8).
To delete a listing, go to the detailed view of a listing and click on “Delete this listing” (figure 9):
Front:
Dashboard:
Managing quotes on your platform from your SBO
Path: SBO > Services > Quotes
Allow askers to request quotes directly from offerors for uncommoditized services.
WHO CAN USE THIS FEATURE?
Logged in super-administrators and administrators
Super-admin can see all quotes made on a platform.
Each quote block (figure 1) displays:
The quote date: start and end time and date
The asker name and its profile
The quote status
The offeror and his profile
The booking’s listing title
The fees applied by the platform
The price
The quote ID
To see the quote details, click on the pen icon when hovering over the quote block.
Each quote detail page displays:
Quote ID (figure 2).
Page table of content (figure 3)
Quote overview card (figure 4) shows:
The asker who made the quote.
The offeror for whom the quotation is intended.
The quote title
The price:
The total amount = the price of the quote.
The total fees.
The booking dates:
The start and end day and time
The status card (figure 5) shows the status history. Statuses are displayed from the oldest to the most recent update.
PSP information (figure 6). Super-administrators can follow payment steps.
As a super-administrator or administrator, you cannot update a quote, this action only is for users on the dashboard side.
As a super-administrator or administrator, you cannot delete a quote, this action is for users on the dashboard side.
Front:
Dashboard:
Bundle configuration:
Business rules:
Defining, categorising and managing different platform users
Managing vendors & customers on the platform
‘User Categories’ help group the users of your platform in searchable verticals
User attributes help user searches to be more accurate by using filters on the user search results page
Manage a message in the threads created on your platform.
Allows you to find all the messages sent via the platform "Contact" page
Defining, categorising and managing the listings and its structure
Managing listings on your platform
‘Categories’ is used to broadly group the listings of your platform.
Attributes are a good way to help users :
Allows you to find all the messages sent via the platform "Contact" page
Path: SBO > Users > Contact
The “Contact” section is about messages sent by users from the “Contact” page on the front side.
These messages can be sent from logged and unlogged users.
For each message sent from the contact page, a email is sent to the administrator email (platform configuration).
WHO CAN USE THIS FEATURE?
Logged super-administrator and administrator
A super-administrator and administrator can not create a contact message, this is only for the users of a platform.
Super-administrators and administrators can have access to the inbox, by clicking the letter icon at the top right corner of the screen. Super-administrators and administrators can see a notification value on this icon when there are unread messages (figure 1)
However, super-administrators and administrators can also access the Inbox by clicking “Contact” on the left-hand side menu (figure 2)
Super-administrators and administrators can see all contact messages sent on a platform. A contact message item is created for each message sent (figure 3).
Each item is composed of:
The subject of the message
“From:” is the Sender’s full name
The sender's email address
Time and date of the sent message
The blue dot (figure 3) next to the subject message indicates that the message is unread.
To see the details of the message, click the folder icon that will appear when you hover your mouse on the contact item.
Here, super-administrators and administrators can see the message details, organized into several cards.
The message info card (figure 4) gives the super-administrator and administrator the full name and email of the user who reaches out.
By clicking the e-mail, it will automatically open a new email with that contact email address as the recipient.
If the full name is underlined and highlighted in blue, clicking it will redirect you to the user’s details page in the SBO.
The subject card (figure 5) will display the subject of the contact message.
The customer message card (figure 6) allows the super-administrator and administrator to see in detail the message sent by the user.
they can also see the time and date the message was sent and the time zone.
Super-administrators and administrators can not update a contact message. They can only read it or delete it.
To answer it they have to write an email with their mailing tool.
To delete a contact message, super-administrators and administrators can only do it by going through one path:
Path: SBO > Users > Contact > Contact details > Delete
Click the pen feature from a contact message item. It will redirect you to the contact message details page. Then click “Delete” (figure 7) on the side card.
By clicking it, a confirmation message will appear (figure 8). Click apply to delete or click cancel.
Front:
The Plaroftm subscription at SCND enables users to enroll in a plan that grants access to regulated features.
To activate this feature you must:
Once these steps are completed, the administrator will gain access to the SBO with the following functionalities:
User Categories help group the users of your platform in searchable verticals
Path: SBO > Users > Categories
User categories are similar to listing categories.
User category groups together users according to specific criteria.
What is it used for?
It is used to classify users into a searchable category.
Categorizing users allows other users to find relevant profiles through the platform.
WHO CAN USE THIS FEATURE?
Authorized administrators can use the user categories management tool.
An authorized administrator can create user categories through the SBO’s Category sub-menu available in the User menu.
Super-administrator and administrators can add a new user category by clicking ‘Add a category’ (figure 1).
A pop-up opens and prompts the super-administrator or administrators to fill out the following information (figure 2).
A tooltip is available for each field. The tooltip’s content can be edited by authorized administrators.
Name: The category’s name
Only the category name is mandatory
Slug: Set of words that will make up the search’s URL link. For SEO purposes.
A slug is automatically generated by default based on the category’s name.
Header Text: Short text describing the category. It is displayed at the top of the user search results when a category is selected.
Footer Title: Title before the footer text at the bottom of the user search results when a category is selected.
Footer Text: Category description displayed at the bottom of the user search results when a category is selected.
Meta-Title: Useful for SEO purposes, the meta-title is the browser tab’s title.
Meta-Description: It goes hand in hand with the meta-title. Also useful for SEO purposes.
Parent Category: Defines the category’s hierarchy level.
Click “Apply” (figure 2) to save the new user category.
The user categories dashboard allows authorized administrators to view all user categories available on the platform.
User categories can have hierarchies. The main category, called a parent category, can contain multiple sub-categories. Each sub-category can also contain multiple sub-sub-categories, etc... Here are a few examples of hierarchies:
One parent category with two sub-categories (figure 3)
Category1 = Parent category
category 1_1 = sub-category one
category 1_2 = sub-category two
One parent category has a sub-category that has a sub-sub-category (figure 4)
Category 2 = Parent category
Category 2_1 = sub-category
Category 2_1_1 = sub-category of the sub-category
Category 2_2
Each category block displays:
The category name
The number of user-profiles related to this category.
Edit a user category by clicking “edit” in a user category block (figure 5).
The editable information is the same as the information required for the “create a category” process described above.
Manage user category hierarchies through drag and drop (figure 6):
Select the user category you want to manage
Drag and drop the icon located at the left border of the User category block
Drag and drop motion can be upwards, downwards (to change the order), to the right, or to the left (to change the level).
Delete a user category by clicking the trash icon in the category block (figure 7).
A confirmation message will appear.
You cannot delete a category if there are users associated with the category.
Tip: Remove the user to be deleted from the category.
SBO:
Dashboard:
Manage a message in the threads created on your platform.
Path: SBO > Users > Messages
All messages sent between users generate a thread.
A thread allows the interlocutors to follow all the messages in the same interface (Dashboard side)
There are 3 types of thread :
Booking threads (associated with a provided service)
Simple threads (associated or not with a listing)
A thread is created for each booking request. The offeror can accept the request directly, or discuss it with the asker to decide whether to accept or refuse a request. If a message is sent during the service request, OR when the service is pending/in progress, it creates threads associated with the provided service.
A thread without a booking is created when a message is sent to a user through the listing page or the profile page. It does not lead directly to a booking because the user has not yet made a service request. There is a difference between a thread created from a listing page and a thread created from the user profile page :
If the thread is created from a listing page, the users will see a "Make a booking request" button at the top of the thread that will take them to the listing.
If the thread is created from the profile page, there is no link to the listing page, because there was no linked listing at the thread creation.
WHO CAN USE THIS FEATURE?
Logged super-administrator or administrator.
A super-administrators or administrators can not create messages on the SBO.
The messages are created by users when they contact each other. Please have a look at the documentation about messages management (Front and Dashboard side).
Super-administrators or administrators can see all threads created between users on the platform. For each thread, an item is created in the SBO (figure 1).
Each thread block is composed of:
The content of the last message sent between users
The message type:
“simple”: Message sent is for information.
These threads are created by sending a message to a user from his profile page or his listing page.
“booking”: Messages sent is linked to a booking (provided service).
These threads are created thread's first message
Who received the first message of the thread
The pictures of the two users associated with the thread
In the message card (figure 4), super-administrators or administrators can see all messages sent in the thread.
Each message block display different pieces of information:
The profile picture of the user who sent the message
“From”: it is the user who sent the message
The message content
The date and hour of the sent message.
To edit a message in a thread, super-administrators or administrators have to click the “pen” icon (from the thread list page). It will redirect them to the thread details page.
For each message block, super-administrators or administrators have an “edit” button (figure 5) at the bottom right. They can click it to modify the message.
Once it is done, click “ok” (figure 6) to save the modifications.
A super-administrator or administrator can not delete any threads on your platform.
Front:
Dashboard:
Managing vendors & customers on the platform
Path: Backoffice > Users > Users
Your platform can be configured to segregate Vendors and Customers (non-switch platform), or to allow users to be both Vendors and Customers at the same time (switch platform).
Core concept: in the back office, users are displayed through 2 views:
List view: displays users in a list which can be searched, sorted and exported
Detailed view: displays the detailed information of 1 user. Also gives access to additional features for each user individually.
When clicking on the “Users” link on the sidebar menu you arrive on the list view page. This page lists all the users of the platform.
Both Vendors and Customers are displayed by default in the list. Filtering options enable operators to display only vendors or buyers.
Each item in the list (figure 1) is composed of:
User picture
User full name
User email
User phone number
User preferred language
User timezone
Fees:
Standard fees: indicates that the user has the standard fees applied to him
Customized fees: indicates that specific fees have been configured for this user
Status:
Live: the user can use the platform
Invalidated: the user profile is suspended from the platform. The user can no longer log in.
In review: the user may log in to the platform, but his profile cannot be viewed by other users and he cannot make bookings nor contact other users.
User account creation date
The number of bookings made by the user:
Asker bookings = bookings made as a customer
Offerer bookings= bookings provided as a vendor
Number of listings associated to this user (click to view list)
User UID
The keyword search field (figure 2) is displayed at the very top of the interface, next to the BackOffice logo.
To perform a search, enter your query in the field and hit “Enter” on your keyboard.
The filters feature helps filter and sort items through different filtering and sorting options.
The “Has a listing” option lets you display only users that have published a listing (irrespective of the listing status).
The spoken languages filter lets you filter users based on the language they speak.
The creation date filter lets you filter users by the date at which they created their profile.
You can choose among one of two sorting policies:
The ‘Creation date’ policy will sort users from the most recently created accounts to the oldest ones.
The ‘Update date’ policy will sort users from the most recently updated accounts to the oldest ones.
This section describes a file export (CSV, Excel…). You can alternatively use the API to export your data.
The “Exports” button (figure 4), allows you to download the data associated with your current search results. To download all items, remove and search criteria.
By clicking on the “Exports” dropdown, a list with file extensions will appear. Choose the format you want to use and it will automatically be saved into your computer. That file can be directly reviewed from your local environment.
Be mindful of data privacy requirements and regulations. Do not download user data unless authorized to do so, and only if absolutely necessary. Treat exported data with the highest regard for security and delete any exported files after use.
From the list view, you can click the “pen” icon on any item to access more information about a user and start editing it.
The presentation card (figure 5) allows operators to see the user’s picture, mother tongue and other spoken languages.
The “Edit” button at the top right of the card will open a new tab in the user’s dashboard (see the Impersonate feature for more about this).
The identity card (figure 4) displays contact and identity information about the user.
That card is composed of:
User’s type :
Individual (phycisal person) OR
Organization (legal entity)
Company (displayed only if the user is an organization)
First name
Last name
Date of birth
Country of residence
Phone number
Postal address: corresponds to the billing address, and the address used for KYC / KYB purposes
Location address: corresponds to the publicly declared location of the user (information displayed in the public profile page)
Depending on your configuration, user bank account details may be displayed here. Bank account details are used for payouts (payment made to a vendor).
If a Payment Service Provider (PSP) is configured on your platform, several technical snippets will be displayed here. Information typically includes user UID on the PSP side and statuses:
Can bed paid: indicates the platform can receive funds for this vendor
The Guest users card displays the users that the current user has invited:
Roles: indicates which roles have been granted to each guest user
Spy icon: enables the operator to Impersonate that user
Pen icon: let’s you edit the invitation email and the user roles
Side card information
The side card information (figure 8) is used to display a summary of the items associated to the user.
These items are:
UID: The unique ID of the user
Listings: Number of listing managed by this user
Asker booking: Number of bookings requested as a Customer
Offeror booking: Number of bookings provided as a Vendor
Reviews received: Number of reviews received
Reviews made: Number of reviews made
Creation date: User account creation date
Update date: User account last update date
Each underlined value is clickable and redirects to the referenced items.
The impersonate feature enables operators with the required permissions to access a customer or vendor dashboard and account as though they were logged in with that user’s account. This feature enables an operator to view all of the impersonified user's information and to carry out all actions that he is entitled to.
This feature is useful in many contexts:
to view all of a user’s configurations
to assist users, potentially even by carrying out actions in their stead through their account
To impersonate a user, click on the spy icon:
Operators can update specific user profile information through the detailed view interface. Other information on the user’s profile can only be changed through the vendor or customer dashboards by using the “impersonate” feature.
3 statuses are available for users:
Live: the user can use the platform
Invalidated: the user profile is suspended from the platform. The user can no longer login.
In review: the user may log in to the platform, but his profile cannot be viewed by other users and he cannot make bookings nor contact other users.
A platform-wide policy can be defined to set the initial user status directly following account creation. By default, users are “Live” as soon as they are created, however, you can set the default status to “In review” through the Configurations interface.
The status of a user can be updated in two ways.
By using the dropdown of a user profile card (figure 10). Clicking on it will reveal the list of available statuses. Clicking a status will immediately change the current user’s status.
From the detailed view of a user, on the right-hand side, a card contains the user status dropdown (figure 11).
Operators can update the user’s password from the back office. This is useful if a user has lost access to his email, and therefore cannot recover a password. Operators have to fill in the ‘password’ field and the ‘confirmation’ field (figure 12) and then click save to apply the changes.
Operators can decide to apply the default platform fees (by default) or apply user-specific fees. Fees are applied to users when they make purchases (Fee as asker) and when they make sales (Fee as offeror). They can be set both as percentages and as fixed amounts (one or both).
To Apply user-specific fees:
Disable “Use standard platform fees” by clicking on the blue switcher
Customer fees: fees paid by this user when he makes a purchase, applied on top of the price asked by the Vendor
Fee as asker (%): allows you to set the fee as a percentage of the sales price (numeric value (0 to 100))
Fee as asker (€): allows you to set the fee as a fixed amount on top of the sales price (numeric value)
Vendor fees: fees are paid by this user when he makes a sale, subtracted from the amount received from his customer
Fee as offeror (%): allows you to set the fee as a percentage of the sales price (numeric value (0 to 100))
Fee as offeror (€): allows you to set the fee as a fixed amount on top of the sales price (numeric value)
Example:
Customer fees are set at 20% and 50$. Vendor fees are set at 5% and 10$.
The customer makes a 100$ purchase:
The customer will pay 100$ + 20$ (20% fee) + 50$ (fixed fee) = 170$ (total to pay by customer)
The vendor receives 100$ (sales price) - 5$ (5% fee) - 10$ (fixed fee) = 85$ (amount paid to vendor
The platform earns 70$ in customer fees and 15$ in vendor fees = 85$ (total platform fees)
Leaving a field empty, or entering “0”, is not the same thing.
Empty fields will default to the standard platform fees. If you do not want to apply one of the fee types, enter “0” in that field.
The category card (figure 14) displays the category(s) that the user is associated with. Operators can change these values through the dropdown.
The user verification card (figure 15) allows operators to manage identity verification of the user.
The verification statuses are displayed on the front office:
ID has been verified: check the box to confirm that the identity of this user has been verified. Depending on the platform configuration, this value may be updated as a result of the KYB process carried out by the PSP.
Email has been verified: check the box to confirm that the email of this user has been verified. If enabled through the platform configuration, email verification can be carried out automatically by sending an email to the user with a verification link.
Phone has been verified: check the box to confirm that the phone number of this user has been verified. If activated through the configurations, users can request a verification code by SMS to verify their account themselves.
The “edit” buttons (figure 16) are used to quickly edit information about a user.
Operators will find this button on the 3 first cards of the page :
Presentation
Identity
Bank account
These buttons impersonate the operator into the user account, and direct the operator to the corresponding interface in the user dashboard.
The impersonate feature enables operators with the required permissions to access a customer or vendor dashboard and account as though they were logged in with that user’s account. This feature enables an operator to view all of the impersonified user's information, and to carry out all actions that he is entitled to.
This feature is useful in many contexts:
to view all of a vendor’s configurations
to assist users, potentially even by carrying out actions in their stead through their account
To impersonate a user, click on the spy icon:
To delete a user, go to the detailed view of a user profile and click on “Delete this listing” (figure 9):
SBO:
Front:
Dashboard:
Managing bids when the request for proposal rendering type is activated
Path: SBO > Services > Bids
A bid with the ‘request for proposal’ rendering type can be considered equivalent to a booking with the other features.
It is the proposal made by an offerer in response to the ‘request for the proposal’ of an asker.
The bid is the services given when an agreement is made between the asker and the offerer to perform the desired service.
The booking allows all parties to agree on the date and if possible the place. It is a written record of this agreement. All of this is done via the platform.
WHO CAN USE THIS FEATURE?
This is for logged super-administrators and administrators with good roles/permissions.
Only the platform users (askers/offerers) can make a bid. Also, a bid is created when an offeror propose is service through an asker request.
On the SBO, super-administrators and administrators can see all the bids made on the platform.
Each bid block (figure 1) is composed of:
The request for proposal title
The bid start time and date
The bid status
The asker
The offeror
The bid price + asker fees
Bid ID
When hovering your mouse on a booking block or selecting one of the bookings, a sidebar menu will pop up. Click the blue folder on the right icon to see the booking details.
The booking overview displays the Asker and Offeror information along with the total price and fees. Here you can also verify the start, end, and duration of the bid.
Statuses will show the current status of the bid.
The Bid page also displays a list of the offered and platform services and prices.
On the payment details, we have a more precise overview of the transaction.
A bid cannot be updated
A bid cannot be deleted
Dashboard:
Business rules:
Managing the different transactions involved in service completion ie. bookings, bids, quotes, payments
Enables the administrator to view the bookings of the platform, make searches adapted to the administration of the platform, and make exports
Managing bids when the request for proposal bundle is activated
Managing quotes on your platform from your SBO
Enables administrators to see payments made, wire transfers received and retrieve invoices
Viewing the ratings made between listers and askers of the platform
Defining and managing the use of Coupons
Path: SBO > Coupon
Askers use coupons to apply discounts on booking requests. Coupons are managed exclusively by authorized platform super-administrators and administrators.
WHO CAN USE THIS FEATURE?
Logged-in authorized administrators
PAth: SBO > Coupons (figure 1)
Click “Add a coupon” (figure 2) to be redirected to the coupon creation page.
Information to fill in (figure 3):
Code: Code shared with users. All characters are authorized.
Offerors: Indicated which offerors are eligible for the voucher.
A coupon can be linked to multiple offerors or all offerors.
If it is linked to one or multiple offerors, the coupon is only usable on the linked offerors' listings
If it isn’t related to any offerors, the voucher is usable on all listings.
Categories: Indicate which categories are eligible for the coupon.
A coupon can be related to multiple categories or all categories
Discount types:
“Amount”: fixed value deducted from the booking amount.
“Percentage” percentage deducted from the booking amount
Upgrades excluded
Discount: discount amount.
According to the selected discount type, the unit value will automatically be updated.
Maximum use: maximum number of times the discount code can be used.
This value is not mandatory
It is considered used if the related booking is
“Pending”
“Paid”
“Accepted”
“Cancelled by asker” (only after offeror acceptance)
It is not considered used if the related booking is
“Expired”
“Cancelled” (before offeror acceptance)
“Decline”
End date: sets the voucher’s expiration date
This value is not mandatory
Minimum amount: sets the minimum amount for a booking request to be eligible.
This value is mandatory
It is not possible to generate a discount coupon offering a 100% discount. The highest discount allowable through a coupon is 99%.
Click “Add coupon“ (figure 4) to save the created coupon.
Once the coupon is created, coupon blocks display (figure 5):
The code name
The creation date
The type of the discount
The end date
The status
The number of uses allowed
The value of the discount
Update a coupon by clicking the folder icon that appears when hovering on the voucher block.
The update process is similar to the one when creating a coupon.
If the coupon code has already been used at least once on the platform, the Super administrator (or administrator) cannot modify:
The Voucher code
The discount type
The discount amount
Super-administrators cannot delete coupon but they can deactivate them through the related checkboxes (figure 6).
Feature configuration:
Business rules:
This page is available only when the feature is enabled.
Super-administrators and administrators cannot create Quotes. Quotes are created by askers. Learn more on how to perform a quote request:
Here you can see the process to update a quote:
Here you can see the process to update a quote:
Enter the in
Enter the in
Set to 1 second
Automatize the
Activate the and run "second:stripe:webhook --listen"
Documentation about message management on the Front:
Documentation about message management on the Dashboard:
Users are both Vendors or Customers that have an account on the platform. Users create their own accounts through the front office (see )
Operators are excluded from the notion of “Users”. Operator accounts are accessed through the “” interface.
Operators cannot create user accounts. User registration is achieved through the front office by users themselves (more about that here: ).
Click on the “eye” icon to view the user’s as it is viewed by customers and vendors in the front office. This will open a new tab.
Can be payout: indicates that the platform has sufficient information to then make a settlement to the vendor (more here: ()
Users can invite other users to join them on the platform (more about that here:


Creating user roles and managing their rights as an administrator
Create/edit/delete administrator accounts that will be able to access the SBO depending on their assigned roles.
Give permissions to users on the platform according to their role.
Create roles, on a platform, and give them rights.


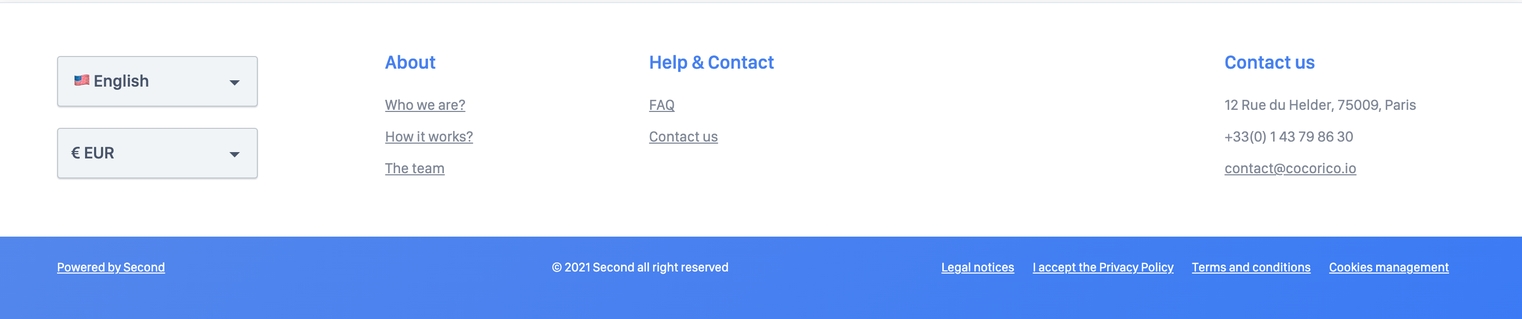

Create/edit/delete administrator accounts that will be able to access the SBO depending on their assigned roles.
Path: SBO > Access Rights > Admins Management
The “admins management” section of the SBO allows the super-administrator to create, edit and delete administrator accounts, which will be able to access the SBO depending on their assigned roles.
WHO CAN USE THIS FEATURE?
Logged super-administrator.
Administrators cannot access this part of the SBO.
the super-administrator can create, and indirectly invite, an administrator account to have access to SBO features.
First, click “Add an administrator” (figure 1) at the top of the page.
A modal will appear (figure 2) to set:
The email input of the administrator you want to invite
Assign a role to the administrator by ticking the checkboxes.
Click “Apply” (figure 2) to save. A mail is sent to the newly added administrator account with the roles assigned, and a link to set his password.
Review all administrators' accounts created with the assigned roles in the table (figure 3). Each line of the table allows the super-administrator to manage an administrator’s account.
For each administrator’s account, the super-administrator can see:
The administrator email
Its role(s)
Actions are all clickable functionality to manage the administrator account.
The detective icon is the Impersonate feature
The pen icon is the update feature
The trash icon is the delete feature
The impersonate feature allows the super-administrator to take control of the current administrator account.
Click the “detective” icon (figure 4) in the Action column.
Update the administrator's accounts by clicking the “pen” icon (figure 5), in the Actions column, of the administrator account.
It will open a modal (figure 6) to modify:
The email, in the text area
The role, by ticking the role checkboxes
Save the modifications by clicking “Apply” (figure 6).
Delete the administrator’s account by clicking the ‘trash’ icon (figure 7).
It will open a pop-up (figure 8), to confirm the choice to delete the administrator’s account.
SBO:
The Subscriptions Dashboard presents subscription details using cards, which display when a user subscribes to a plan.
At the top of the dashboard, administrators can export all details from the Plans Dashboard in CSV format. This functionality enables data analysis using third-party software.
The administrator also has the option to sort all the cards in the dashboard by the date of the update and the creation date.
At the top of the dashboard, users can filter subscription plans based on two criteria: Created At and Updated At.
Created At: A selected date allows the administrator to filter subscription plans created within the chosen time frame.
Updated At: A selected date allows the administrator to filter subscription plans updated within the chosen time frame.
Status: The administrator can filter the subscriptions using the following statuses
Active
Inactive
Payment error
Paid
Canceled
Each subscription generates a unique subscriber card, enabling the administrator to oversee details related to each user's subscription. Each card provides access to the following information:
Subscriber name and associated subscription plan
Subscription status
Subscription start date
Assigned subscription roles
Subscription ID
Subscription price
When the mouse hovers over the right side of the card, an edit icon appears, enabling the administrator to access the user's subscription details.
Accessing a user's subscription details provides an overview of the subscription, displaying the same information found in the subscription card. Additionally, administrators can view all transactions associated with the subscription, along with their respective periods.
The payment information consists of the payment details and the user's registration status in Stripe.
Subscriptions are available only when Stripe is configured as the payment service provider and can be paid exclusively using a credit card.
On the left side of the subscription edit page, the administrator has access to the following information and actions:
User UID
User Name
Subscription Creation date
Subscription most recent update date
The Plans Dashboard provides administrators with a centralized interface to manage all subscription plans available in the marketplace.
At the top of the dashboard, administrators can export all details from the Plans Dashboard in CSV format. This functionality enables data analysis using third-party software.
To create a new marketplace subscription plan, the administrator can initiate the process by clicking the "Create a plan" button.
When the process of creating a new subscription plan is initiated, the administrator is directed to a new window where the following information is required to complete the process:
Name: This refers to the subscription name, which is prominently displayed to attract the user's attention.
Subtitle: A brief text that appears below the subscription name. Its purpose is to provide a concise description of the subscription for the user.
Description: This field allows the administrator to provide a detailed explanation of the subscription, including its features and benefits.
Price: The monthly cost associated with the subscription.
Role: The administrator assigns the role that users subscribing to this plan will receive. Roles are created within the role management section, and permissions are assigned to these roles in the rights management menu. Only one role can be assigned to each subscription plan.
At the top of the dashboard, users can filter subscription plans based on two criteria: Created At and Updated At.
Created At: A selected date allows the administrator to filter subscription plans created within the chosen time frame.
Updated At: A selected date allows the administrator to filter subscription plans updated within the chosen time frame.
Once a subscription plan is created, it appears on the plan dashboard as a card. Each card displays the following details:
Plan Name
Plan Subtitle
Current Status (Active/Inactive)
Plan Description
Date of Last Update
Assigned Role
Number of Active Users - Clicking on it displays the active subscriptions
Monthly Price
Plan ID
This information provides a comprehensive overview of the plan’s status, pricing, and user assignments, facilitating efficient management.
A six-dot icon is displayed in the top left corner of each card, enabling the administrator to adjust the display order of subscription plans in the front-end user interface. To rearrange the plans, the administrator can simply drag and drop the cards into the desired order.
Each plan card includes a dropdown menu that allows users to configure the subscription status. A plan's status can be set to either "Active" or "Inactive."
A plan can not be set as inactive if it has at least one user with a subscription plan active.
When the mouse hovers over the right side of the card, an edit icon appears, enabling the administrator to modify and update the plan information.
The administrator is unable to modify the monthly subscription price after the plan has been created. Additionally, the administrator cannot delete a subscription plan if at least one active user is subscribed.
On the left side of the subscription edit page, the administrator has access to the following information and actions:
Subscription ID
Number of active users
Subscription Creation date
Subscription most recent update date
The administrator can delete the subscription and modify its status. However, these actions can only be performed if there are no active users currently subscribed.
User attributes help user searches to be more accurate by using filters on the user search results page
Path: SBO > Users > Attributes
User attributes are similar to listing attributes.
User attributes are additional information that is provided for each user.
Each user attribute can be linked to a user category and is thus dynamically displayed according to the user category selected for the users. Each attribute also offers a self-explanatory tooltip.
User attributes must be in user attribute groups. User attribute groups assemble user attributes by themes to facilitate their understanding and improve their visibility.
User attributes can be easily deleted even if linked to users due to their informative nature.
WHO CAN USE THIS FEATURE?
User attributes and user attribute groups are managed by authorized administrators.
A user attribute group can have zero to multiple user attributes.
An authorized administrator can create user attribute groups through the SBO’s Attribute Groups sub-menu available in the User menu. Click ‘Add a group of attributes’ (figure 1) at the top of the page to create a user attribute group.
The following fields are required:
User Attribute Group name
Select the user categories the user attribute group will be related to (figure 2).
If no user category is selected, the user attribute group will be linked to all user categories.
Click ‘Add an attribute’ (figure 3) and a pop-up window will open (figure 4).
The following information is required:
“Mandatory attribute” to make this attribute mandatory upon profile creation
“Attribute name” (mandatory)
“Attribute tooltip” gives a brief description of the attribute
“Attribute group” is the attribute group you link to this attribute.
“Type” is the attribute type.
Checkbox: Checkbox attribute
Number: Numerical attribute
Date: Date picker attribute
Free text: Free text attribute
Select list: Prepopulated list attribute
“Add to the search engine” checkbox to show this attribute in the search results page filters.
Click “Apply” to save the user attribute.
The user attributes dashboard allows authorized administrators to view all user attributes available on the platform.
User attributes are grouped under their related user attribute groups (figure 5).
Each user attribute block (figure 6) displays:
The user attribute name
The number of user-profiles using this attribute
Edit a user attribute group by clicking “edit” (figure 7).
Super-administrator and administrators can manage the group name and the related user category (figure 8).
Edit a user attribute by clicking “edit” (figure 9).
Editable information is identical to the information required during the “create an attribute” process.
Delete a user attribute group by clicking the trash icon (figure 10).
Deleting a user attribute group will also remove the attributes related to this group.
Delete a user attribute by clicking the trash icon (figure 11).
SBO:
Dashboard:
Viewing the ratings made between listers and askers of the platform
Path: SBO > Services > Reviews
Reviews are composed of a rating and a comment made by users on the platform. A review is always related to a service provided and can be made when the service is validated (X time unit from the start or the end of the service provided depending on the configuration).
WHO CAN USE THIS FEATURE?
Logged super-administrators and administrators.
Reviews are only created for askers who have booked a service and for offerers who have listed their service on the platform. Super-administrator and administrators do not have to review a service provided. A super-administrator or administrator cannot create a review.
To know how to create a review as an asker or offerer you can read the documentation related to the reviews in the Dashboard.
A super-administrator or an administrator can see all reviews made on the platform with to the review dashboard.
Each review made is managed as an item (figure 1).
Each review block is composed of:
The review rating value.
The reviewer comments.
The user is under review.
The user who made the review.
The booking is related to this review.
Review ID.
To read a review, super-administrators or administrators can read it from the review list. By clicking the “pen” icon, they will be sent to the review details page.
The first card named “Review overview” (figure 2) is a summary of the review made.
That card is composed of:
The user who made the review (and his profile picture)
The user who received the review (and his profile picture)
The review’s rating value
The review’s date and time (and the timezone)
The review’s message
The review’s status (that can be changed to hidden)
The second card, named “Booking info” (figure 3), is a summary of the booking related to the review made.
That card is composed of:
The total amount of the related provided service
The booking ID
The related listing title
The start date and time of the related provided service
The end date and time of the related provided service
The duration of the related provided service
Reviews are manageable on a platform. To do so super-administrators or administrators have to click the “pen” icon. It will redirect them to the review details page.
Super-administrators or administrators can update the status review with the dropdown button (figure 4), by clicking it, a status list will appear. Super-administrators or administrators will then have to choose between the available statuses:
Published: everyone can see the review
Hidden: only the super-administrator/administrator and the person who made the review can see it
Super-administrators or administrators can update the rating value by clicking the stars (figure 5). By clicking the stars, super-administrators or administrators can apply a different rate, a modal message will appear to confirm the change.
By confirming it, super-administrators or administrators will update the rating value.
Users can update the message written in the review. By clicking “edit” (figure 6) and write/correct the message in the text area.
Clicking “OK” (figure 7) will save the changes.
Super-administrators or administrators cannot delete a review.
Dashboard:
Enables administrators to see payments made, wire transfers received and retrieve invoices
Path: SBO > Services > Payments
The payments section is where super administrators/administrators can see all payments made on the platform. There are two types of payments:
The “pay-in”: is the money that comes from the customer in the payment system when he makes a payment.
The “payout”: is the money that is directed to the service provider from the payment system when the offerer requests to be paid for his service by the platform.
At each step of the booking and payment validation process, an email is sent to the user.
The payouts are not automatic, the super-administrators or the administrators with the dedicated roles can do the payout from the SBO.
The payout is secured by a password. You have to enter it every time you want to make a transfer.
WHO CAN USE THIS FEATURE?
Logged super-administrators and administrators, can use this feature.
BackOfficeThe keyword search field (figure 1) is displayed at the very top of the interface, next to the BackOffice logo.
To perform a search, enter your query in the field and hit “Enter” on your keyboard.
The filters feature helps filter and sort items through different filtering and sorting options.
You can select the start and end date to filter listings within that range (figure 2).
Once the time and date are filled, click “Filter” (figure 2.1), and the results will be filtered following the selected values.
The smart sorting feature on the payment dashboard aids operators in efficiently reviewing relevant payments on the platform. It follows specific principles for prioritizing the display of payments, as outlined below.
Error Payments Priority:
Non-bank wire payments that are flagged as erroneous will be displayed first.
Creation Date Priority:
The remaining payments will be displayed based on their creation date.
The most recent payment will be shown first, followed by older payments.
Payment is automatically created when a booking is accepted by the asker and the offerer. People concerned about the payment procedure will receive a mail to follow the process. A payment cannot be created by an administrator.
To see a payment list super-administrators or administrators have to choose between the pay-in and the payout interface. To do so, click “Pay-ins” or “Payouts” on the top border (figure 1).
On the pay-in list, all payments done by the services customers will be listed.
Each incoming payment is an item on the pay-in list (figure 2).
Each pay-in block (figure 2 ) is composed of:
The status of the payment.
The date and hour the Pay-in have been made
The ultimate beneficiary of this Pay-in
The payment source
The payment type used to do the Pay-in
The associated service
The total amount paid for the booking.
For Pay-in = booking amount (inclusive of offeror fees) + asker fees
The Pay-in ID
On the payout list, super-administrators or administrators will see all payments that are done or that should be done to the services providers.
Each outgoing payment is an item on the payment list (Figure 3).
Each payout block is composed of:
The payment status OR the button to perform the payout (prerequisites are displayed if the payout cannot proceed)
The date and hour the payout has been made
The payment beneficiary
The payment source
The payment status
The payment type to the beneficiary
The associated service
The total amount paid for the service.
For payouts = booking amount - platform fees
The payout ID
To read the payment details, click on the pen icon and it will redirect you to the payment details page. It is the same information for the pay-in and the payouts
The payment detail page (figure 4) is composed of:
The payment ID at the top
The table of content
The payment status is on the right side of the page.
The first part is the payment overview (figure 5).
The first section is the payment overview card, which is composed of:
The payment type
The amount of the payment
The beneficiary (most of the time is the service provider)
The payment source
The booking ID related to this payment
The second section is about:
The due date
The payment ID
Invoice: click on “Download” to download the invoice (figure 5)
The invoice is available only when the payment has been made. It is about platform fees paid
The statuses card (figure 6) allows the super-administrator or the administrator to follow the history of the Statuses process.
For each payment, super-administrators or administrators can see the PSP information (figure 7). Stripe is the example here.
These pieces of information and presentation can change according to the PSP chosen. The goal is to be able to associate the information of payment with the information displayed directly from the PSP interface.
Pay-in cannot be updated.
Super-administrators or administrators can update the status of the payout.
As explained above, payouts are non-automatic, super-administrators or administrators have to do it manually.
The automatic payout has not been integrated for security reasons. An outgoing payment can hardly be recovered.
To update the payment status super-administrators or administrators have to pay the offerer. Click “Send x €” (figure 8) to perform the payment action.
A modal will appear (figure 9) to fill in the payment password. Click “Send” to do the payment.
The other way to do it is, to click on the pen feature. Super-administrators or administrators will be redirected to the payment detail page. On the right side, super-administrators or administrators will have the button “Send €x to …” (figure 10).
The same modal will appear (figure 9) and you have to fill in the payment password and click “Send”.
By doing this, the payment status for payouts will be updated.
Pay-ins or payouts cannot be deleted.
Dashboard:
Bundle configuration:
Payment Service Provider feature (PSP) - Configuration
Business rules: