Commoditized Rendering types
Learn more about rendering types
What is a rendering type?
The rendering type defines how the platform interacts with vendors and customers to deliver the most relevant information based on the service offered by the vendor. Additionally, the rendering type influences the booking process, which consists of two stages. Vendors are required to provide comprehensive details about their services, while customers must supply necessary information during booking to ensure a seamless service experience.
Commoditized rendering types available on SCND
In SCND, the concept of a commoditized service is supported by the platform through three distinct rendering types. These rendering types are designed to accommodate any service that a vendor may propose, ensuring flexibility and adaptability within the platform.
How to configure a rendering type
In SCND, the administrator has the capability to enable all rendering types simultaneously or select specific ones that align with the marketplace business model. To activate the commoditized service described in this documentation, access to the Super Back Office (SBO) is required. Navigate to the left-side menu and follow the path: SBO > Configurations > Features > Platform Configuration > Platform Mode to complete the configuration.
At least one of the Commoditized or Uncommoditized rendering types must be selected.

Listing Deposit (All rendering types)
Learn how to select the rendering type during the listing creation.
First steps of creating a listing
The process of creating a listing consists of three initial steps in which the vendor provides the basic information required regardless of the selected rendering type. Once the rendering type is chosen in the third step, the subsequent steps will adapt accordingly to capture the specific details necessary for the listing.
Publish a service
The listing creation process begins on the homepage. If the "switch" configuration in the SBO is enabled, both vendor and customer roles have the ability to create a listing. When this setting is active, users must select their roles during account registration.
However, if the configuration is enabled with restrictions, only accounts designated as vendors will have permission to create listings.
If the option to publish a service is not visible on the homepage of a switch platform, the user is currently on the customer homepage. To switch to the vendor homepage, click the "Become a Vendor" button located in the top-right corner.

To start the listing creation process, click on "Publish a service" on the homepage. This action will trigger the listing deposit process.

Listing Title and Description.
The user is required to specify a title that accurately represents the provided service, accompanied by a detailed description outlining the nature and scope of the service. Both fields are mandatory and the listing title must have a maximum of 50 characters.
Tips: pick a short and clear title for your listing. This is the first thing that customers will see, time to shine!

Media Selection
During the listing deposit process, vendors have the ability to upload multiple file types to enhance the listing's detail and appeal for potential customers.
Images
During the media selection process, vendors can upload various types of media to enhance their listings. The platform supports multiple image file formats, including JPG, PNG, GIF, and WebP. By default, the maximum allowable image file size is set to 12MB. However, this limit can be modified through the SBO configuration setting "Max size of a listing image."
At least one image must be uploaded, as it serves as the listing thumbnail. The administrator can set a max/min number of images through the "Max number of listing images" and "Min number of listing images"configuration in the SBO. Additionally, another configurable option available in the SBO settings for administrators, "Use profile picture as first image," allows the user’s profile picture to be automatically set as the first image in the listing cover.

Files
The system allows users to upload PDF files to the listing. While this is not a mandatory requirement, vendors have the option to include additional details about their services by attaching relevant PDF documents.

Videos
The system allows vendors to add videos to their listings by simply pasting the YouTube URL. Once the URL is provided, the solution automatically integrates the video into the listing without requiring any additional steps.

Rendering type Auto Suggestion
In the third step, the vendor must select the rendering type model, which determines how customers interact with the listing. As previously mentioned in this section, this selection also affects the pricing structure, whether based on time, service, or the number of participants.
To support vendors in this process, an AI-powered feature has been incorporated into this step. For additional information, refer to the Rendering Type Auto Suggestion section.
Note: The rendering type of a listing cannot be modified after it has been published or saved as a draft.

Once the initial steps are completed, the process will proceed based entirely on the selected rendering type. For more details on how the listing deposit process continues, refer to the following content:
Time Based
What is the Time Based Rendering type
The Time-Based is a Rendering Type offering a model that allows vendors to provide bookable services for a specified duration, measured in hours or days. This rendering type is applicable when vendors offer accommodations, such as apartments, houses, or flats, or when providing experiences where pricing is based on the total booking period.
Charges are determined according to the duration of usage, ensuring that the cost aligns with the number of hours or days booked. This model can also be applied to the rental of other assets, including vehicles (e.g., cars, buses, motorcycles) and equipment, allowing vendors to structure their pricing based on time-based utilization.
To learn more about this feature, access
This process follows a structural backbone with slight differences depending on the following rendering type:
Create a Listing (Time Based)
How to create a listing as a platform user
Path: Homepage > Publish a listing
Definition
The Listing Deposit for Time-Based Rendering process involves creating a listing on a platform to showcase services offered or required. This functionality enables vendors to create listings where pricing is determined based on time increments, such as hours or days.
To deposit a listing, users must be registered and logged into the platform. The Log In and Register options must be utilized to gain access to this feature.
In a non-switch platform configuration, only vendors can create listings.
Creating a listing
The user fills in the following information to create a listing page as displayed in the following section - Show a listing (Time-Based)
Triggering the listing creation workflow
To understand how this step is reached during the listing process creation, refer to the Rendering Type Selection (Commoditized) section in the documentation.
Base Price
The base price represents the standard rate for the service. This rate can be configured on a per-hour or per-day basis by adjusting the "Time Unit" setting in the SBO to 60 for hourly pricing or 1440 for daily pricing. Once the listing is complete, users can further refine their pricing policies on the listing edition page. This includes applying discounts and setting variable pricing for different dates. Depending on the value entered and the platform fees, the potential income is automatically displayed.

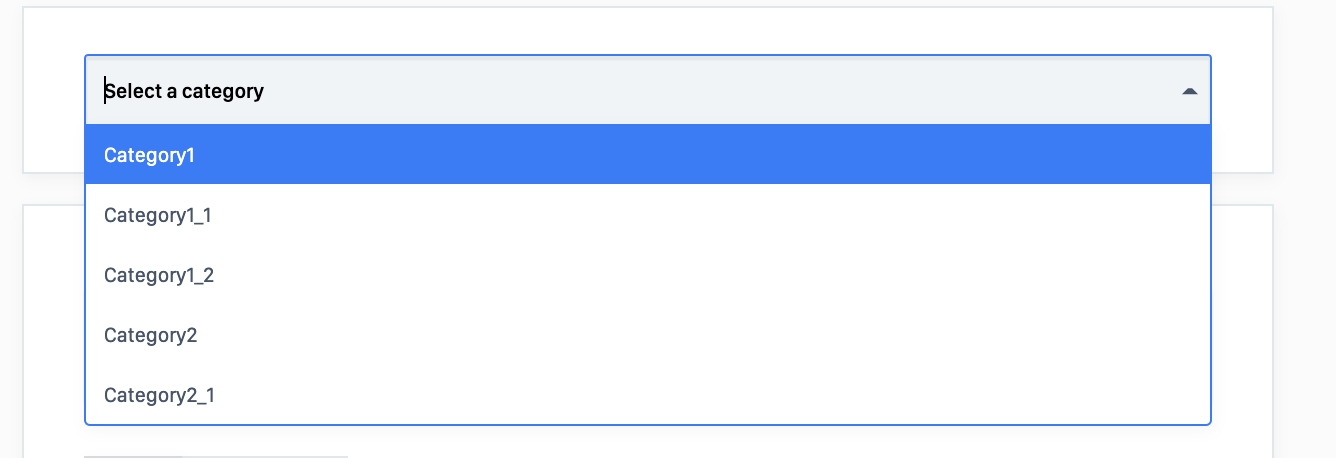
Set your category
Categories provide a structured way to describe listings and organize them into sections, enhancing the user experience during the search process. They help streamline navigation and improve discoverability. For details on configuring categories, refer to the Listing Category Management section.
Multiple categories can be selected for a single listing.
Set your attributes
Attributes provide an additional layer of information to describe a listing. They are structured, searchable entities that are associated with specific categories. The available attributes may vary depending on the category selected for a listing. A "*" symbol displayed on the right side of an attribute field indicates that the attribute is mandatory. For detailed instructions on creating and managing attributes, refer to the Listing Attributes Management section.
Address of the service
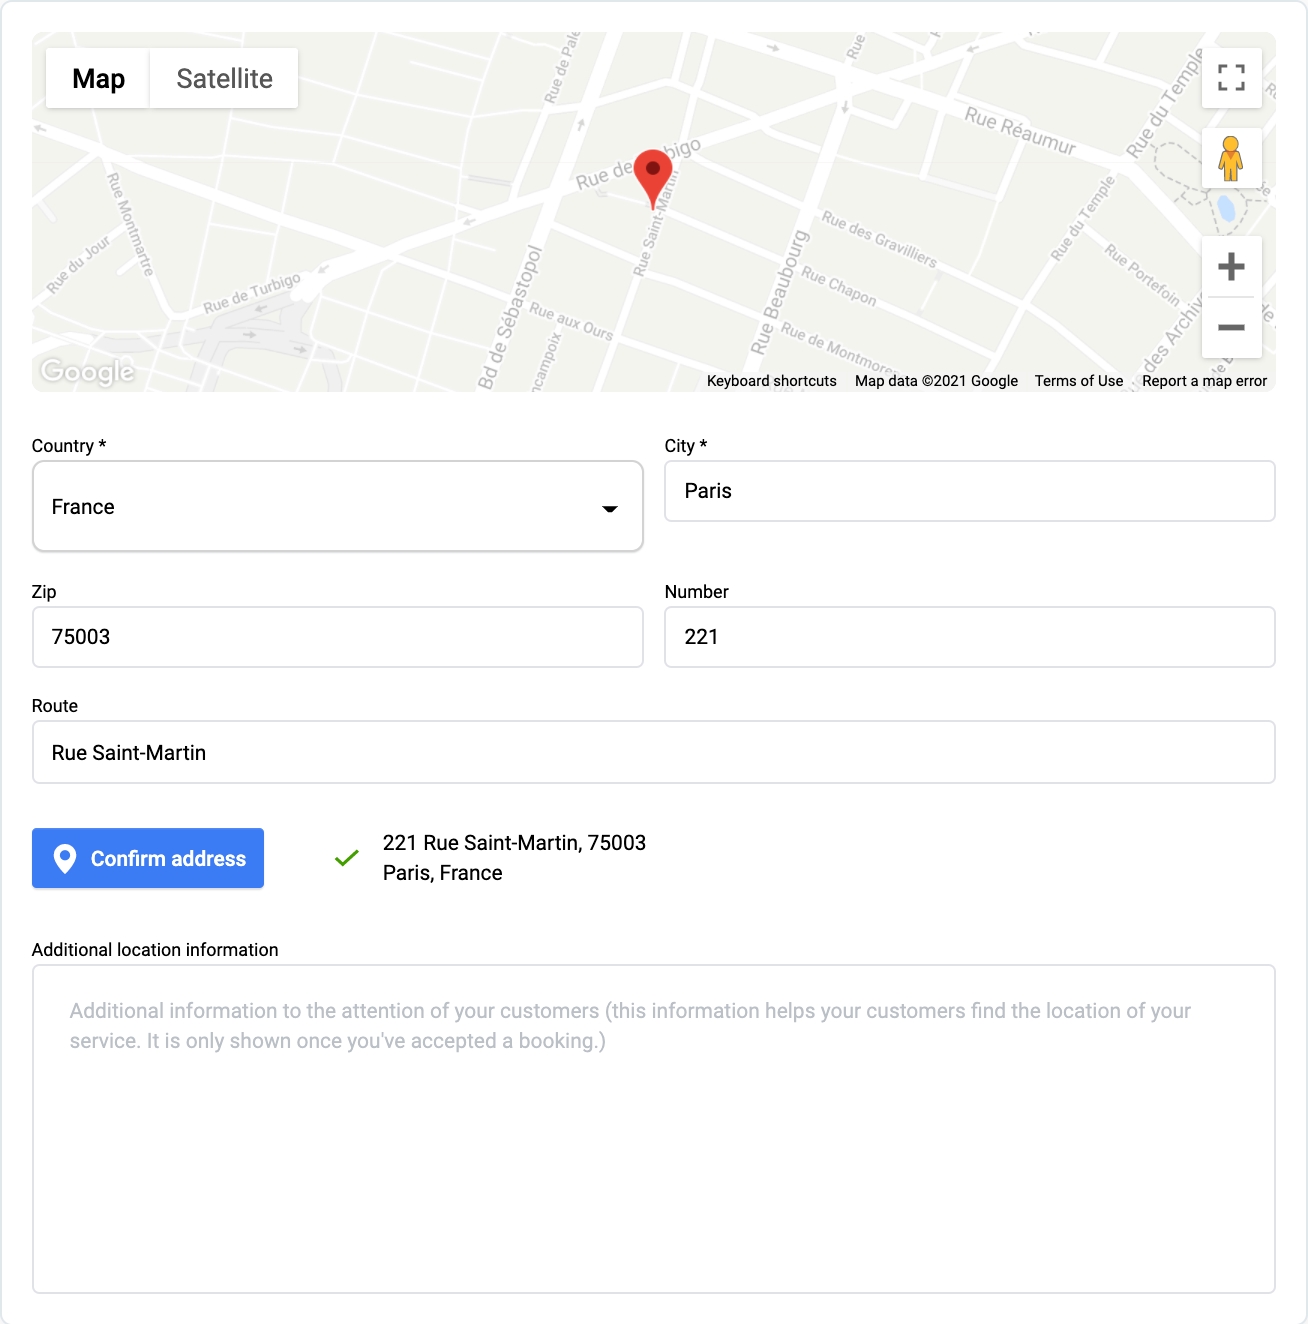
The Address section allows the vendor to provide the location where the service will be performed. The following details must be entered at this step:
Country (dropdown field)
City (mandatory)
ZIP Code
Street Number
Street Name

If the full address is not mandatory on the listing, the user can click on the arrow icon in order to hide the ZIP, Number, and Route.
The “Confirm Address” checks the information and displays the location on the right-hand map.
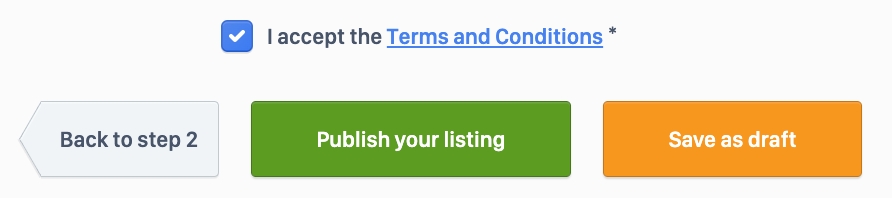
At the conclusion of the listing deposit process, the user must check the "I accept the Terms and Conditions" checkbox and select either "Publish your listing" or "Save as a draft". Choosing "Save as a draft" will create the listing without publishing it, and it will be marked as "Hidden" in the user's Dashboard.
Update a listing during the listing deposit
Navigation Steps
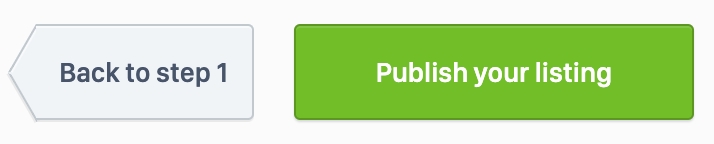
During the listing deposit process, the user can update the listing’s information by clicking “Back to step X” (figure 10). This redirects the user to the previous step in which he can edit the previously entered information.
Languages management
The offeror can also update the listing’s translations manually via the language icon (figure 11.1).

The user then selects the desired language through a list of available languages (figure 11.2).
An automatic translation is set up by default. Any non-manually translated fields are automatically translated.
Once the listing deposit process is done, the user can set additional information such as the calendar, seasonal price, etc through their dashboard described in the related article: Listings dashboard (Time-Based rendering type) - Edit
Delete a listing during the listing deposit
Users cannot delete a listing during the listing deposit process as it is not published yet. They can, however, interrupt the deposit process. When it happens, in the SBO the listing will be tagged as a Draft Status.
A published listing can be deleted through the listing user’s dashboard: Listings dashboard (TIme-Based rendering type) - Delete a listing
Related resources
Business rules:
Edit a Listing (Time Based)
How to manage and edit a listing
Path: Dashboard > Listing > Listings
Definition
User dashboard page through which users can manage their listings.
WHO CAN USE THIS FEATURE?
Switch users: All logged-in users
Non-Switch users: All logged-in offerors
Show a listing
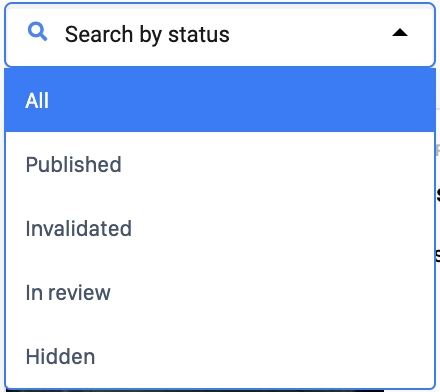
The user dashboard’s Listing section displays the list of all of his listings. These can be filtered by listing status (figure 1):
All: All listings
Published: Listings published on the platform
Invalidated: Listings declared as invalid by the administrator
In review: Listings being reviewed by authorized administrators, not publicly visible (only admins and the offeror can view the listing)
Hidden: Hidden listings, not publicly visible (only admins and the offeror can view the listing)

Each listing block (figure 2) displays:
The listing status
The listing media elements
The listing location
The listing title
The listing description
The listing price
The “Duplicate” button
The “Edit” button

Update a listing
Duplicate
The “Duplicate” button in the top right corner of the listing block will copy the listing.
This is especially useful when creating multiple similar listings with only a few variations.
Edit
Users can modify their listings' information through the “Edit” button located next to the “Duplicate” button.
Path: Dashboard > Listings > Listing # > Presentation
Editing a listing presents the listing information in several sections. At the top of each section is always displayed:
The title of the current listing (figure 5)
A status dropdown button (figure 6) to filter listings
The “Duplicate” button (figure 7)

The “View listing” button (figure 8) to visualize the listing’s public display.

Information banners (figure 9) to guide the user when required

Presentation
This presentation should describe the listing’s services. The information must be brief and extensive to attract the customer.
About
Three text fields build up the presentation section:
The listing title (figure 10) (mandatory)

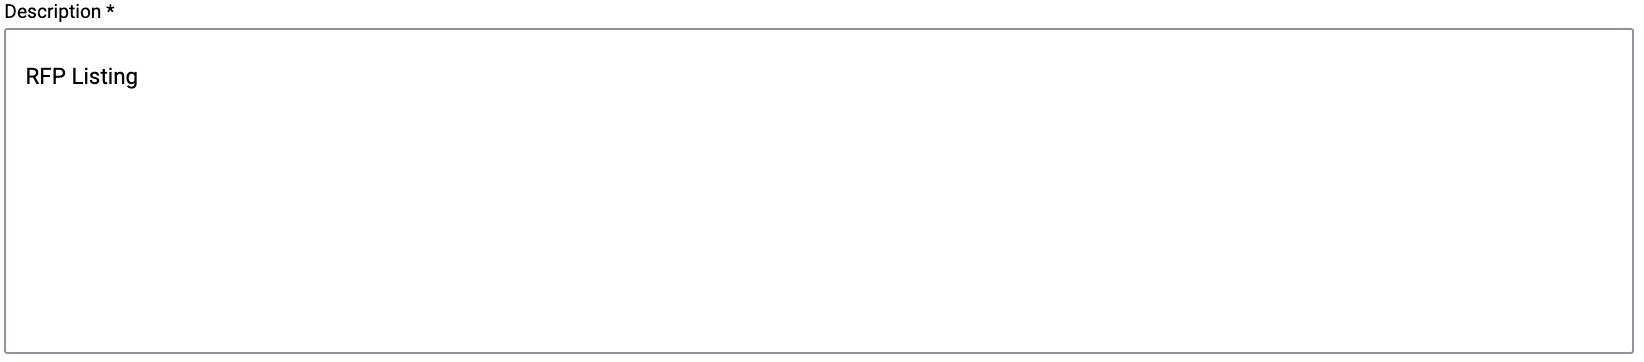
The description (figure 11) (mandatory)
Click “Save” (figure 13) to save changes.

Categories
Users can update the listing’s categories through the dedicated dropdown multiselection button (figure 14).
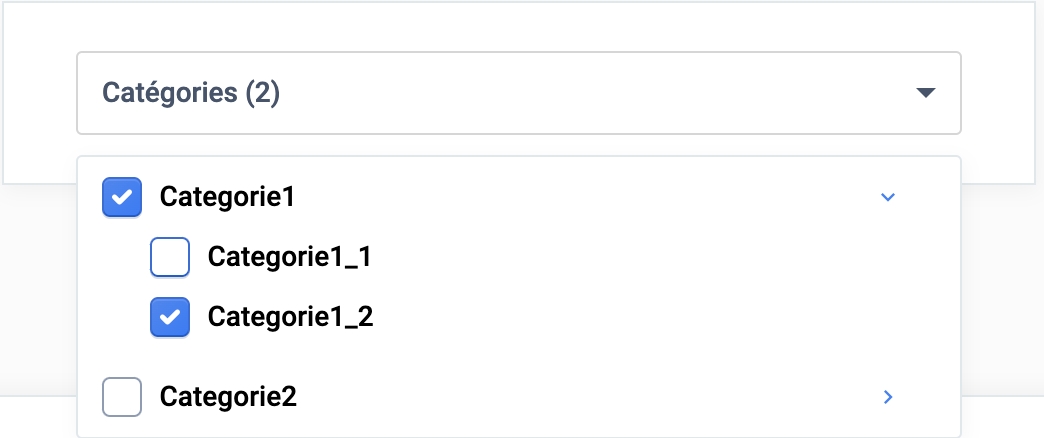
If the user selects a parent category, the listing is automatically displayed in all the child categories.
If the user selects a child category, the listing will only be displayed in this child category + the parent category.
Click “Save” to save changes.
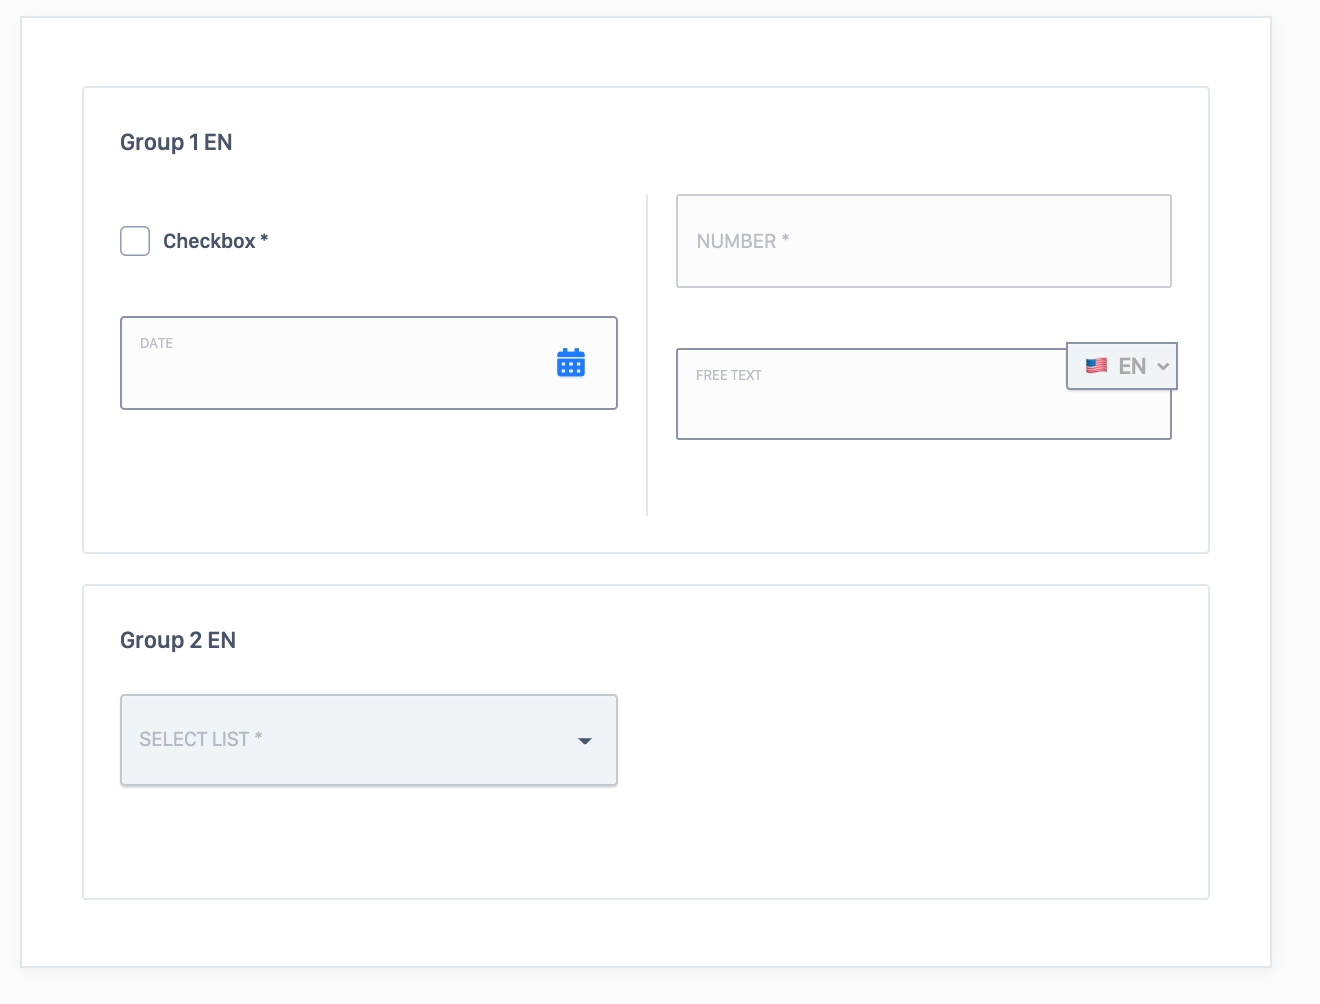
Attributes
Users can manage/add attributes here.
Attributes are organized as groups (figure 15.1), which each bearing an attribute group name (figure 15.2) on top of each block.

Attributes can be of different types: free text, checkbox, date, number, select list (figure 15.1).
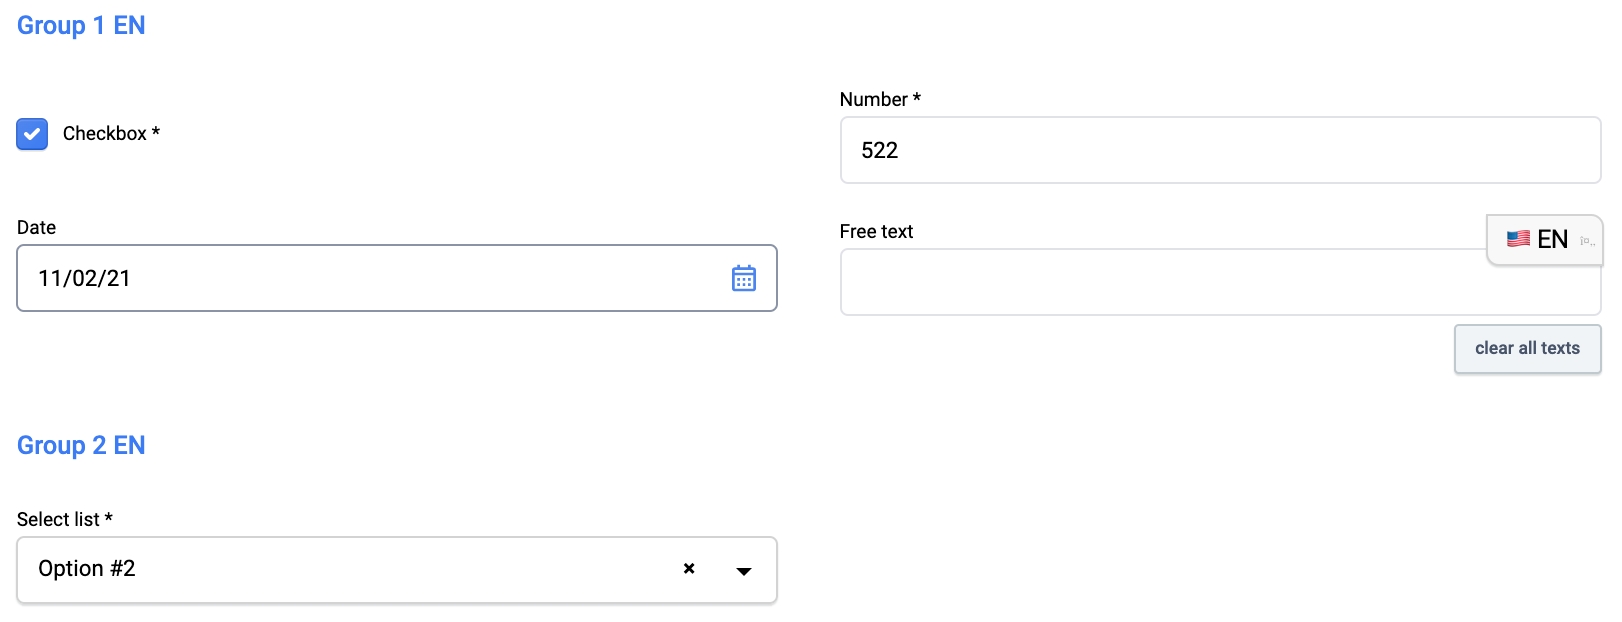
Attributes are linked to the selected categories. Depending on the platform’s configuration, attributes may or may not be mandatory.
Click “Save” to save changes.
Media
Users can update and add media elements such as images, videos, and files in this section (figure 16.1).

To add elements, the user either clicks “Click here to select your files” or drags and drops files in the dedicated block (figure 16.2).
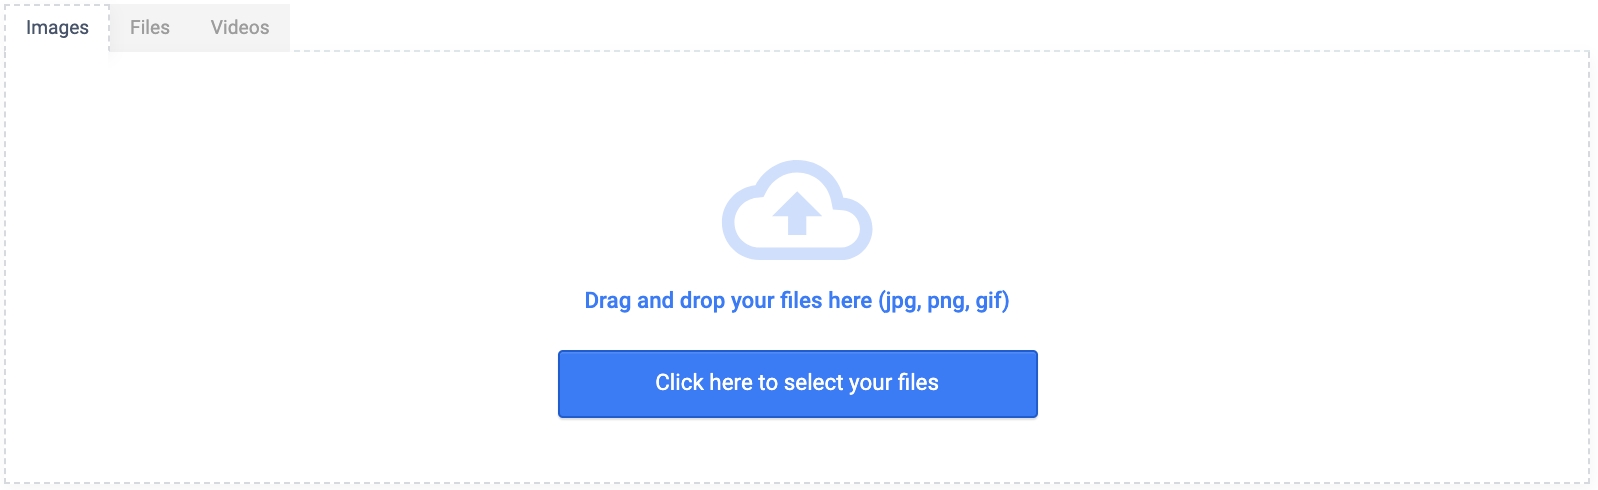
Video can be added via their youtube URL (figure 16.3).

Under the drag and drop block, previews of the uploaded media (figure 16.4) are displayed. The user can manage the media order by simple drag and drop (figure 16.4).
The red trash icon deletes a media element.
There is no confirmation message when deleting media elements.

Click “Save” to save changes.
Price & conditions
Users can manage their listings' price rules in this section.
Base price
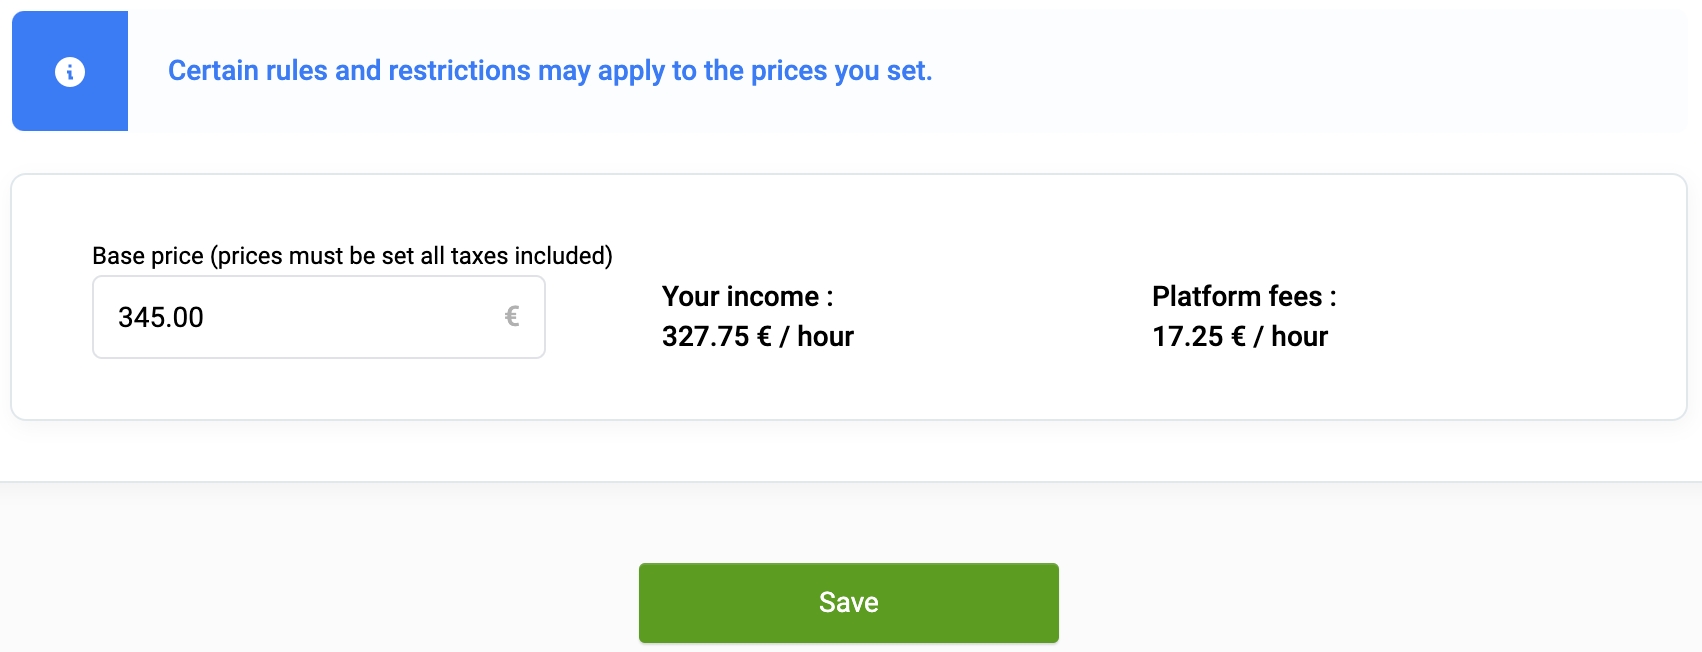
The base price represents the initial price assigned when a listing is published. This price is visible to users in the listing preview block. However, the final amount a user pays may differ due to potential seasonal pricing adjustments.
The system calculates and displays the listing’s potential income and applicable platform fees based on the specified price (see Figure 17).
To designate a listing as free, the price must be set to zero.
The minimum and maximum listing prices can be modified through the SBO by adjusting the Listing > Minimum Price or Listing > Maximum Price settings. To apply any changes, click Save.
Seasonal prices
The user can choose between 2 types of seasonal prices:
Prices per date (managed through the calendar view)
Recurring prices
Calendar view
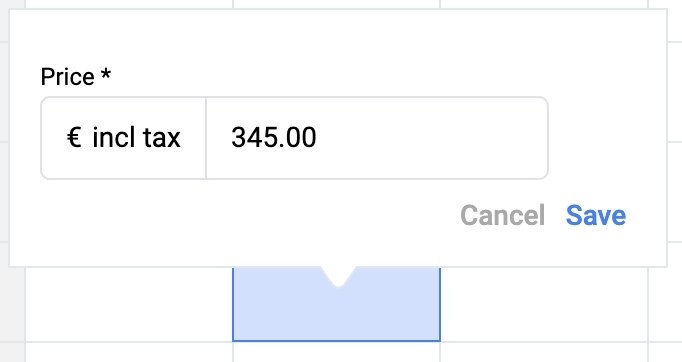
Prices per date allow the user to set a specific price per date.
By clicking a date, a price input appears (figure 18) and prompts the user to fill in a price. The user can select date/time ranges by clicking and dragging onto several calendar ranges.
The “Today”, “Day” and “Week” buttons (figure 19) change the calendar display accordingly.

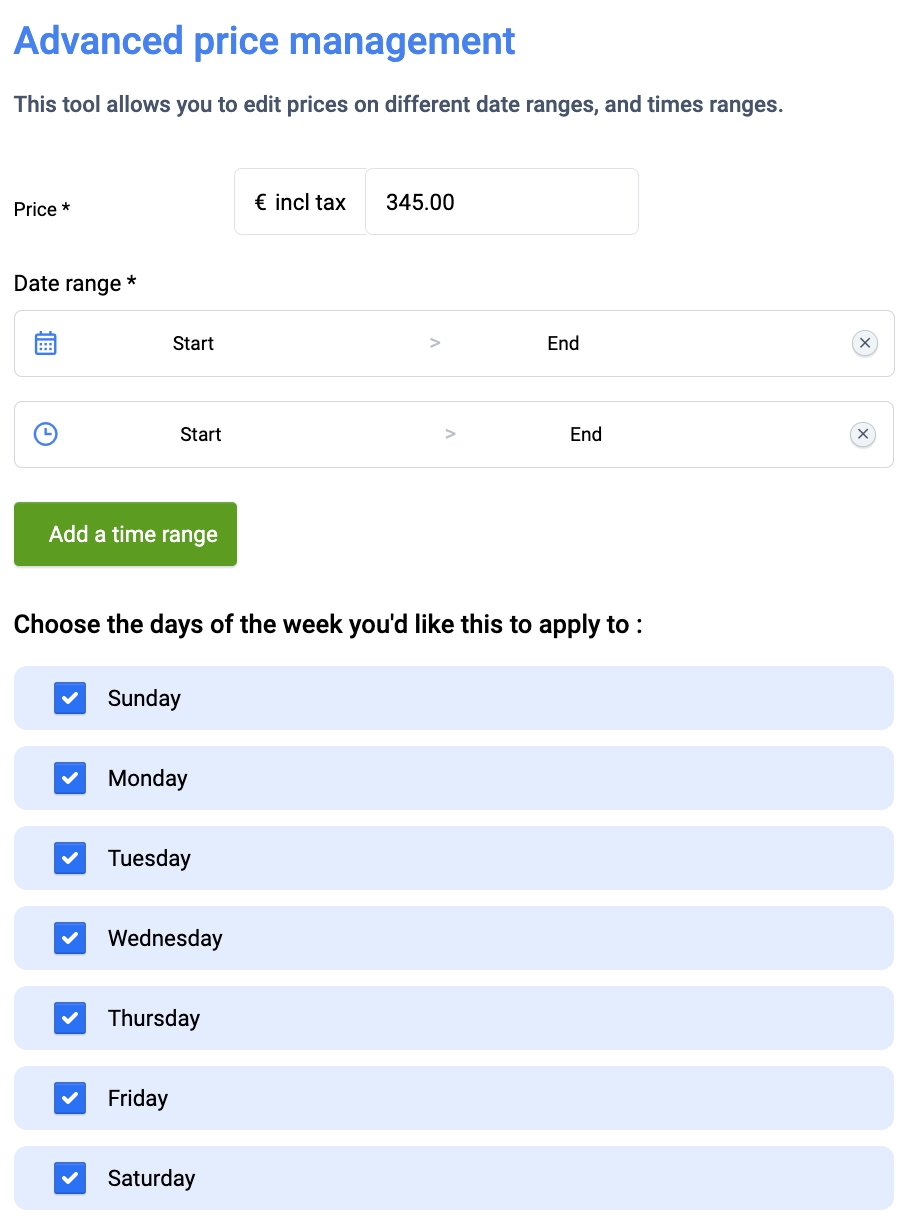
Recurring prices
Recurring prices (figure 20) are a way to set prices over recurring weekdays (e.g. weekends are more expensive than weekdays).
To do so, a user enters:
The price
The applicable date range
The weekdays on which the price will be applied
Upgrades
During the listing edition process, users now have the option to add an upgrade to their listing. For detailed instructions on managing upgrades, refer to the Upgrade Management section.
Settings
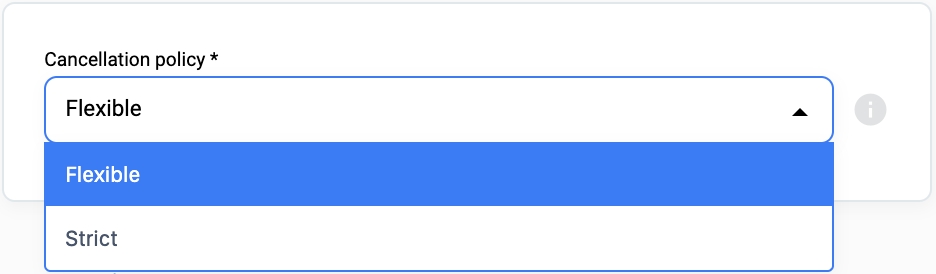
Cancellation policy
Users can also manage their listing’s cancellation policy by choosing between a “Flexible” cancellation policy or a “Strict” policy (figure 21).
The default value is determined by the platform administrator through the "Cancellation Policy" configuration within the SBO.
Users can only select one of the two policies offered by the platform. The parameters of each policy are set by authorized platform administrators.
Minimum and maximum duration
Users can establish a minimum and maximum booking duration for their listing (figure 22).

Discounts
Users can add discounts to their listing through the “Add a new discount” button (figure 23.1).

Each discount is set in percentages based on a threshold to be defined (figure 23.2).
The red trash icon deletes a media element.
There is no confirmation message when deleting a discount.

Calendar
Default listing availabilities are determined by the platform’s configuration. In most cases, platforms set listing calendars to be unavailable by default. To begin receiving booking requests, offerors must manually configure their availabilities.
Calendar
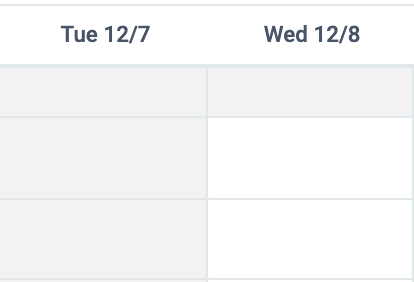
Users can change their listing’s availabilities through this calendar interface.
Greyed-out days are past dates and cannot be edited. White days are non-edited dates (figure 24.1).
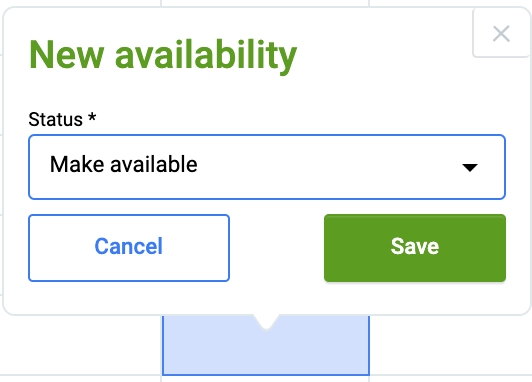
Clicking a date/time slot opens a pop-up window (figure 2.2) prompting the user to set availability for the selected period:
Make available: the date turns green (and depending on the platform’s configuration, a price (base or specific according to how prices were set) will be displayed)
Make unavailable: the date turns red
Users can also click and drag to select several dates/time slots to do bulk changes.
A “reset availabilities” button (Figure 24.3) is available at the top of the calendar block. This deletes all calendar settings and resets to default settings (usually a calendar with no availabilities).
Advanced
This advanced calendar tool allows users to quickly set their availabilities over large periods.
The parameters available are:
Status: “available” or “unavailable” (figure 25.1)

Date range with the start date and the end date (and hours depending on the platform’s configuration) (figure 25.2)

Weekdays to apply these changes to (figure 25.3)
Click “Save” to save changes.
Synchronization
The synchronization tool helps users import an external agenda’s events into the on-platform agenda and turn them into unavailabilities. To do so, the user enters the external agenda’s URL (figure 26).

Click “Save” to save changes.
Learn more about calendar synchronization here: Calendar Sync Feature - Business Rules
Address
The “address” section manages the listing’s address (figure 27).
Confirm the address and click on “Save” to save changes.
Delete a listing
Users can delete listings through the listing status dropdown menu available throughout the listing edition sections (figure 28).
A confirmation message prompts the user to validate the deletion.

A deleted listing is no longer listed in the users' dashboard or search results. However, all related bookings, messages, and payments remain listed for history and tracking purposes.
Related resources
Business rules:
Show a Listing (Time Based)
Learn how a listing page is displayed.
Path: Homepage > All listings > Listing
Definition
Listing pages are the public interfaces displaying services' detailed information. These pages also allow users to book said services.
WHO CAN USE THIS FEATURE?
All users
Create a listing
Offerors are the only user types who can create listings. Askers cannot create listings.
The listing creation process is described in the article Service solution: Create a listing.
Read a listing page
When a user clicks the listing preview card, the listing’s detailed information will be displayed in a new tab.
Each listing page follows the same structure.
Main body
The main body is structured as followed:
Information section
Listing title (figure 1):

Location (figure 2).
The location indicates where the service will be rendered.

“Favorites” icon (figure 3):

Breadcrumb (figure 4) gives users information on the platform’s internal navigation path.

The menu (figure 5) summarizes the listing’s structured information. Users can directly access a section by clicking one of the menu’s sections.

Media section
The media section (figure 6.1) displays the media elements related to the listing.

Supported media formats are files (pdf), images (jpg, png, gif), videos (youtube URLs).
Videos from the media section are youtube videos available directly on your platform to ensure maximum user retention and avoid external redirections (figure 6.2).
Users must consent to cookies to be able to watch videos. If they do not consent, videos will not be readable.

Description section
The description block (figure 6) displays additional textual information about a listing.
Option section
The "Options" section presents the available upgrades that users can add to their booking.

Booking policy section
The booking policy section (figure 8) displays information about the cancellation rules and refund rates applied depending on the cancellation date. This information is automatically set according to the offeror’s cancellation policy choice.

About the Offeror section
The offeror section (figure 9) displays the following information regarding the listing offeror:
Certified information of the offeror
2 buttons:
“My profile” button to redirect a user to the offeror’s dedicated profile page.

FIgure 9.1 “Contact me” button to send the offeror a message through the platform’s internal messaging system.

FIgure 9.2 
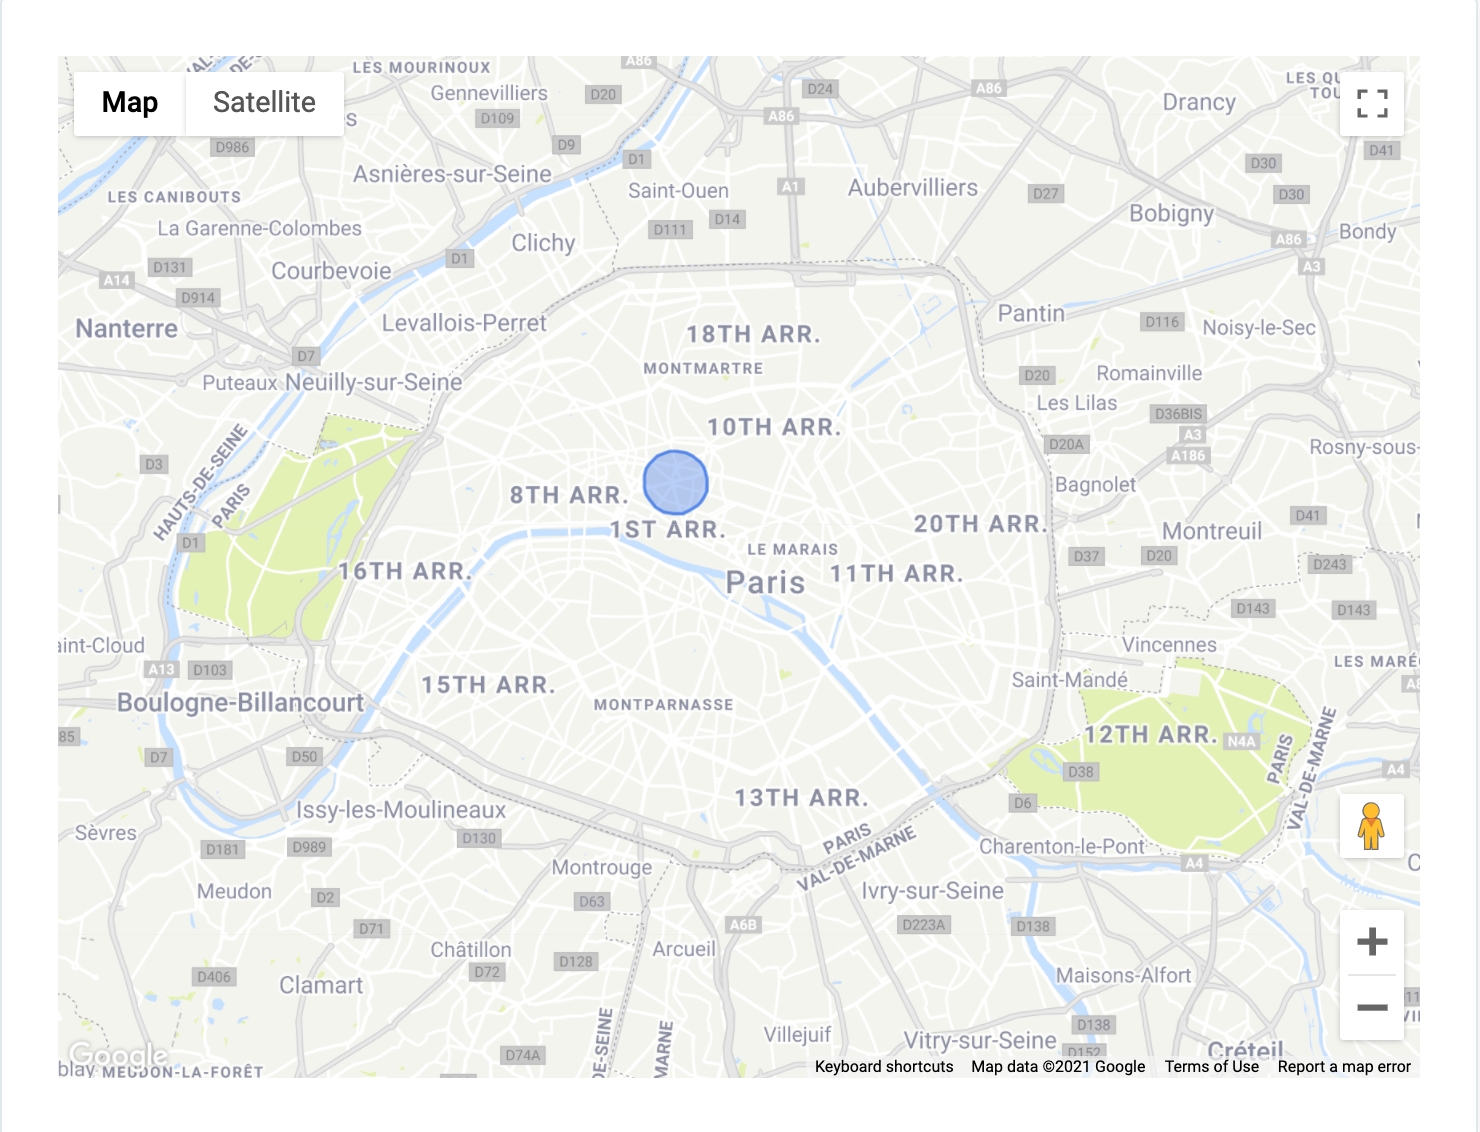
Location section
The locations section displays a map (figure 10) which indicates either the listing’s rendering location or an intervention area. Users can navigate through the interactive map through the use of standardized commands (zoom in, out, drag and click).
A blue circle may sometimes be displayed instead of an exact location. This indicates the listing’s rendering/intervention area as a protection/security measure.
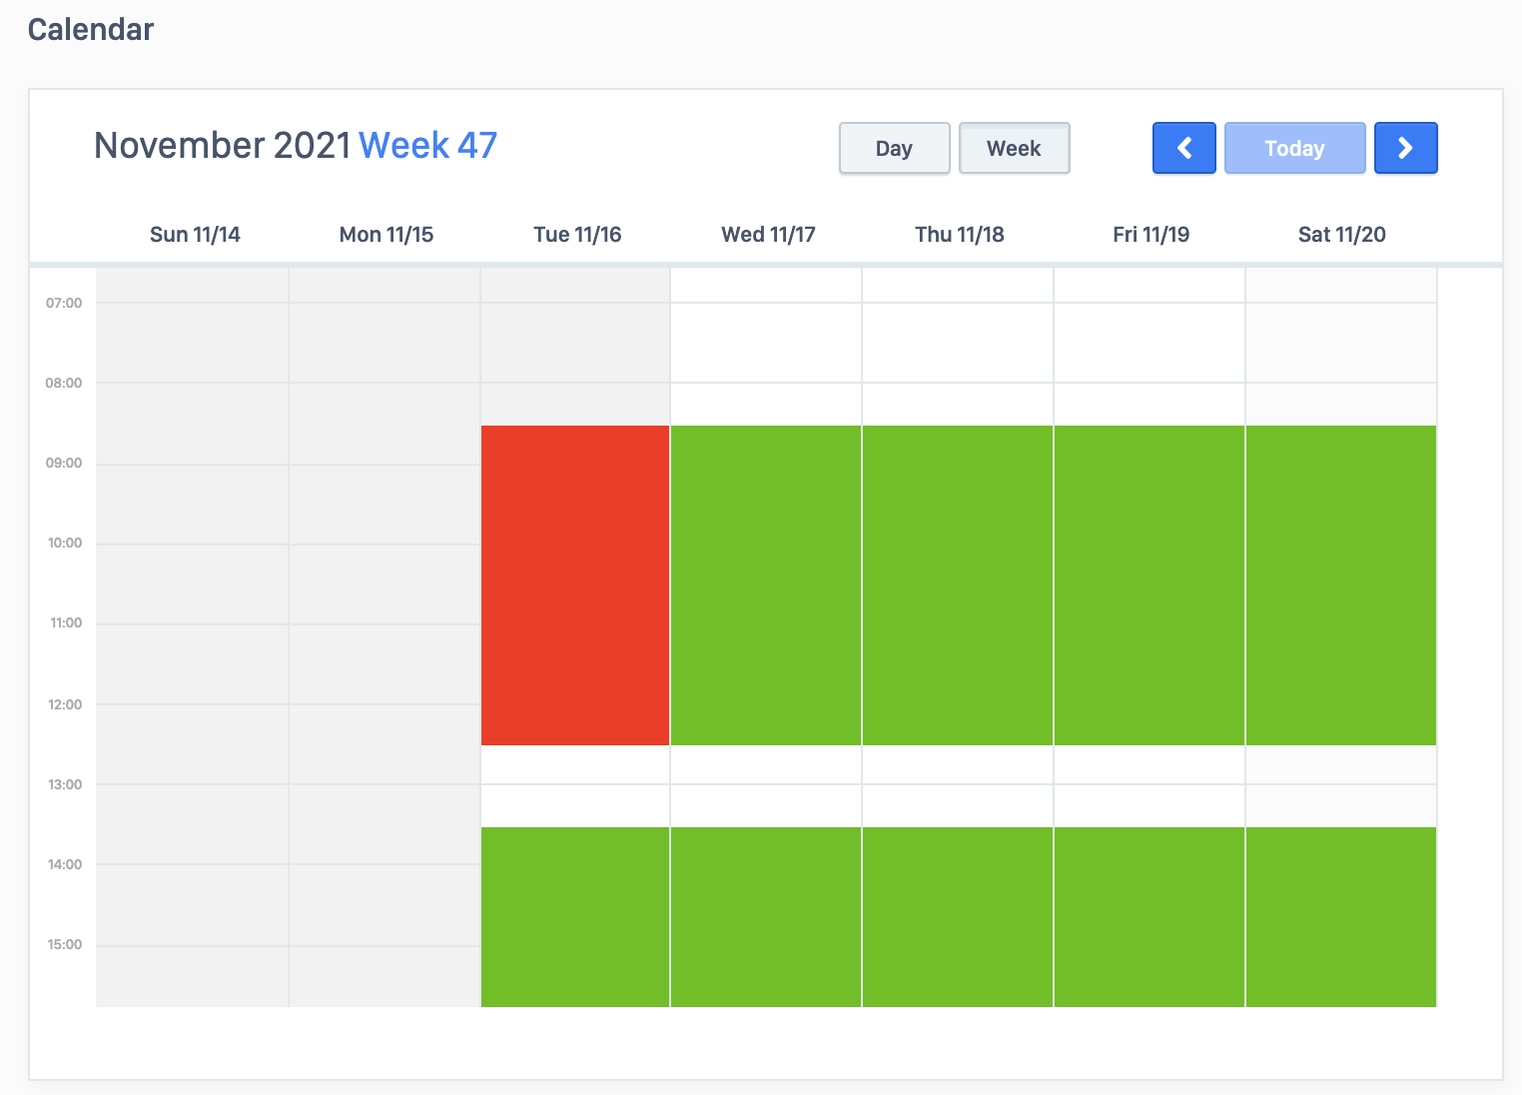
Calendar section
The listing’s availabilities (figure 11) are displayed at the bottom of the listing page under the calendar section. An intuitive colour code is used to visually give availability information at a glance:
Red: the listing is not available
Green: the listing is available
Users can change the calendar view from a daily view to a weekly view. Users can also navigate through the calendar by using the top-right arrows.
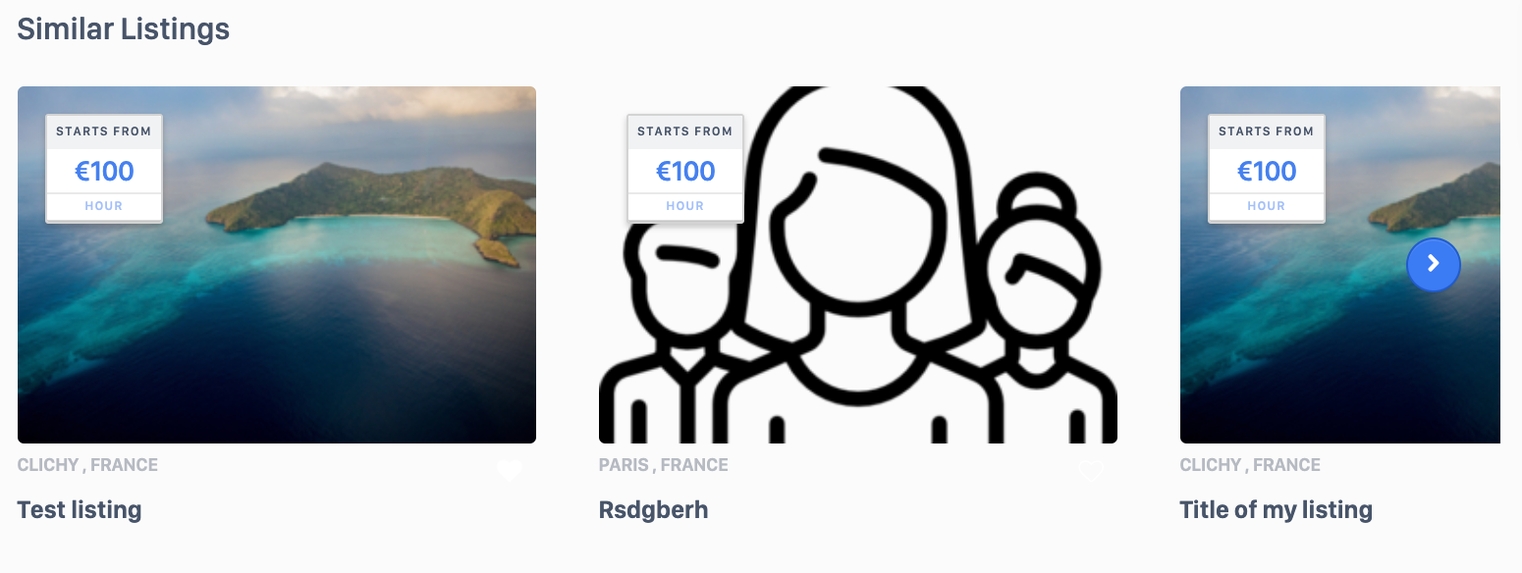
Similar listings section
The similar listing section (figure 12) provides a selection of other listings that might be of interest to the user.
This section encourages users to stay longer on the platform by providing alternatives to a given listing. This may increase the chances of finding the right match and conversion rates.
The booking block
The booking block is related to the booking action. This block is anchored to the page and always remains visible while scrolling through the listing page.
The booking block displays by default the booking’s base price. The following information is managed through this block:
The listing’s total price (figure 13.1).
The listing’s preview card available in the search results displays the listing’s default price.
Prices may vary according to the offeror’s pricing rules and selected dates.
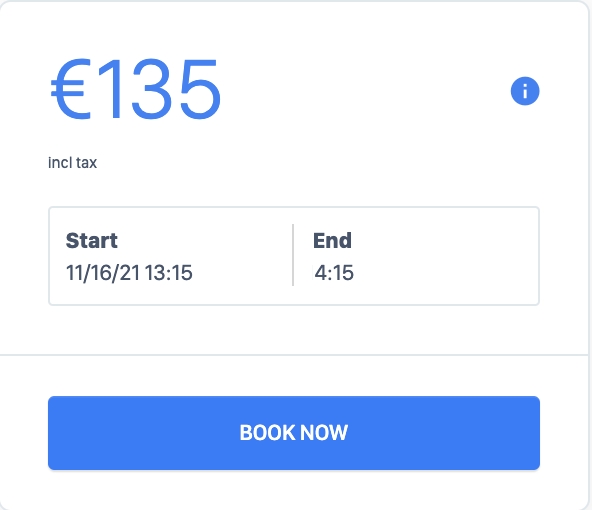
Requested service dates (figure 14).
Users select the start date (and time if applicable ) and the end date (or time if applicable) for the booking request. The selectable dates depend on the listing’s availabilities.
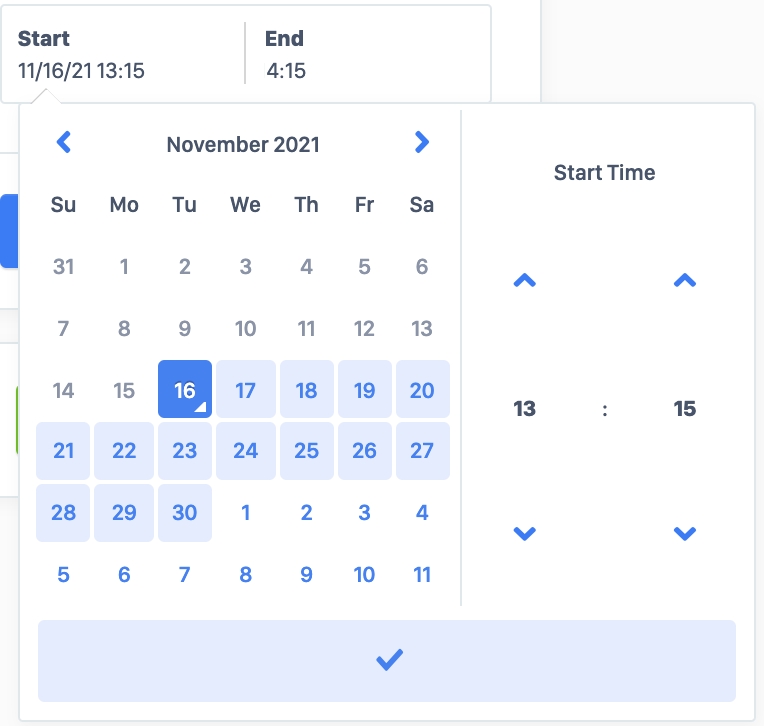
The “Book now” button (figure 15) initiates the booking request process for the previously entered dates and conditions.

Update listing page
Only offerors can update their listings via their dashboard. This process is described in the section - Edit a Listing (Time Based)
Customers cannot update listings.
Delete listing page
Only offerors can delete their listings via their dashboard. The process is described in the article: Edit a Listing (Time Based)
Customers cannot delete listings.
Related resources
Business rules:
Book a Service (Time Based)
Booking request workflow
Path: Homepage > All listings > Listing > Booking
Definition
The booking request process is made out of the checkout + the payment process + the final confirmation
WHO CAN USE THIS FEATURE?
Logged in users
Create a booking request
To create a booking request, users select in a listing page the variables required in the related booking block (usually the start and/or end date and/or time, quantities). They then click the “Book now” button (figure 1) which initiates the booking request process.
Checkout
The Checkout Overview page is the initial screen presented to users upon selecting the "Book Now" button. To enhance clarity, the page is divided into multiple sections.
Date & location
The data block (figure 2) summarizes the requested date, time & duration for the booking request.
The location block (figure 3) summarizes the service location for the booking request.
Principal Services
The main services block (figure 4) displays the following information about the services requested in the booking request:
Listing title
Quantity
Time unit
Price per unit
Discounts
Total cost
Platform service fees block
The platform service fees block (figure 5) informs the users of the fees taken by the platform. The displayed fees depend on the platform administrator’s configuration.
Coupon
In the Coupon section, customers have the option to apply a discount coupon, which will reduce the total amount payable. For further details, refer to the Discount Coupon Section.

Total price
The total price block (figure 6) indicates the booking’s total price.
Fees and taxes included
Message
The message block (Figure 7) enables users to submit messages and attach files to the offeror. The "Your message" field can be displayed in the configuration settings via the SBO by disabling the "Add message field in new booking form" option. Additionally, this field can be set as mandatory by enabling the "Message field required" option.
The user needs to accept the platform terms & conditions by checking on the checkbox (figure 8).
To confirm the booking request, the user then clicks “Continue >” (figure 9) which will redirect him to the payment page.
The right section
On the right-hand side of the page, the booking-related offeror’s information (figure 10) is displayed in a dedicated information block.
UThe payment page
No amounts are charged until the booking request is accepted. Additionally, the platform holds the amount paid until the service is rendered.
On this page, the user selects their payment method, which is determined by the payment service provider configured. To configure a payment service provider, the "Payment Method" setting in the SBO must be modified. Below is a list of available payment methods based on the payment service provider:
Bank Wire Transfer: Mangopay only
Direct Debit Payment: Stripe only
For more information regarding the payment types and workflows, refer to the Payment Service Provider section.
The confirmation page
The confirmation page (figure 13) confirms the booking request has been successfully made. This ends the booking request process.
The offeror then receives an alert for a new booking request.
The user is then automatically redirected to his platform dashboard, described in the article: Bookings dashboard (Time-Based rendering type)
Update a booking request
A user can update his booking request during 2 steps of the process.
The user can click “Edit” (figure 14) available on the left-hand side at the end of the checkout overview page to modify the date and time for his booking request.
Similarly, “Edit” is available on the payment page. This redirects the user back to the checkout overview page.
Delete a booking request
Users cannot delete a booking request.
Users can either stop the booking request process, in which case no booking request is made; or users can cancel booking requests from their dashboard.
The process is described in the article: Bookings dashboard (Time-Based rendering type) - Update a booking
Related resources
Business rules:
Seat Based
The Seat-Based rendering type is a standardized option that administrators can enable within SCND. When activated, vendors can create listings based on the number of participants who will benefit from the service.
For example, in the case of a training class, customers specify the number of participants at the time of booking. The system then calculates the total cost based on the number of seats selected.
Example:
A class offers 10 available seats.
The customer booked 4 seats.
Each seat costs 10 euros.
The total booking cost is 40 euros.
This pricing model ensures that customers are charged based on actual usage, making it suitable for services where capacity is limited.
To learn more about this feature, access
This process follows a structural backbone with slight differences depending on the following rendering type:
Create a Listing (Seat Based)
How to create a listing as a platform user in the Seat-Based rendering type.
Path: Front > Publish a listing
Definition
The Listing Deposit for Seat-Based Rendering process involves creating a listing on a platform to showcase services offered or required. This functionality enables vendors to create listings where pricing is determined based on number of seats booked for a session.
To deposit a listing, users must be registered and logged into the platform. The Log In and Register options must be utilized to gain access to this feature.
In a non-switch platform configuration, only vendors can create listings.
Create a listing
The user fills in the following information to create a listing page as displayed in the following section - Show a listing (Set Based)
Triggering the listing creation workflow
To understand how this step is reached during the listing process creation, refer to the Rendering Type Selection (Commoditized) section in the documentation.
About your Session
In the seat-based rendering type, the base price is determined by multiplying the price per participant by the total number of participants in a session at the time of booking.
Additionally, vendors have the option to offer a free session by selecting the "Free Session" checkbox.
The system also factors in platform fees per participant, which can be configured by an administrator through the SBO under "Platform Asker Fees" or "Platform Offerer Fees" within the configuration settings.

For the Seat-Based rendering type, the vendor must configure the system to notify the customer of the session duration.

In the final section of this block, the vendor is required to specify the maximum number of participants permitted to attend each session.

About your session availability
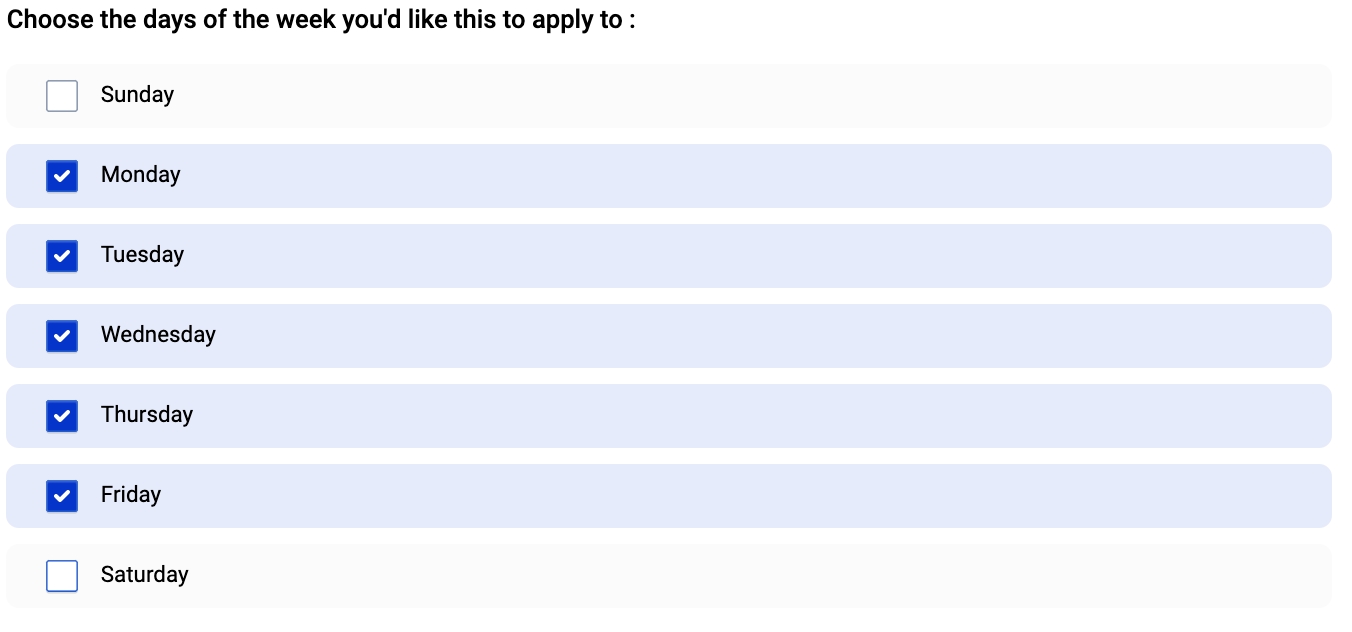
In this section, the vendor is required to configure session availability by specifying the start and end dates for each session, along with the corresponding time range. Additionally, the vendor can define the specific days of the week within the selected date range when the sessions will be available.

Set your category
Categories provide a structured way to describe listings and organize them into sections, enhancing the user experience during the search process. They help streamline navigation and improve discoverability. For details on configuring categories, refer to the Listing Category Management section.
Multiple categories can be selected for a single listing.
Proceed to step 4 by clicking “Proceed to step 4 of 4”.

Set your attributes
Attributes provide an additional layer of information to describe a listing. They are structured, searchable entities that are associated with specific categories. The available attributes may vary depending on the category selected for a listing. A "*" symbol displayed on the right side of an attribute field indicates that the attribute is mandatory. For detailed instructions on creating and managing attributes, refer to the Listing Attributes Management section.
Address of the service
The Address section allows the vendor to provide the location where the service will be performed. The following details must be entered at this step:
Country (dropdown field)
City (mandatory)
ZIP Code
Street Number
Street Name
If the full address is not mandatory on the listing, the user can click on the arrow icon in order to hide the ZIP, Number, and Route.
The “Confirm Address” checks the information and displays the location on the right-hand map.
At the conclusion of the listing deposit process, the user must check the "I accept the Terms and Conditions" checkbox and select either "Publish your listing" or "Save as a draft". Choosing "Save as a draft" will create the listing without publishing it, and it will be marked as "Hidden" in the user's Dashboard.
Show a listing on the platform
The listing information entered by the user can be viewed through the dashboard. To access it, navigate through the following path: Dashboard > Listing > [Listing Name] > Presentation. Further details about this page can be found in the article below: Listings dashboard (Seat-based rendering type) - Presentation.
Update a listing during the listing deposit
Navigation Steps
During the listing deposit process, the user can update the listing’s information by clicking “Back to step X” (figure 10). This redirects the user to the previous step in which he can edit the previously entered information.
Languages management
The offeror can also update the listing’s translations manually via the language icon (figure 11.1).
The user then selects the desired language through a list of available languages (figure 11.2).
An automatic translation is set up by default. Any non-manually translated fields are automatically translated.
Once the listing deposit process is done, the user can set additional information such as the calendar, seasonal price, etc through their dashboard described in the related article: Listings dashboard (Time-Based rendering type) - Edit
Delete a listing during the listing deposit
Users cannot delete a listing during the listing deposit process as it is not published yet. They can, however, interrupt the deposit process. When it happens, in the SBO the listing will be tagged as a Draft Status.
A published listing can be deleted through the listing user’s dashboard: Listings dashboard (Seat-Based rendering type) - Delete a listing
Related resources
Business rules:
Edit a Listing (Seat-Based)
Listing dashboard edition for the Session bundle
Path: Dashboard > Listing > Listing edition
Definition
User dashboard page through which users can manage their listings.
WHO CAN USE THIS FEATURE?
Switch: All users
Non-switch: Logged offerors
Create a listing
Users can create a listing through the Front interface, by clicking the “Publish your listing”.
The process is described in the following article: Listing deposit (Seat-Based rendering type)
Once at least one listing is created, a user can view all of his listings in the user dashboard’s Listing section.
Show a listing
The user dashboard’s Listing section displays the list of all of his listings. These can be filtered by listing status (figure 1):
All: All listings
Published: Listings published on the platform
Invalidated: Listings declared as invalid by the administrator
In review: Listings being reviewed by authorized administrators, not publicly visible (only admins and the offeror can view the listing)
Hidden: Hidden listings, not publicly visible (only admins and the offeror can view the listing)
Each listing block displays:
The listing status
The listing media elements
The listing location
The listing title
The listing description
The listing price
The “Duplicate” button
The “Edit” button

Edit
Users can modify their listings' information through the “Edit” button located next to the “Duplicate” button.
Path: Dashboard > Listings > Listing # > Presentation
Editing a listing presents the listing information in several sections. At the top of each section is always displayed:
The title of the current listing.
A status dropdown button to filter listings
The “Duplicate” button
The “View listing” button (figure 8) to visualize the listing’s public display.
Information banners (figure 9) to guide the user when required
Presentation
The Seat-Based Rendering type shares some initial configurations with the Time-Based Rendering type. For instructions on editing the first section, titled "Presentation," refer to the following link: Time-Based > Presentation.
Price & Conditions
Base Price
After creating a listing, the vendor can modify the price per participant. All information presented during the listing creation process remains available in this section, including the option to designate the listing as free.

Upgrades
During the listing edition process, users have the option to add an upgrade to their listing. For detailed instructions on managing upgrades, refer to the Upgrade Management section.
Settings
Maximum number of participants
The vendor has the ability to modify the maximum number of participants. This allows for adjustments to increase or decrease the participant limit as needed.
Cancellation Policy
Vendors can also manage their listing’s cancellation policy by choosing between a “Flexible” cancellation policy or a “Strict” policy.
The default value is determined by the platform administrator through the "Cancellation Policy" configuration within the SBO.
Vendors can only select one of the two policies offered by the platform. The parameters of each policy are set by authorized platform administrators.
Calendar
Default listing availabilities are determined by the platform’s configuration. In most cases, platforms set listing calendars to be unavailable by default. To begin receiving booking requests, offerors must manually configure their availabilities.
Calendar
Users can change their listing’s availabilities through this calendar interface.
Greyed-out days are past dates and cannot be edited. White days are non-edited dates (figure 24.1).
Clicking a date/time slot opens a pop-up window (figure 2.2) prompting the user to set availability for the selected period:
Make available: the date turns green (and depending on the platform’s configuration, a price (base or specific according to how prices were set) will be displayed)
Make unavailable: the date turns red
Users can also click and drag to select several dates/time slots to do bulk changes.
A “reset availabilities” button (Figure 24.3) is available at the top of the calendar block. This deletes all calendar settings and resets to default settings (usually a calendar with no availabilities).
Advanced
The advanced calendar works the same as the basic mode described in the following article: Edit a Listing (Time-Based)
By setting the advanced calendar, you will have to set the number of participants for the sessions you will create, thanks to the dropdown button (figure 2)
Synchronization
The synchronization tool helps users import an external agenda’s events into the on-platform agenda and turn them into unavailabilities. To do so, the user enters the external agenda’s URL.
Click “Save” to save changes.
Learn more about calendar synchronization here: Calendar Sync Feature - Business Rules
Address
The “address” section manages the listing’s address.
Confirm the address and click on “Save” to save changes.
Delete a listing
To delete a listing you can follow the same process as the basic mode, described in the following article: Edit a Listing - Delete a listing
Related resources
Business rules:
Show a Listing (Seat-Based)
Instructions for listing pages - Seat-Based rendering type activated
Path: Homepage > All listings > Listing
Definition
Listing pages serve as public interfaces that provide detailed information about available services. These pages also enable users to book services directly. In seat-based listings, availability details are clearly presented and explicitly displayed within a designated section of the listing.
WHO CAN USE THIS FEATURE?
All users
Create a listing
Offerors are the only user types who can create listings. Askers cannot create listings.
The listing creation process is described in the article Session solution: Create a listting
Read a listing
See the following documentation for more information: Show a listing (Time-Based)
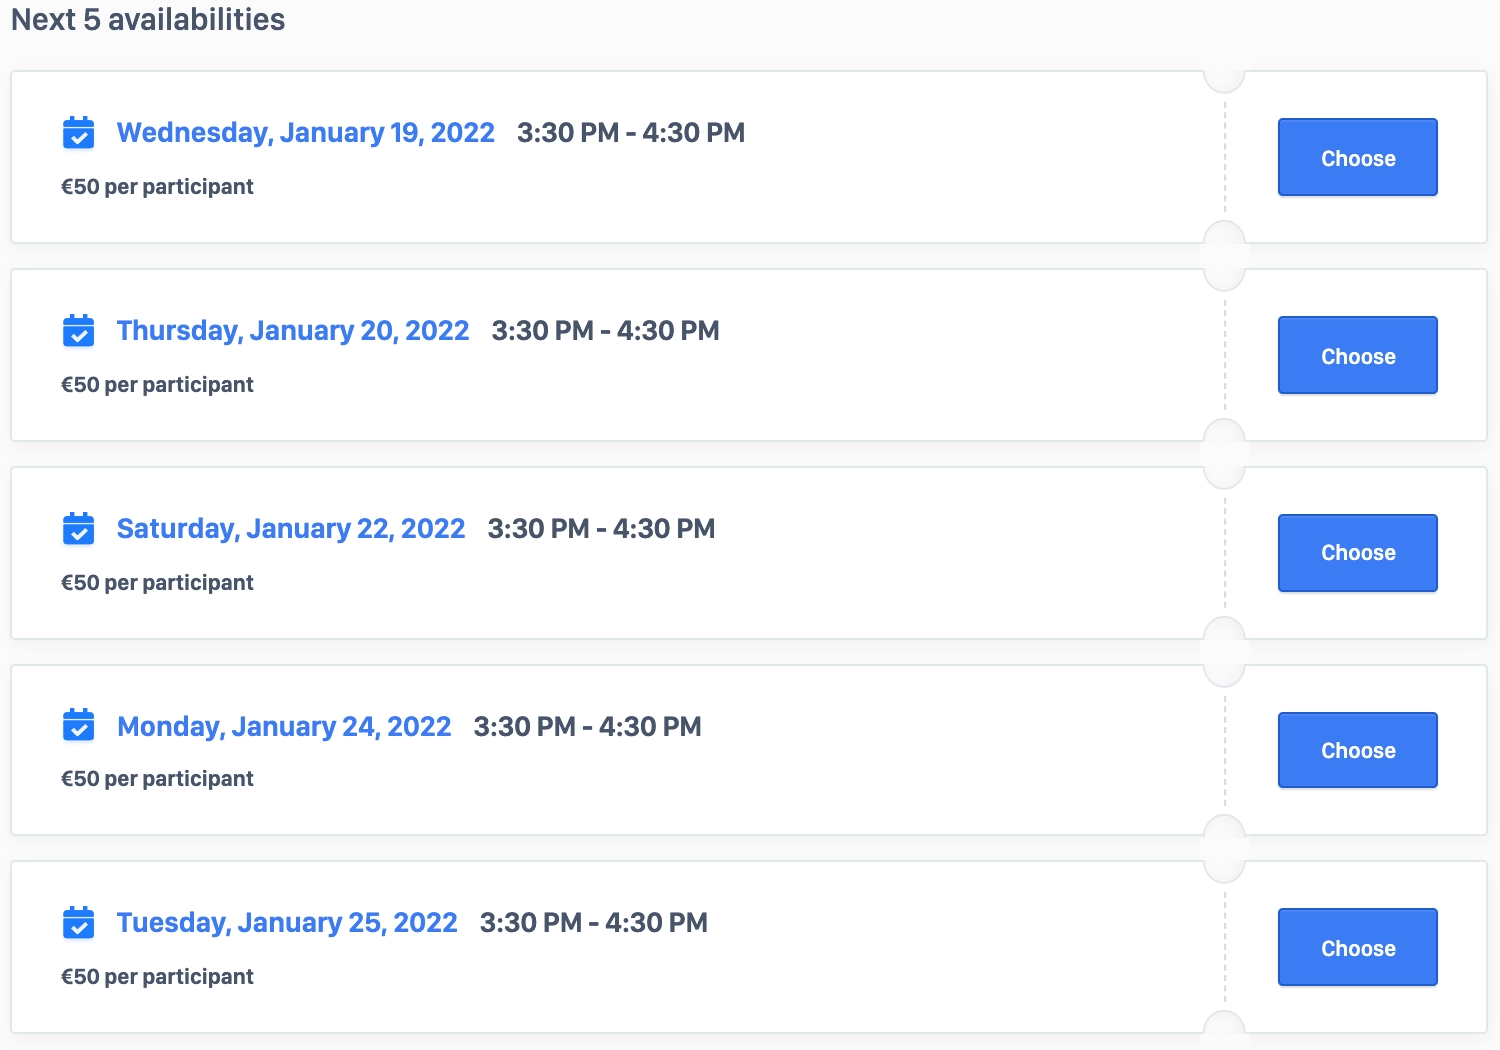
Additionally, listings bear a “Next 5 availabilities” section (figure 1).
This section displays all the upcoming sessions available in the listing.
Each session block (figure 1) displays:
The session date
The session start time and end time
The session price
A “Choose” button to add the session to the booking request.

Update a listing
Only offerors can update their listings via their dashboard. The process is described in the article: Edit a listing (Seat-Based). Askers cannot update listings.
Delete a listing
Only offerors can delete their listings via their dashboard. The process is described in the article: Edit a listing (Seat-Based). Askers cannot delete a listings.
Related resources
Business rules:
Book a Listing (Seat-Based)
Workflow page of booking confirmation with the Session bundle activated.
Path: Homepage > All listings > Listing > Booking
Definition
The booking request process is made out of the checkout + the payment process + the final confirmation
WHO CAN USE THIS FEATURE?
Logged in users
Create a session booking
To create a session booking, users select the desired session displayed on the left-hand side of the listing page (figure 1).
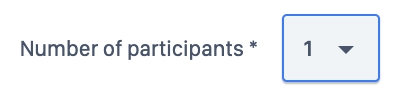
Users can set the number of participants for their booking (figure 2).
Click “Book now” (figure 3) to confirm the booking request.

Book a Service
The checkout overview pages are similar to the ones from the Time-based rendering type. Learn more through the following documentation: Book a Service (Time-Based)
Session
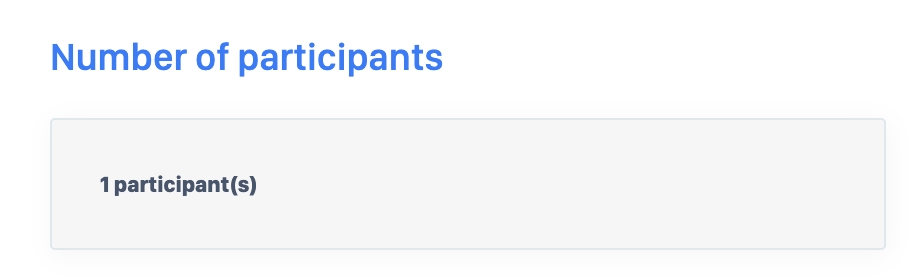
The session confirmation pages are similar to the ones from the time-based, with the addition of the number of participants (figure 4).
Update a session booking
Updating a session booking follows the same process as the one from the time-based rendering. Learn more through the following documentation: Edit a Listing (Time-based)
Delete a session booking
A booking request cannot be deleted. Users have the option to either halt the booking request process before submission, preventing the creation of a request, or cancel an existing booking request through the dashboard.
The process is described in the article: Bookings dashboard (Time-Based rendering type) - Update a booking
Related resources
Dashboard:
Business rules:
Flat Rate
The Flat-rate rendering type enables vendors to offer services that are booked based on a predefined experience. In this model, the vendor provides a detailed listing description that includes information about the service and its total fixed duration.
Customers can only select the start date and time, as the total duration is predetermined by the vendor. The end time is automatically calculated by adding the fixed duration to the selected start time.
If the vendor has more services in the same listing, customers can book multiple services within the same listing and complete payment for all selected services in a single transaction. The total duration would be the combined amount of time for all the booked services.
For example, a vendor offering a Ferrari driving experience in Paris would need to provide details about the experience, including pricing and the total duration in hours.
To learn more about this feature, access
This process follows a structural backbone with slight differences depending on the following rendering type:
Create a Listing (Flat Rate)
How to create a listing as a platform user with the service bundle activated.
SubscriptionSubscription Path: Front > Publish a listing
Definition
The listing deposit refers to the process of setting up a listing on our platform, enabling vendors to showcase and offer multiple services simultaneously. To streamline this process, administrators can define standard service structures using the service template within the SBO (Service Back Office). This feature provides vendors with a predefined framework, making it easier for them to create and manage their service listings efficiently. By utilizing these templates, vendors can ensure consistency and accuracy in their service offerings while reducing the time required for setup.
To deposit a listing, users must be registered and logged into the platform. The Log In and Register options must be utilized to gain access to this feature.
In a non-switch platform configuration, only vendors can create listings.
Creating a Service
Triggering the listing creation workflow
To understand how this step is reached during the listing process creation, refer to the Rendering Type Selection (Commoditized) section in the documentation.
Creating a Service
The user has the option to either utilize a pre-configured service template set up by the platform administrator or create a custom service.

The image below displays all configurable settings available to the administrator, allowing for the modification of various service parameters.

The process for creating a service template is described in the following documentation: Service templates (Flat Rate rendering type)

To utilize a predefined service template established by the platform administrator, the Service Template toggle must be enabled via the slider. To create a custom service, the Custom Template slider should be activated.

Users retain the option to select a service template to prefill their service details. The following fields remain editable:
Category
Title
Description
Price and Duration
Minimum and Maximum Orderable Quantity

Creating a Service Subscriptions
In the Flat-Rate rendering type, SCND provides also an option for vendors to establish a subscription model that automatically charges customers at regular intervals based on the configured settings. For additional information, refer to the "Subscription" section. This function can be configured by adjusting the "Service Type" configuration in the SBO
When enabled, during the listing creation process for the Flat-Rate rendering type, a new "Service Type" checkbox will appear below the service template in the service selection section. This checkbox allows the vendor to specify whether the service should be created as a regular service, also referred to as a One-shot service, or as a subscription service.
Subscriptions service templates can also be pre-configured in the SBO.

If the subscription service type is selected, additional options will appear to configure periodic pricing. SCND supports subscription models on a weekly, monthly, and yearly basis. The subscription period is configured through the "Subscription Frequencies" configuration in the SBO

Once the service creation process is complete, the user should click "Proceed to Step 4 of 4" to advance to the next step.

Address of the service
The Address section allows the vendor to provide the location where the service will be performed. The following details must be entered at this step:
Country (dropdown field)
City (mandatory)
ZIP Code
Street Number
Street Name
If the full address is not mandatory on the listing, the user can click on the arrow icon in order to hide the ZIP, Number, and Route.
The “Confirm Address” checks the information and displays the location on the right-hand map.
At the conclusion of the listing deposit process, the user must check the "I accept the Terms and Conditions" checkbox and select either "Publish your listing" or "Save as a draft". Choosing "Save as a draft" will create the listing without publishing it, and it will be marked as "Hidden" in the user's Dashboard.
Show a listing on the platform
The user can read the listing information entered through his dashboard.
Path: Dashboard > Listing > Name of the listing > Presentation
This page is described in detail in the article:
Update a listing
Navigation Steps
During the listing deposit process, the user can update the listing’s information by clicking “Back to step X” (figure 10). This redirects the user to the previous step in which he can edit the previously entered information.
Languages management
The offeror can also update the listing’s translations manually via the language icon (figure 11.1).
The user then selects the desired language through a list of available languages (figure 11.2).
An automatic translation is set up by default. Any non-manually translated fields are automatically translated.
Once the listing deposit process is done, the user can set additional information such as the calendar, seasonal price, etc through their dashboard described in the related article: Listings dashboard (Time-Based rendering type) - Edit
Delete a listing
Users cannot delete a listing during the listing deposit process as it is not published yet. They can, however, interrupt the deposit process. When it happens, in the SBO the listing will be tagged as a Draft Status.
A published listing can be deleted through the listing user’s dashboard: Listings dashboard (Basic solution) - Delete a listing
Related resources
Business rules:
Edit a Listing (Flat-Rate)
Manage the services offers within a listing
processPath: Dashboard > Listing > Listing edition
Definition
Service Management on the Flat-Rate rendering type provides an overview of the available services within a listing, enabling efficient management and customization. Users can select from default services or create tailored services to meet specific requirements.
WHO CAN USE THIS FEATURE?
Switch: All users
Non-switch: Logged offerors
Create a Listing
Users can create a listing through the Front interface, by clicking the “Publish your listing”.
The process is described in the following article: Listing deposit (Flat-Rate rendering type)
Once at least one listing is created, a user can view all of his listings in the user dashboard’s Listing section.
Show a Listing
The user dashboard’s Listing section displays the list of all of his listings. These can be filtered by listing status (figure 1):
All: All listings
Published: Listings published on the platform
Invalidated: Listings declared as invalid by the administrator
In review: Listings being reviewed by authorized administrators, not publicly visible (only admins and the offeror can view the listing)
Hidden: Hidden listings, not publicly visible (only admins and the offeror can view the listing)
Each listing block displays:
The listing status
The listing media elements
The listing location
The listing title
The listing description
The listing price
The “Duplicate” button
The “Edit” button

Edit
Users can modify their listings' information through the “Edit” button located next to the “Duplicate” button.
Path: Dashboard > Listings > Listing # > Presentation
Editing a listing presents the listing information in several sections. At the top of each section is always displayed:
The title of the current listing.
A status dropdown button to filter listings
The “Duplicate” button
The “View listing” button (figure 8) to visualize the listing’s public display.
Information banners (figure 9) to guide the user when required
Presentation
The Seat-Based Rendering type shares some initial configurations with the Time-Based Rendering type. For instructions on editing the first section, titled "Presentation," refer to the following link: Time-Based > Presentation.
Price & Conditions
Services
In this section (figure 3) of the dashboard, you will be able to see the service you offer within a listing.

Service card
For each service card (figure 4) you can see:
The dots for the drag and drop action
The slide button to activate or disable the service in your listing
The service title
The service price
The service duration
The pen icon allows you to edit the service card.
Service template card
The service template card (figure 5) is the service template administrator has already created on the platform.
To go quicker in adding a service you can use the service template by clicking the button “+ Use this template” (figure 6).
Adding or updating Services
To create/ add a service in your listing you can go on the Services section of the Price & conditions part of the listing dashboard and click the button “Add a service” (figure 1).
It will open a modal (figure 2) and you will have to fill:
The service title
The service description
The price
The category
The minimum and maximum orderable quantity
The duration
To save your modification, please click the button “Save” in the modal.

Delete a service
To delete a service in a listing, please follow this path:
Path: Dashboard > Listings > Listing > Edit Listing > Price & Conditions > Services > Service card > Edit service card > Delete
You will be able to delete a service by clicking the button “delete” (figure 8 ), in the edit modal of the service card.
There is no confirmation message, it is deleted directly
To create/ add a service to your listing you can go to the Services section of the Price & conditions part of the listing dashboard and click the button “Add a service”
If the subscription configuration is enabled in the application, the vendor has the option to create a new service subscription by selecting the desired service type.

The system displays the available service subscription options, allowing the vendor to select a pricing plan based on the chosen subscription frequency.

Click on Save to complete the process.
The process of updating a service subscription is the same as updating a one-shot service.
Delete a subscription service
To delete a subscription service in a listing, please follow this path:
Path: Dashboard > Listings > Listing > Edit Listing > Price & Conditions > Services > Subscription Service card > Edit service card > Delete
You will be able to delete a service by clicking the button “delete” (figure 8 ), in the edit modal of the service card.
To update a service already created, the user must click on the pen icon and update the information.

A modal will appear displaying the service information, allowing the vendor to modify and save the details as needed.

Upgrades
During the listing edition process, users have the option to add an upgrade to their listing. For detailed instructions on managing upgrades, refer to the Upgrade Management section.
Settings
Cancellation policy
Users can also manage their listing’s cancellation policy by choosing between a “Flexible” cancellation policy or a “Strict” policy (figure 21).
The default value is determined by the platform administrator through the "Cancellation Policy" configuration within the SBO.
Users can only select one of the two policies offered by the platform. The parameters of each policy are set by authorized platform administrators.
Discounts
Users can add discounts to their listing through the “Add a new discount” button.
Each discount is set in percentages based on a threshold to be defined.
The red trash icon deletes a media element.
There is no confirmation message when deleting a discount.
Calendar
Default listing availabilities are determined by the platform’s configuration. In most cases, platforms set listing calendars to be unavailable by default. To begin receiving booking requests, offerors must manually configure their availabilities.
Calendar
Users can change their listing’s availabilities through this calendar interface.
Greyed-out days are past dates and cannot be edited. White days are non-edited dates (figure 24.1).
Clicking a date/time slot opens a pop-up window (figure 2.2) prompting the user to set availability for the selected period:
Make available: the date turns green (and depending on the platform’s configuration, a price (base or specific according to how prices were set) will be displayed)
Make unavailable: the date turns red
Users can also click and drag to select several dates/time slots to do bulk changes.
A “reset availabilities” button (Figure 24.3) is available at the top of the calendar block. This deletes all calendar settings and resets to default settings (usually a calendar with no availabilities).
Advanced
This advanced calendar tool allows users to quickly set their availabilities over large periods.
The parameters available are:
Status: “available” or “unavailable” (figure 25.1)
Date range with the start date and the end date (and hours depending on the platform’s configuration) (figure 25.2)
Weekdays to apply these changes to (figure 25.3)
Click “Save” to save changes.
Synchronization
The synchronization tool helps users import an external agenda’s events into the on-platform agenda and turn them into unavailabilities. To do so, the user enters the external agenda’s URL (figure 26).
Click “Save” to save changes.
Learn more about calendar synchronization here: Calendar Sync Feature - Business Rules
Address
The “address” section manages the listing’s address (figure 27).
Confirm the address and click on “Save” to save changes.
Delete a listing
Users can delete listings through the listing status dropdown menu available throughout the listing edition sections (figure 28).
A confirmation message prompts the user to validate the deletion.
A deleted listing is no longer listed in the users' dashboard or search results. However, all related bookings, messages, and payments remain listed for history and tracking purposes.
Related resources
Business rules:
Show a Listing (Flat Rate)
Instructions for listing pages - Flat-Rate rendering type activated
Path: Homepage > All listings > Listing
Definition
Listing pages function as public interfaces that present comprehensive details about available services while also enabling users to book them. When the Flat-Rate rendering type is enabled, these listings provide information at two distinct levels: general listing details and specific service information. To ensure consistency and standardization, service information can be structured using predefined service templates.
Similarly, when the Subscription feature is activated, listing pages display two levels of information: general listing details and subscription service information. Subscription service details can also be organized using service templates to maintain a structured and uniform presentation.
WHO CAN USE THIS FEATURE?
All users
Create a listing
Offerors are the only user types who can create listings. Askers cannot create listings.
The listing creation process is described in the article Service solution: Create a listing.
Show a listing
Show a listing (One-Shot Service)
The following documentation describes the information displayed: Show a Listing (Time-Based)
Additionally, listings bear an “Our services” section (figure 1).
This section displays all the services offered by the offeror in the listing. These services are organized in service template blocks.
Each service template block (figure 1) displays:
The service title
The service duration
The service category
The service description
The service price
An “Add” button to add the service to the booking request.

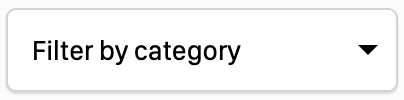
If an offeror offers several services and/or subscription services, users can filter them by category to only display those of interest, thanks to the dropdown button (figure 2)
Show a listing (Subscription)
The following documentation describes the information displayed: Show a listing (Time-Based)
Additionally, listings bear an “Our services” section (figure 1).
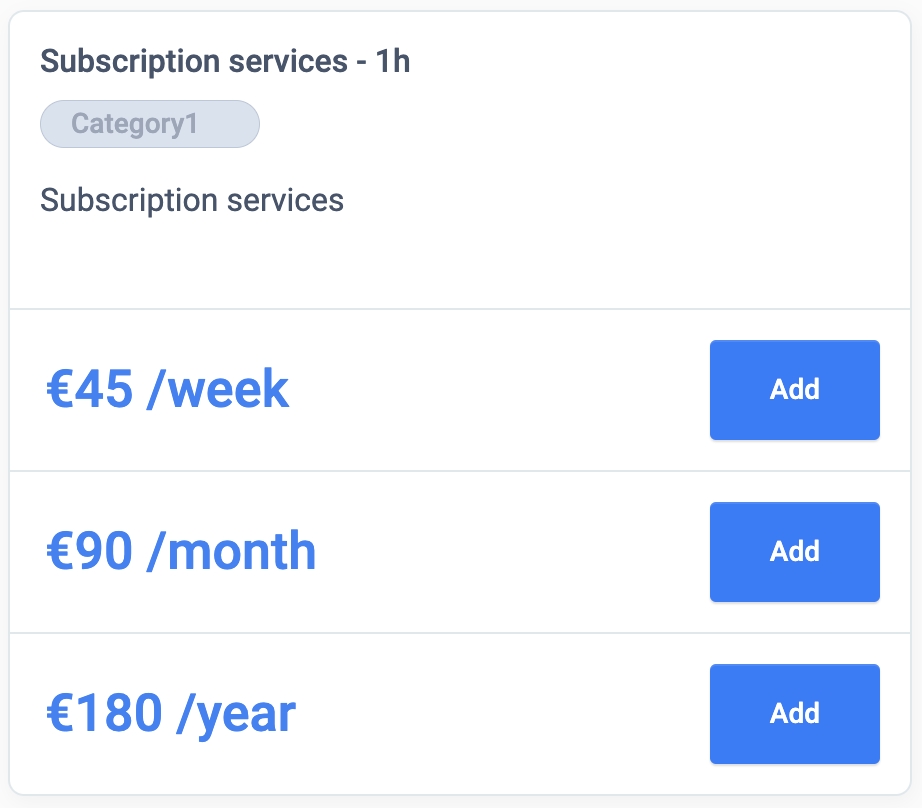
This section displays all the services and/or subscription services offered by the offeror in the listing. These subscription services are organized in subscription service template blocks.
Each subscription service template block (figure 1) displays:
The subscription service title
The subscription service duration
The subscription service category
The subscription service description
The subscription service price per frequencies
An “Add” button to add the subscription service per frequency to the booking request.
If an offeror offers several services and/or subscription services, users can filter them by category to only display those of interest, thanks to the dropdown button (figure 2)
Update a listing
Offerors have the ability to update their listings through their dashboard. The procedure for making updates is detailed in the article "Edit a Listing (Flat-Rate)." Askers do not have the capability to modify listings.
Delete a listing
Only offerors have the ability to delete their listings through their dashboard. The deletion process is outlined in the article "Edit a Listing (Flat-Rate)" Askers do not have the option to delete listings.
Related resources
Business rules:
Book a Listing (Flat Rate)
Workflow page of a booking confirmation
Path: Homepage > All listings > Listing > Booking
Definition
The booking request process is made out of the checkout + the payment process + the final confirmation
WHO CAN USE THIS FEATURE?
Logged in users
Create a service booking
Create a booking (One-Shot Service)
Select a listing and choose the date and starting time (figure 1).
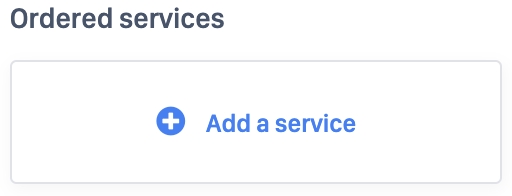
To add a service, click “Add a service” (figure 2). This will redirect the user to the services available in the listing (figure 3). Click “Add” (figure 3) in the service card to add this service to the booking.


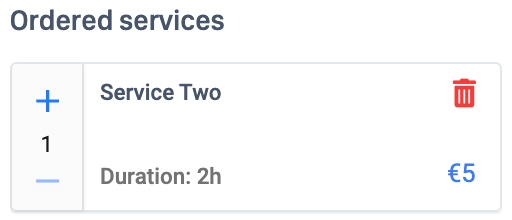
The user can set the orderable quantity in the booking (figure 4).

Click “Book now” (figure 5).

Create a booking (Subscription)
Select a listing and choose the date and starting time (figure 1).

To add a service, click “Add a service” (figure 2). This will redirect the user to the services available in the listing (figure 3). Click “Add” (figure 3) in the subscription service frequency to add this subscription service to the booking.
One-shot services and subscription service are not compatible for the booking process.
The users can not book, in the same booking, a one-shot service and a subscription service. It is the same for upgrades too.

The user can set the orderable quantity in the booking (figure 4).
Click “Book now” (figure 5).

Book a service
The checkout overview pages are similar to the ones from the Time-based rendering type. Learn more through the following documentation: Book a Service (Time-Based)
The “Principal services” become “Services”
Services
The service section (figure 6) details the following information:
The service name
The quantity booked
The Price per unit
The unit type
The duration
The discount

Update a service booking
Updating a service booking follows the same process as the one from the Time Based Rendering type. Learn more through the following documentation: Booking request (Time-Based rendering type)
Delete a service booking
Users cannot delete a booking request.
Users can either stop the booking request process, in which case no booking request is made; or users can cancel booking requests from their dashboard.
The process is described in the article: Bookings dashboard (Time-Based rendering type) - Update a Booking
Related resources
Business rules: