Log in & Register
Creating accounts as a user
Path: Homepage > Log in
Definition
Register: For non-connected users who do not have a platform account.
Log in: For non-connected users who have a platform account.
WHO CAN USE THIS FEATURE?
For all users who want to connect to the platform.
When to log in or register to the platform?
Log-in/registration is required in two scenarios.
Direct registration/login
Clicking “Log in” or “Register” navbar buttons on the homepage (figure 1).

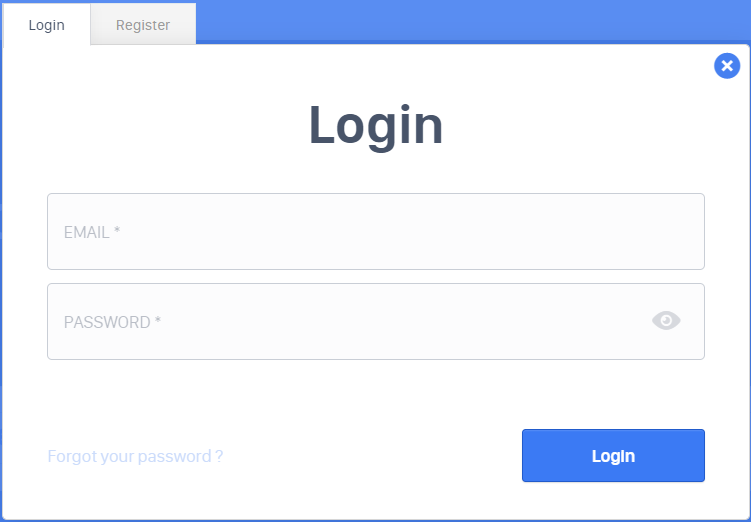
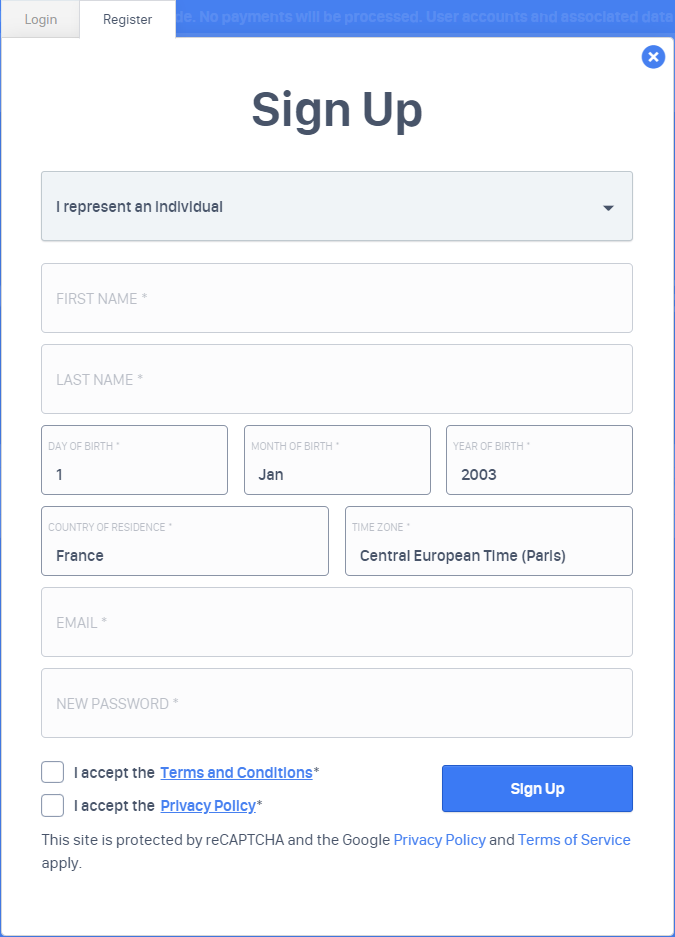
A login or registration form is displayed through a pop-up window (figure 2.1, figure 2.2).
Requested registration/login
Depending on the platform’s authorizations, users may browse through the platform without being logged in.
However, some on platform actions listed hereafter require the user to be logged in:
Publishing a listing (figure 3.1). Refer to this documentation: Listing deposit (Basic solution)

Booking service on the listing page (figure 3.2)

Clicking a link in a platform generated e-mail
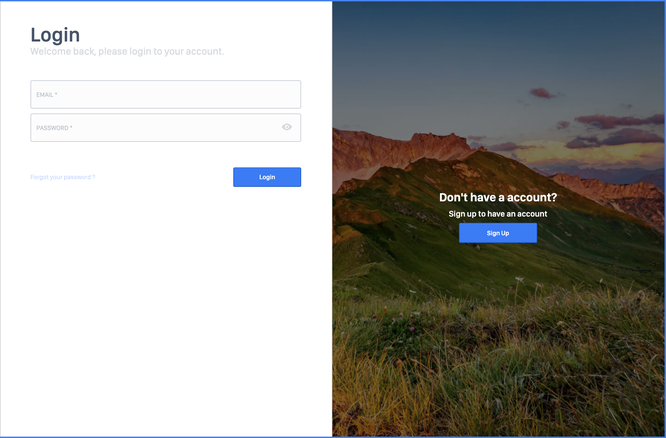
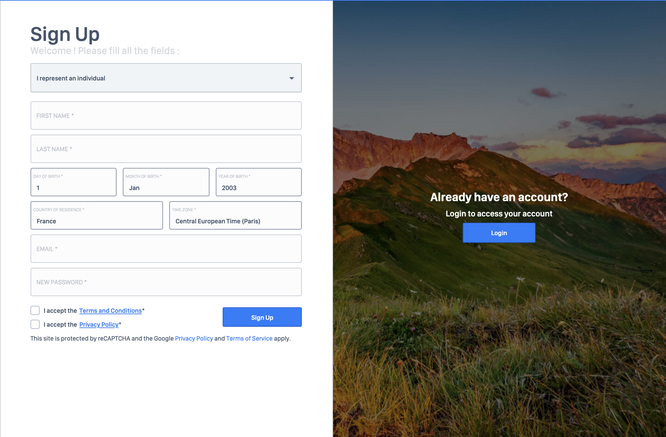
Upon performing any of these actions, the user is automatically redirected to the login/registration page. The user can then either enter his platform credentials to log in (figure 4.1) or click the “Sign Up” button and fill out the registration form (figure 4.2) to create an account.
Create an account (registration)
To create an account, a user fills out a registration form.
The user first indicates his legal status (individual or organization) through a dropdown box. The rest of the form can slightly vary according to his choice.
The differences are illustrated below:
For individuals (figure 5.1), the fields prompt information regarding the user.
For organizations (figure 5.2), the fields prompt information regarding the company’s contact.
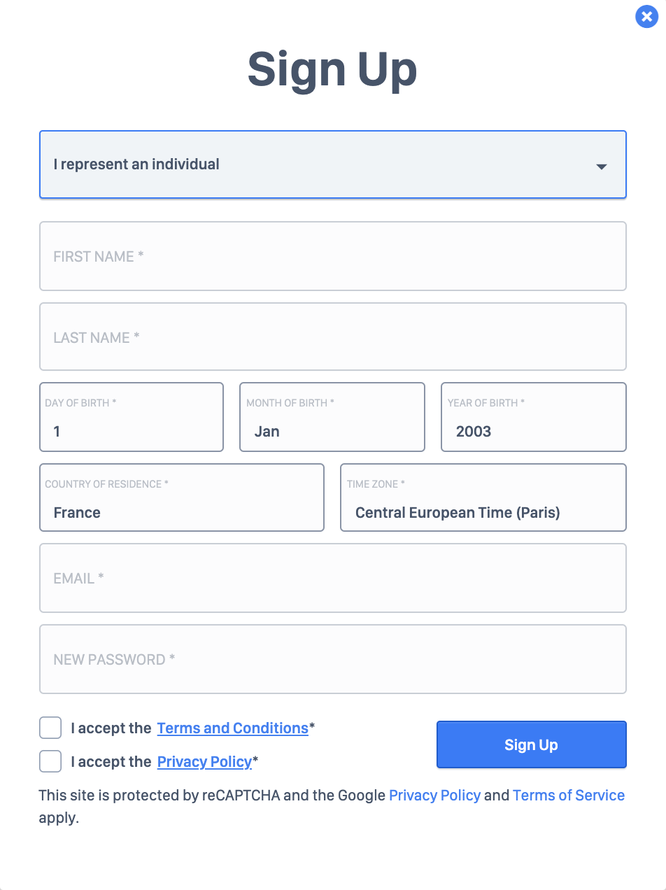
An “Individual” user will have to fill out (figure 5.1):
His first name (will be displayed on invoices)
His last name (will be displayed on invoices)
His birth date
His address
His email (platform automated emails are sent to this address)
His password
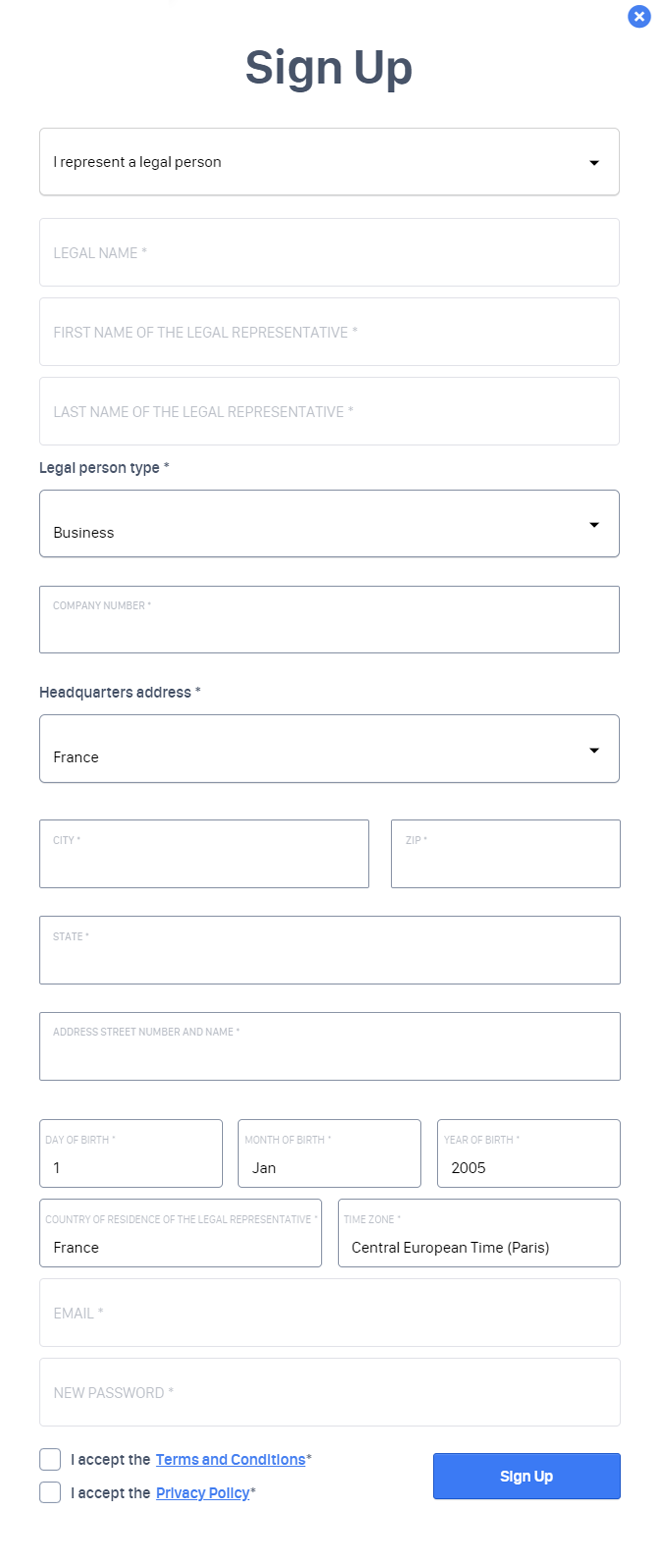
An “Organization” user will have to fill out (figure 5.2):
The company name (will be displayed on invoices)
The first name of the legal representative
The last name of the legal representative
The birth date of the legal representative
The company’s address
An email (platform automated emails are sent to this address)
A password
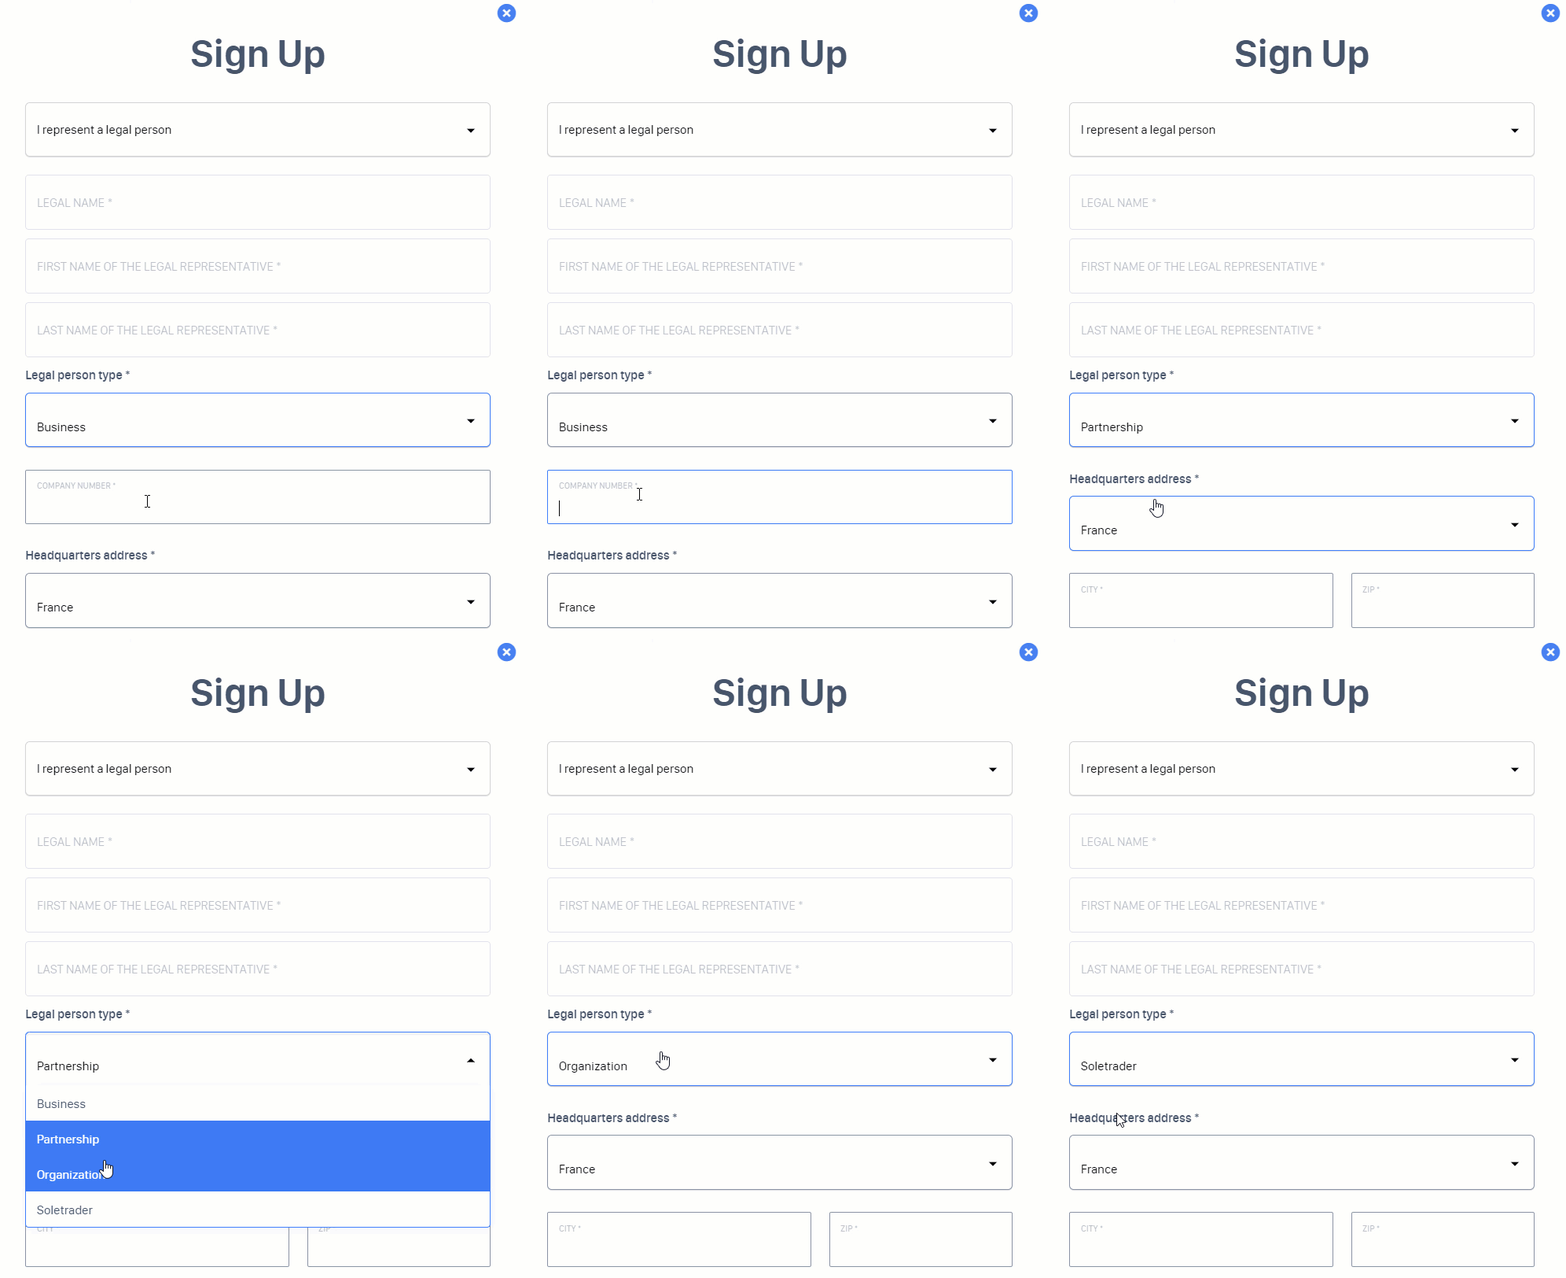
When the Mangopay bundle is enabled, depending on the type of company, different documents may be required for processing. If a Soletrader, Partnership, or organization, is selected, there is no need for adding extra information to the registration process. However, the company number is requested if the category Business is selected. (figure 5.3)
Each user must accept the following conditions by ticking the related checkboxes:
“I accept terms and conditions”
“I accept the Privacy policy”
To finalize registration, the user clicks the “Sign up” button.
Following registration, the user will receive a confirmation email.
Read the login/register pop-up
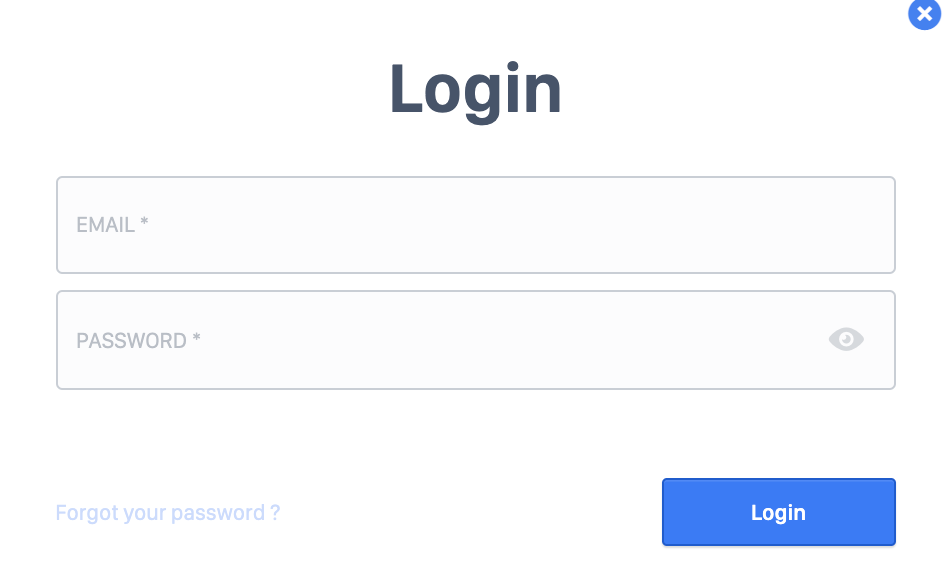
To log in, a user must indicate:
His email, in the first field (figure 6)
His password, in the second field (figure 6)
The “eye” icon allows the user to visualize the password. (figure 6)
The user clicks “login”. (figure 6)
Update the login/register information
Forgot password
If a user forgets his password, he can click the “Forgot your password ?” button (figure 7)

Then a pop-up window will open prompting the user to enter his platform account e-mail address (figure 8).
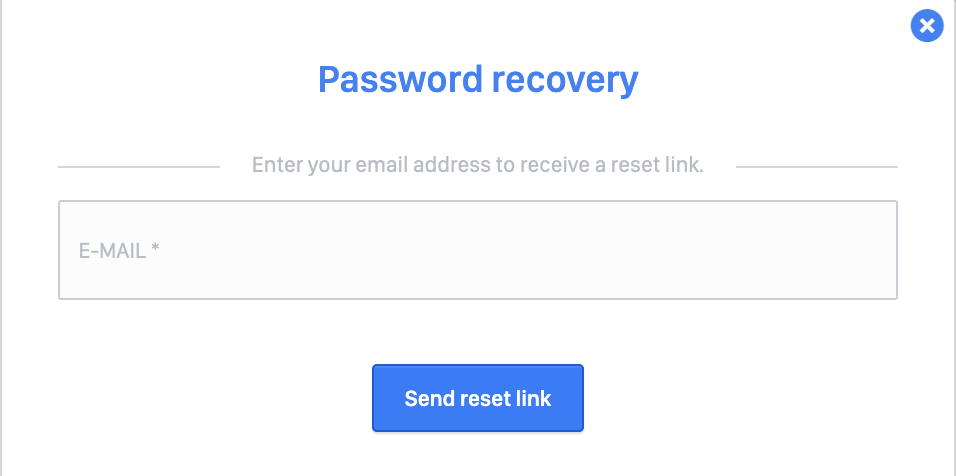
An email with a link to reset his password will be sent to the address should the e-mail address be correct.
Delete the login/register display
Users can not delete their accounts through these pages.
Related resources
Front :
Last updated
Was this helpful?