Viewing and managing users
Managing vendors & customers on the platform
Path: Backoffice > Users > Users
Definition
Users are both Vendors or Customers that have an account on the platform. Users create their own accounts through the front office (see Log in & Register)
Your platform can be configured to segregate Vendors and Customers (non-switch platform), or to allow users to be both Vendors and Customers at the same time (switch platform).
Core concept: in the back office, users are displayed through 2 views:
List view: displays users in a list which can be searched, sorted and exported
Detailed view: displays the detailed information of 1 user. Also gives access to additional features for each user individually.
Operators are excluded from the notion of “Users”. Operator accounts are accessed through the “Administrators Management” interface.
Creating a user
Operators cannot create user accounts. User registration is achieved through the front office by users themselves (more about that here: Log in & Register).
List view
When clicking on the “Users” link on the sidebar menu you arrive on the list view page. This page lists all the users of the platform.
Both Vendors and Customers are displayed by default in the list. Filtering options enable operators to display only vendors or buyers.

Each item in the list (figure 1) is composed of:
User picture
User full name
User email
User phone number
User preferred language
User timezone
Fees:
Standard fees: indicates that the user has the standard fees applied to him
Customized fees: indicates that specific fees have been configured for this user
Status:
Live: the user can use the platform
Invalidated: the user profile is suspended from the platform. The user can no longer log in.
In review: the user may log in to the platform, but his profile cannot be viewed by other users and he cannot make bookings nor contact other users.
User account creation date
The number of bookings made by the user:
Asker bookings = bookings made as a customer
Offerer bookings= bookings provided as a vendor
Number of listings associated to this user (click to view list)
User UID
Searching and sorting
Keyword search
The keyword search field (figure 2) is displayed at the very top of the interface, next to the BackOffice logo.
To perform a search, enter your query in the field and hit “Enter” on your keyboard.

Filters
The filters feature helps filter and sort items through different filtering and sorting options.
The “Has a listing” option lets you display only users that have published a listing (irrespective of the listing status).
The spoken languages filter lets you filter users based on the language they speak.
The creation date filter lets you filter users by the date at which they created their profile.

Sorting
You can choose among one of two sorting policies:
The ‘Creation date’ policy will sort users from the most recently created accounts to the oldest ones.
The ‘Update date’ policy will sort users from the most recently updated accounts to the oldest ones.
Exporting
This section describes a file export (CSV, Excel…). You can alternatively use the API to export your data.
The “Exports” button (figure 4), allows you to download the data associated with your current search results. To download all items, remove and search criteria.

By clicking on the “Exports” dropdown, a list with file extensions will appear. Choose the format you want to use and it will automatically be saved into your computer. That file can be directly reviewed from your local environment.
Be mindful of data privacy requirements and regulations. Do not download user data unless authorized to do so, and only if absolutely necessary. Treat exported data with the highest regard for security and delete any exported files after use.
Viewing the public user profile
Click on the “eye” icon to view the user’s public profile as it is viewed by customers and vendors in the front office. This will open a new tab.
Detailed view
Access the detailed view of a listing with the “Pen” Icon
From the list view, you can click the “pen” icon on any item to access more information about a user and start editing it.
Presentation card
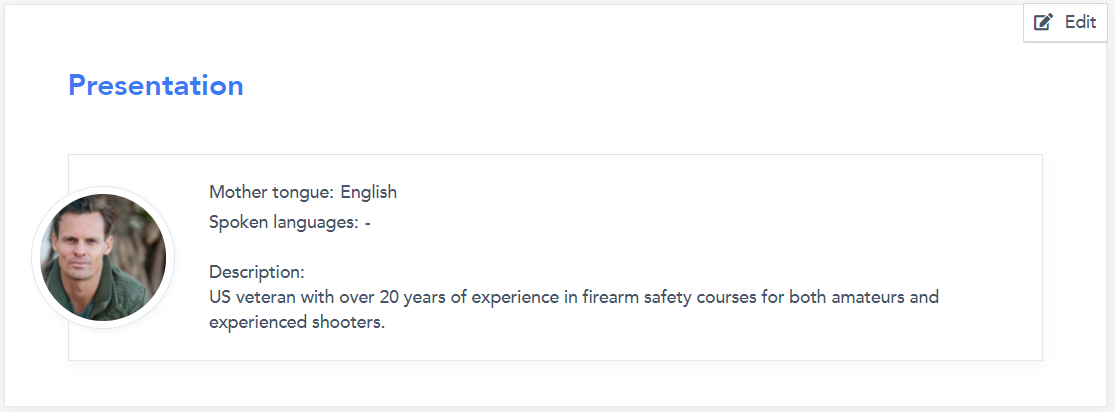
The presentation card (figure 5) allows operators to see the user’s picture, mother tongue and other spoken languages.
The “Edit” button at the top right of the card will open a new tab in the user’s dashboard (see the Impersonate feature for more about this).
Identity card
The identity card (figure 4) displays contact and identity information about the user.
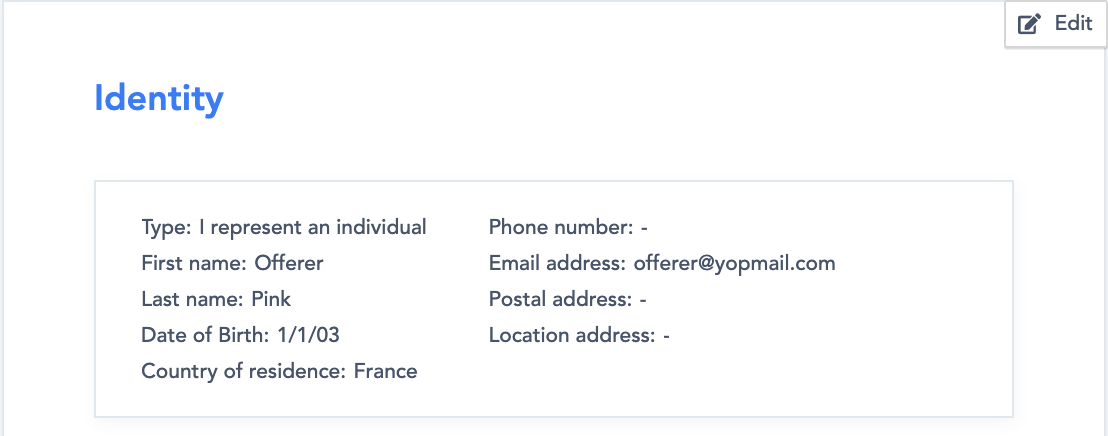
That card is composed of:
User’s type :
Individual (phycisal person) OR
Organization (legal entity)
Company (displayed only if the user is an organization)
First name
Last name
Date of birth
Country of residence
Phone number
Email
Postal address: corresponds to the billing address, and the address used for KYC / KYB purposes
Location address: corresponds to the publicly declared location of the user (information displayed in the public profile page)
Bank account
Depending on your configuration, user bank account details may be displayed here. Bank account details are used for payouts (payment made to a vendor).
PSP details
If a Payment Service Provider (PSP) is configured on your platform, several technical snippets will be displayed here. Information typically includes user UID on the PSP side and statuses:
Can bed paid: indicates the platform can receive funds for this vendor
Can be payout: indicates that the platform has sufficient information to then make a settlement to the vendor (more here: (Payments management)
Guest Users
Users can invite other users to join them on the platform (more about that here: User profile dashboard (All rendering types) - User group
The Guest users card displays the users that the current user has invited:
Email
Roles: indicates which roles have been granted to each guest user
Spy icon: enables the operator to Impersonate that user
Pen icon: let’s you edit the invitation email and the user roles

Side card information
The side card information (figure 8) is used to display a summary of the items associated to the user.
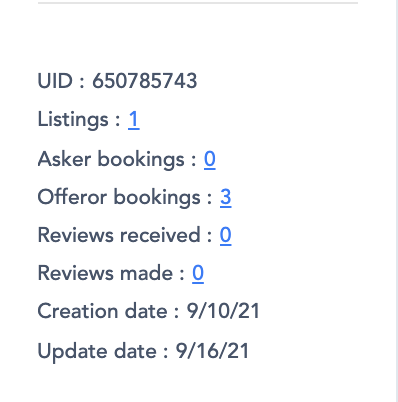
These items are:
UID: The unique ID of the user
Listings: Number of listing managed by this user
Asker booking: Number of bookings requested as a Customer
Offeror booking: Number of bookings provided as a Vendor
Reviews received: Number of reviews received
Reviews made: Number of reviews made
Creation date: User account creation date
Update date: User account last update date
Each underlined value is clickable and redirects to the referenced items.
The impersonate feature
The impersonate feature enables operators with the required permissions to access a customer or vendor dashboard and account as though they were logged in with that user’s account. This feature enables an operator to view all of the impersonified user's information and to carry out all actions that he is entitled to.
This feature is useful in many contexts:
to view all of a user’s configurations
to assist users, potentially even by carrying out actions in their stead through their account
To impersonate a user, click on the spy icon:

Updating a user profile
Operators can update specific user profile information through the detailed view interface. Other information on the user’s profile can only be changed through the vendor or customer dashboards by using the “impersonate” feature.
User status
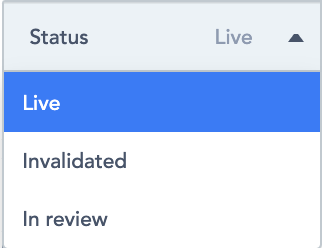
3 statuses are available for users:
Live: the user can use the platform
Invalidated: the user profile is suspended from the platform. The user can no longer login.
In review: the user may log in to the platform, but his profile cannot be viewed by other users and he cannot make bookings nor contact other users.
A platform-wide policy can be defined to set the initial user status directly following account creation. By default, users are “Live” as soon as they are created, however, you can set the default status to “In review” through the Configurations interface.
The status of a user can be updated in two ways.
By using the dropdown of a user profile card (figure 10). Clicking on it will reveal the list of available statuses. Clicking a status will immediately change the current user’s status.

From the detailed view of a user, on the right-hand side, a card contains the user status dropdown (figure 11).
Password
Operators can update the user’s password from the back office. This is useful if a user has lost access to his email, and therefore cannot recover a password. Operators have to fill in the ‘password’ field and the ‘confirmation’ field (figure 12) and then click save to apply the changes.

Fees (platform commissions)
Operators can decide to apply the default platform fees (by default) or apply user-specific fees. Fees are applied to users when they make purchases (Fee as asker) and when they make sales (Fee as offeror). They can be set both as percentages and as fixed amounts (one or both).
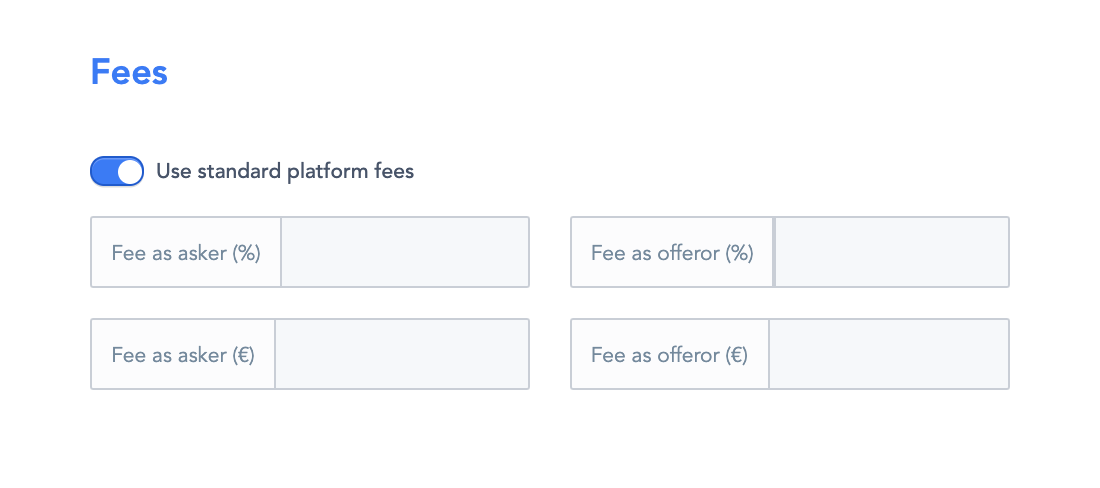
To Apply user-specific fees:
Disable “Use standard platform fees” by clicking on the blue switcher
Customer fees: fees paid by this user when he makes a purchase, applied on top of the price asked by the Vendor
Fee as asker (%): allows you to set the fee as a percentage of the sales price (numeric value (0 to 100))
Fee as asker (€): allows you to set the fee as a fixed amount on top of the sales price (numeric value)
Vendor fees: fees are paid by this user when he makes a sale, subtracted from the amount received from his customer
Fee as offeror (%): allows you to set the fee as a percentage of the sales price (numeric value (0 to 100))
Fee as offeror (€): allows you to set the fee as a fixed amount on top of the sales price (numeric value)
Example:
Customer fees are set at 20% and 50$. Vendor fees are set at 5% and 10$.
The customer makes a 100$ purchase:
The customer will pay 100$ + 20$ (20% fee) + 50$ (fixed fee) = 170$ (total to pay by customer)
The vendor receives 100$ (sales price) - 5$ (5% fee) - 10$ (fixed fee) = 85$ (amount paid to vendor
The platform earns 70$ in customer fees and 15$ in vendor fees = 85$ (total platform fees)
Leaving a field empty, or entering “0”, is not the same thing.
Empty fields will default to the standard platform fees. If you do not want to apply one of the fee types, enter “0” in that field.
Categories
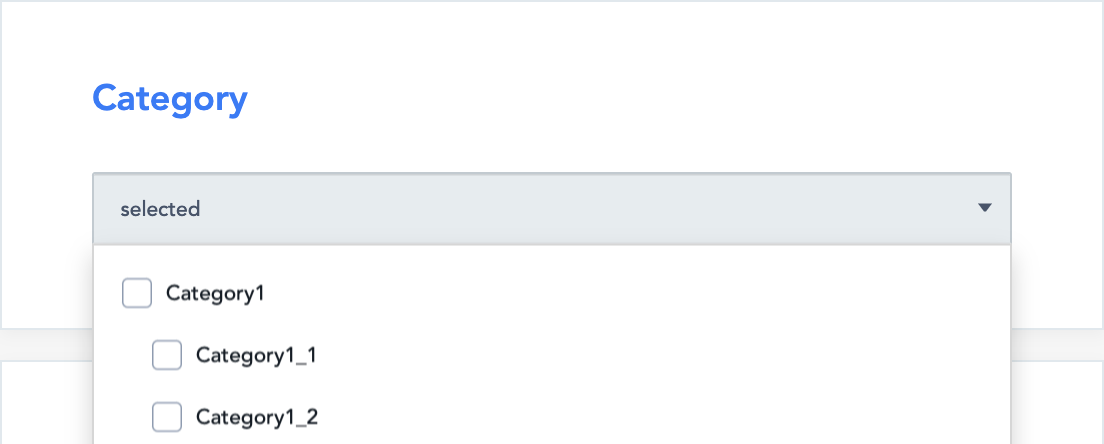
The category card (figure 14) displays the category(s) that the user is associated with. Operators can change these values through the dropdown.
User verifications
The user verification card (figure 15) allows operators to manage identity verification of the user.
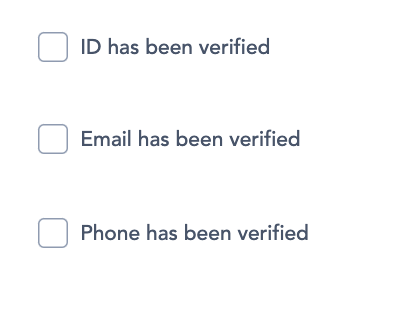
The verification statuses are displayed on the front office:
ID has been verified: check the box to confirm that the identity of this user has been verified. Depending on the platform configuration, this value may be updated as a result of the KYB process carried out by the PSP.
Email has been verified: check the box to confirm that the email of this user has been verified. If enabled through the platform configuration, email verification can be carried out automatically by sending an email to the user with a verification link.
Phone has been verified: check the box to confirm that the phone number of this user has been verified. If activated through the configurations, users can request a verification code by SMS to verify their account themselves.
Edit buttons
The “edit” buttons (figure 16) are used to quickly edit information about a user.

Operators will find this button on the 3 first cards of the page :
Presentation
Identity
Bank account
These buttons impersonate the operator into the user account, and direct the operator to the corresponding interface in the user dashboard.
The impersonate feature
The impersonate feature enables operators with the required permissions to access a customer or vendor dashboard and account as though they were logged in with that user’s account. This feature enables an operator to view all of the impersonified user's information, and to carry out all actions that he is entitled to.
This feature is useful in many contexts:
to view all of a vendor’s configurations
to assist users, potentially even by carrying out actions in their stead through their account
To impersonate a user, click on the spy icon:

Delete a user profile
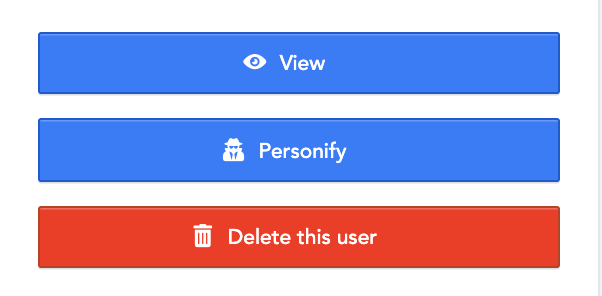
To delete a user, go to the detailed view of a user profile and click on “Delete this listing” (figure 9):
Related resources
SBO:
Front:
Dashboard:
Last updated
Was this helpful?